
Chatshop Merchant User Guide
Comprehensive guide for Store Admins in operating the Chatshop Merchant CMS.
Overview
This document contains a guide for using Chatshop features on the Chatshop Merchant CMS used by Store Admins. The guide covers steps starting from Customer Information, Sales, Products, and Transaction Information.
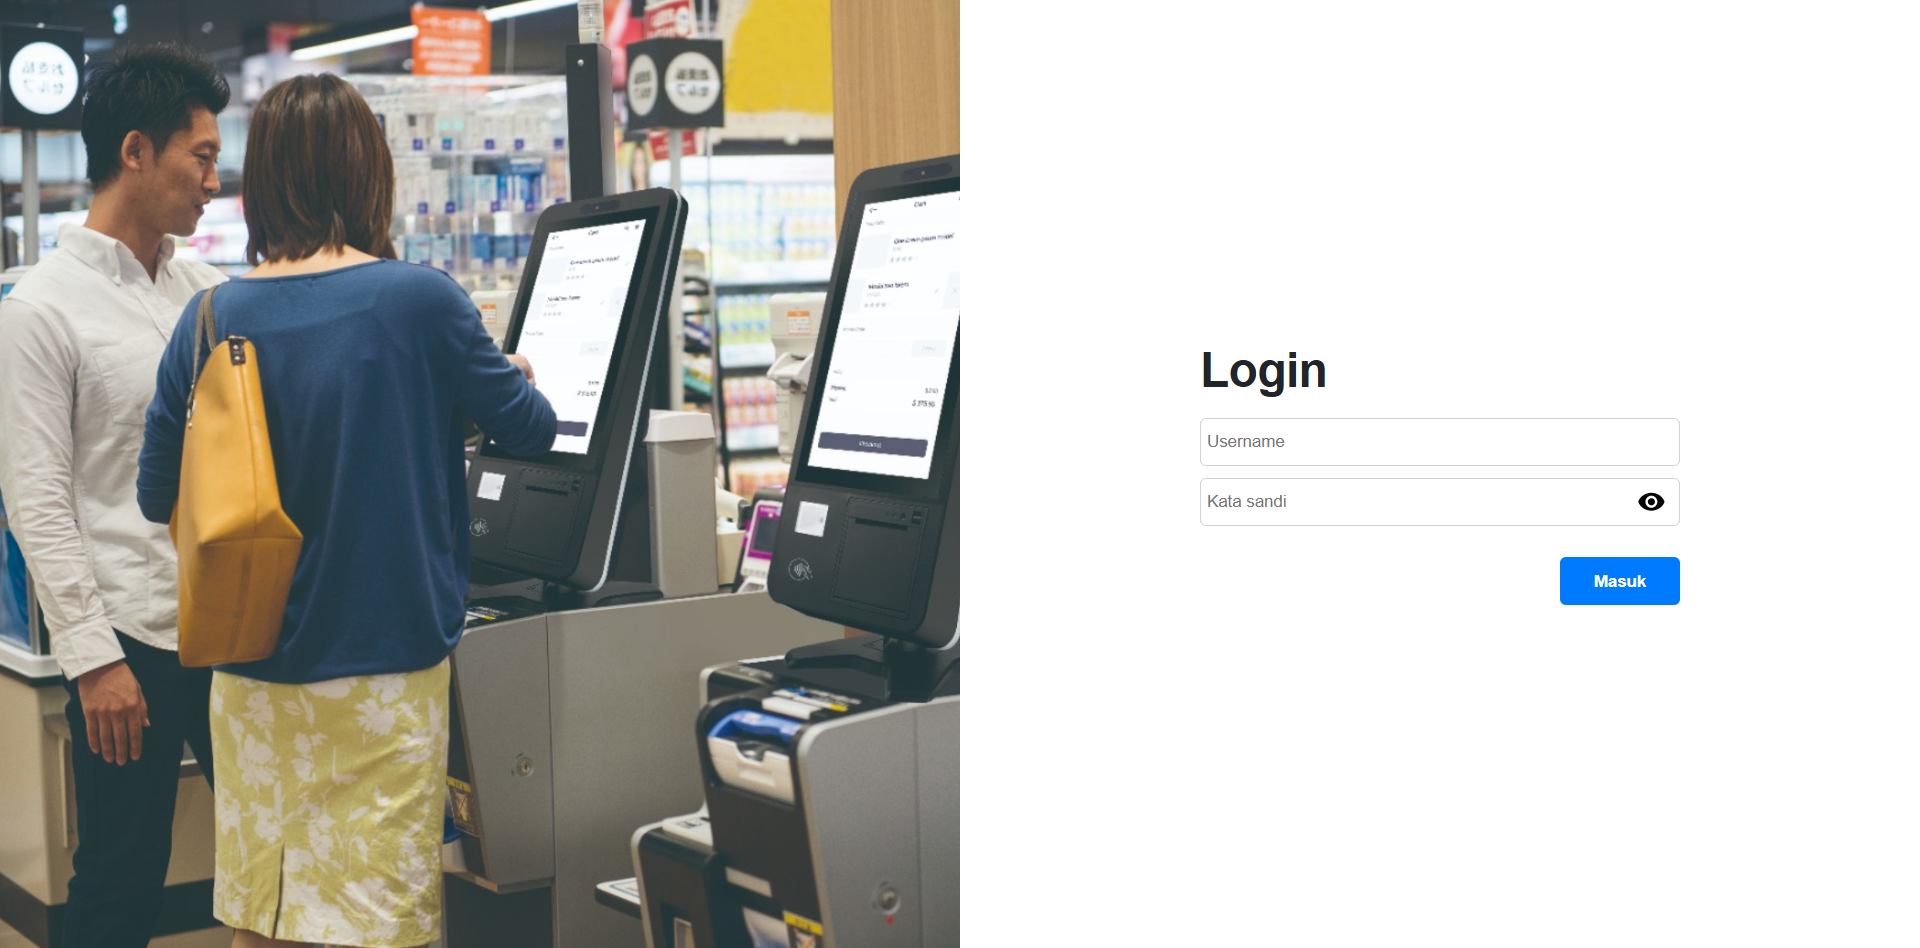
1. Log in
This page is used by Store Admins to input the previously registered Username and Password (username and password) to access the Chatshop Merchant CMS.
Here are the steps:
- Enter the Username registered in the Merchant system.
- Enter the Password according to the Shop account.
- Click the Masuk (Login) button to enter the system.
If the input data is correct, the Admin will be successfully directed to the Home or main page.
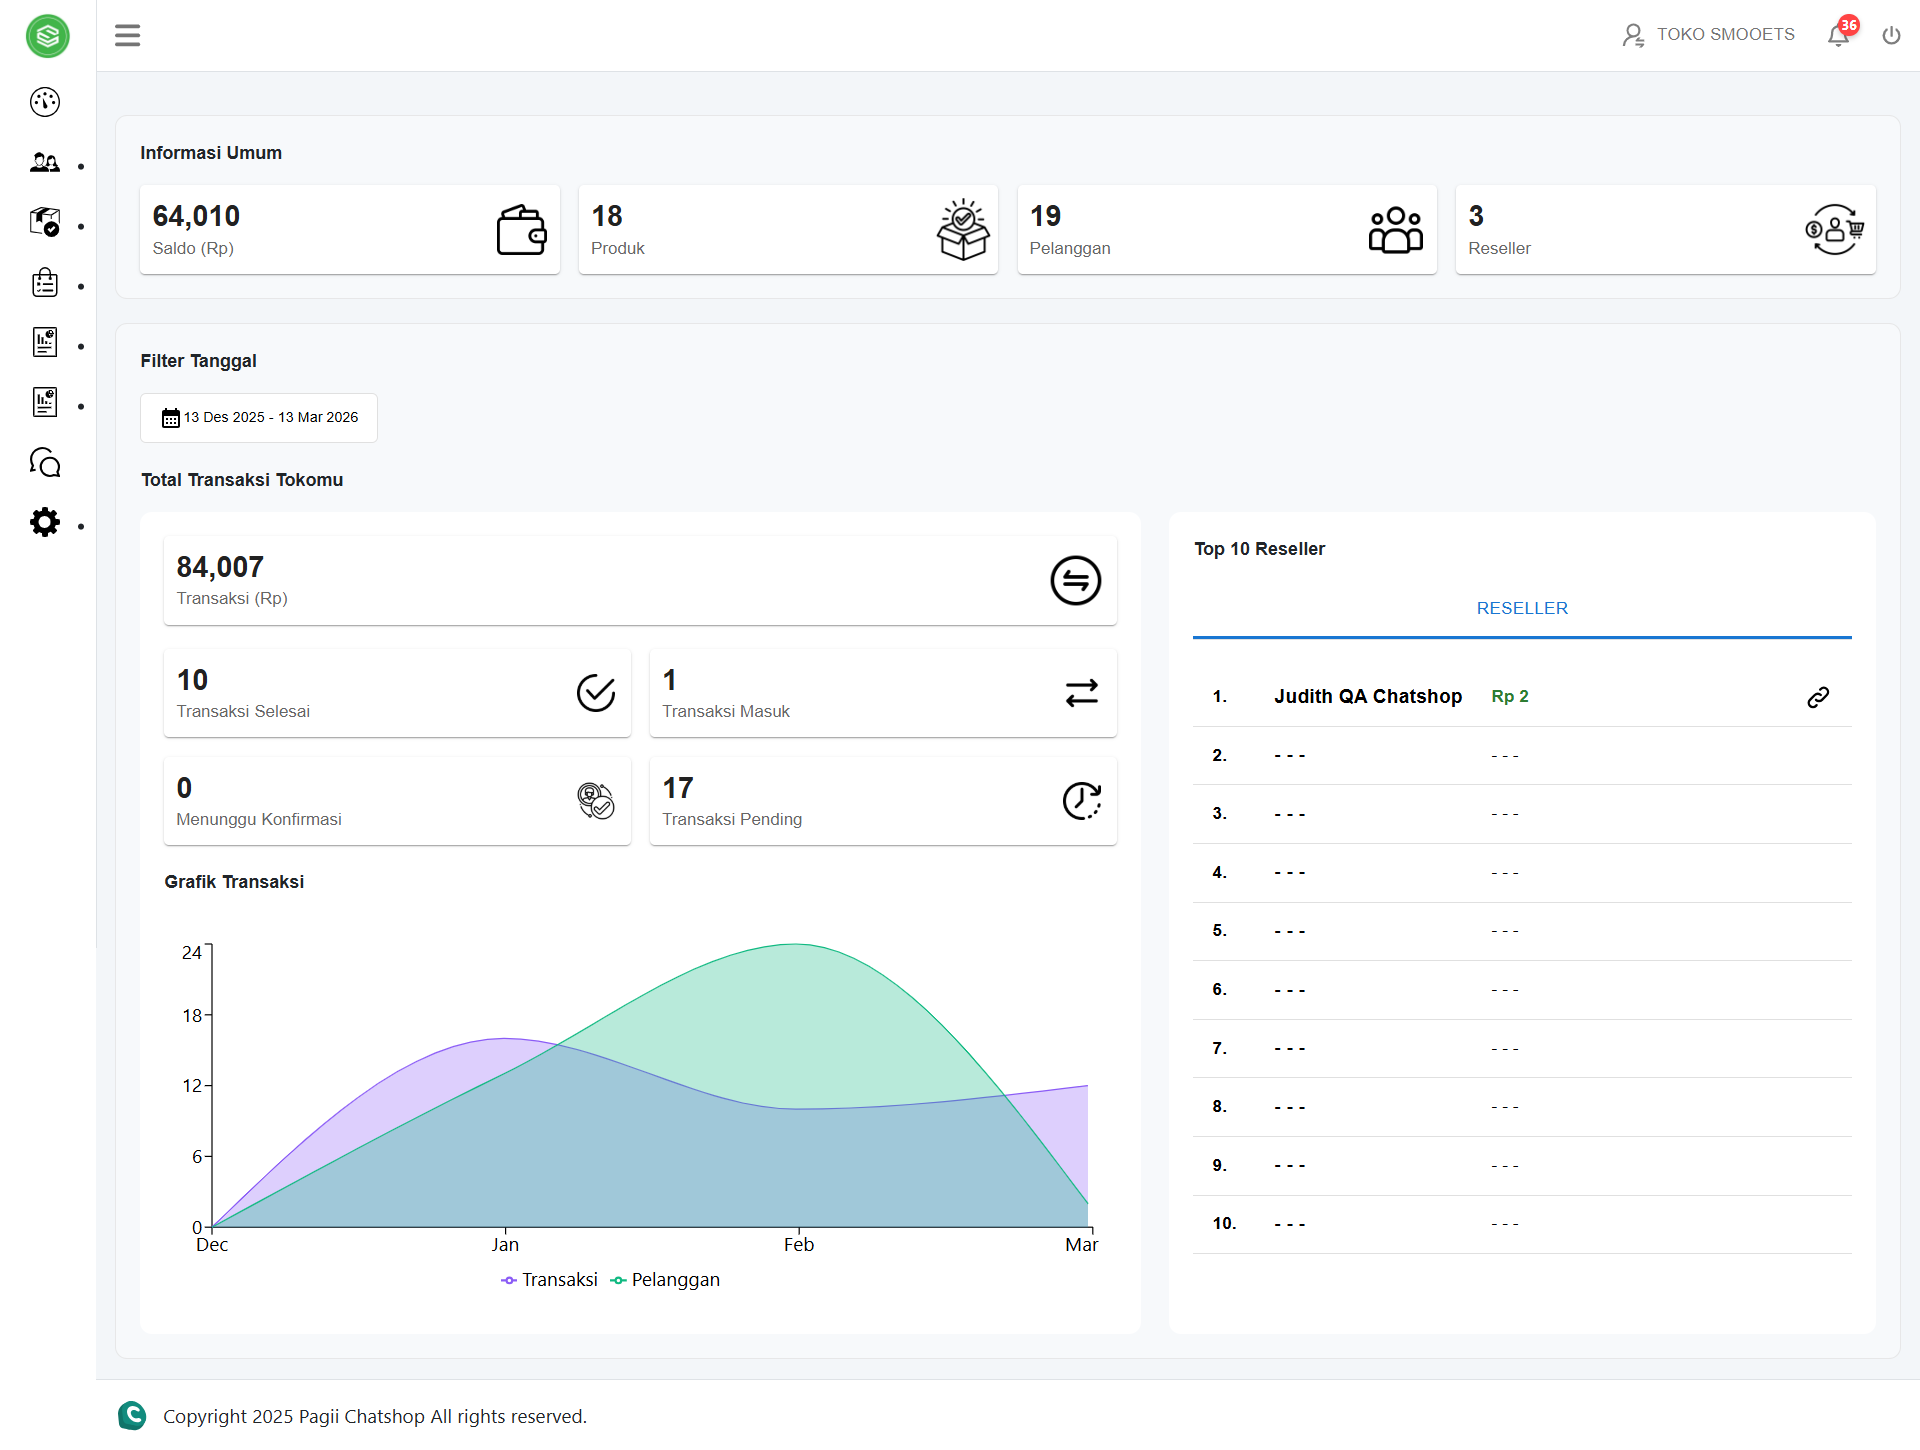
2. Home
This page is the main view after the Store Admin successfully logs into the Merchant CMS system. On this page, the Store Admin can see a summary of General information, namely Customers, Products, & Date Filter, as well as Information on your Store's Total Transactions.
General Information:
- • Customers: Information on the number of customers who have ordered Products.
- • Products: Information on the Products that customers have ordered.
- • Date Filter: The Store Admin can view relevant information according to the desired period, making the analysis and tracking process easier.
Your Store's Total Transactions:
- • Transactions: Information on the number of transactions in currency format, completed by Customers.
- • Transaction Count: Information on the number of transactions in quantity format or the number of Customers who have made a Transaction.
- • Top 10 Resellers: Information on the number of resellers with the highest sales/revenue.
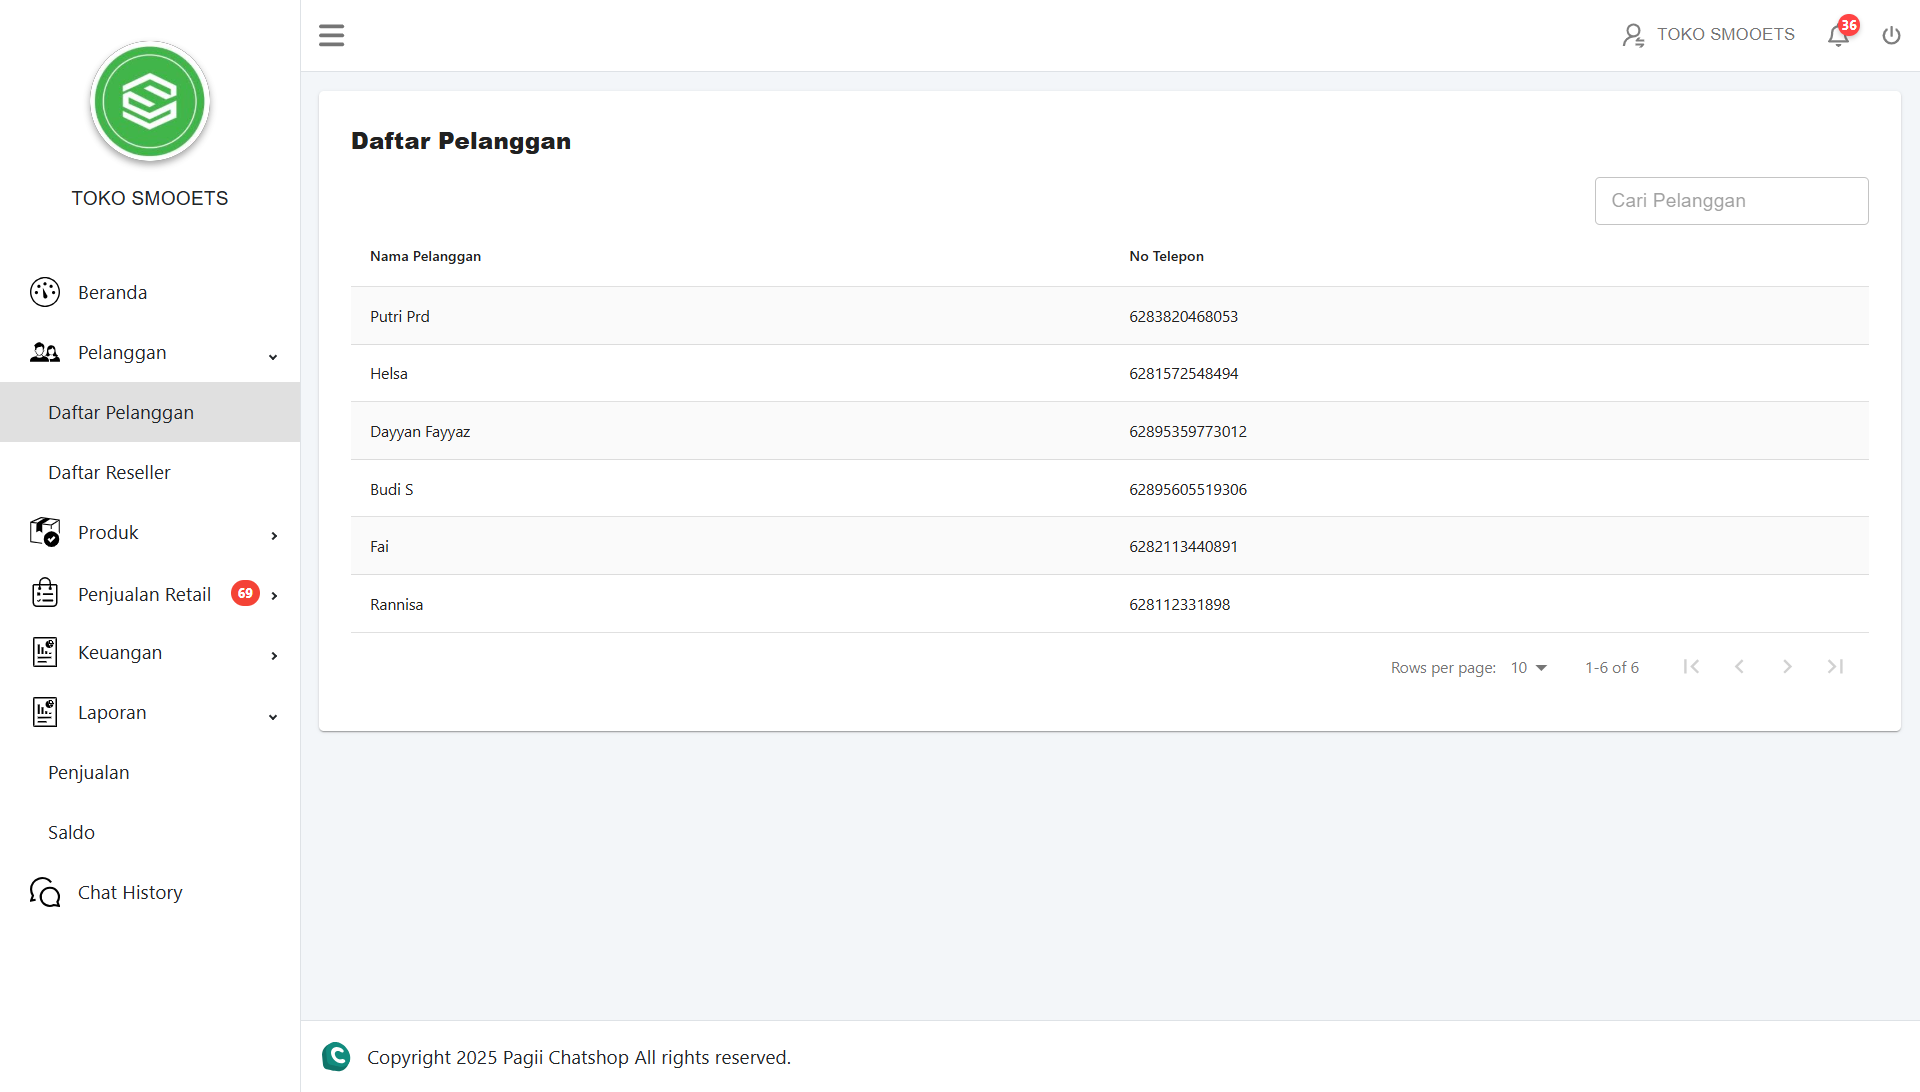
3. Customers
The Customer Page consists of 2 Categories: Customer List & Reseller List. The Store Admin can view a list of Customer Names & Phone Numbers. The Store Admin can search for Customer Names and Phone Numbers in the Reseller List menu, and in the Reseller List, they can Add Resellers, Edit, Search, and Delete.
3.1 Customer List
The Customers menu is used to manage customer data who have placed orders at the store. The Admin can view the list of customers along with their registered phone numbers, and search for specific customers more easily.
Here are the steps:
- Click the Pelanggan menu in the left sidebar.
- Select the Daftar Pelanggan submenu.
- The system will display a list of customers along with the saved phone numbers.
- To search for a specific customer, type the customer's name in the Cari Pelanggan field or you can also type the Phone Number.
- Navigate the pages using the Next / Previous buttons at the bottom of the table to view the next list of customers.
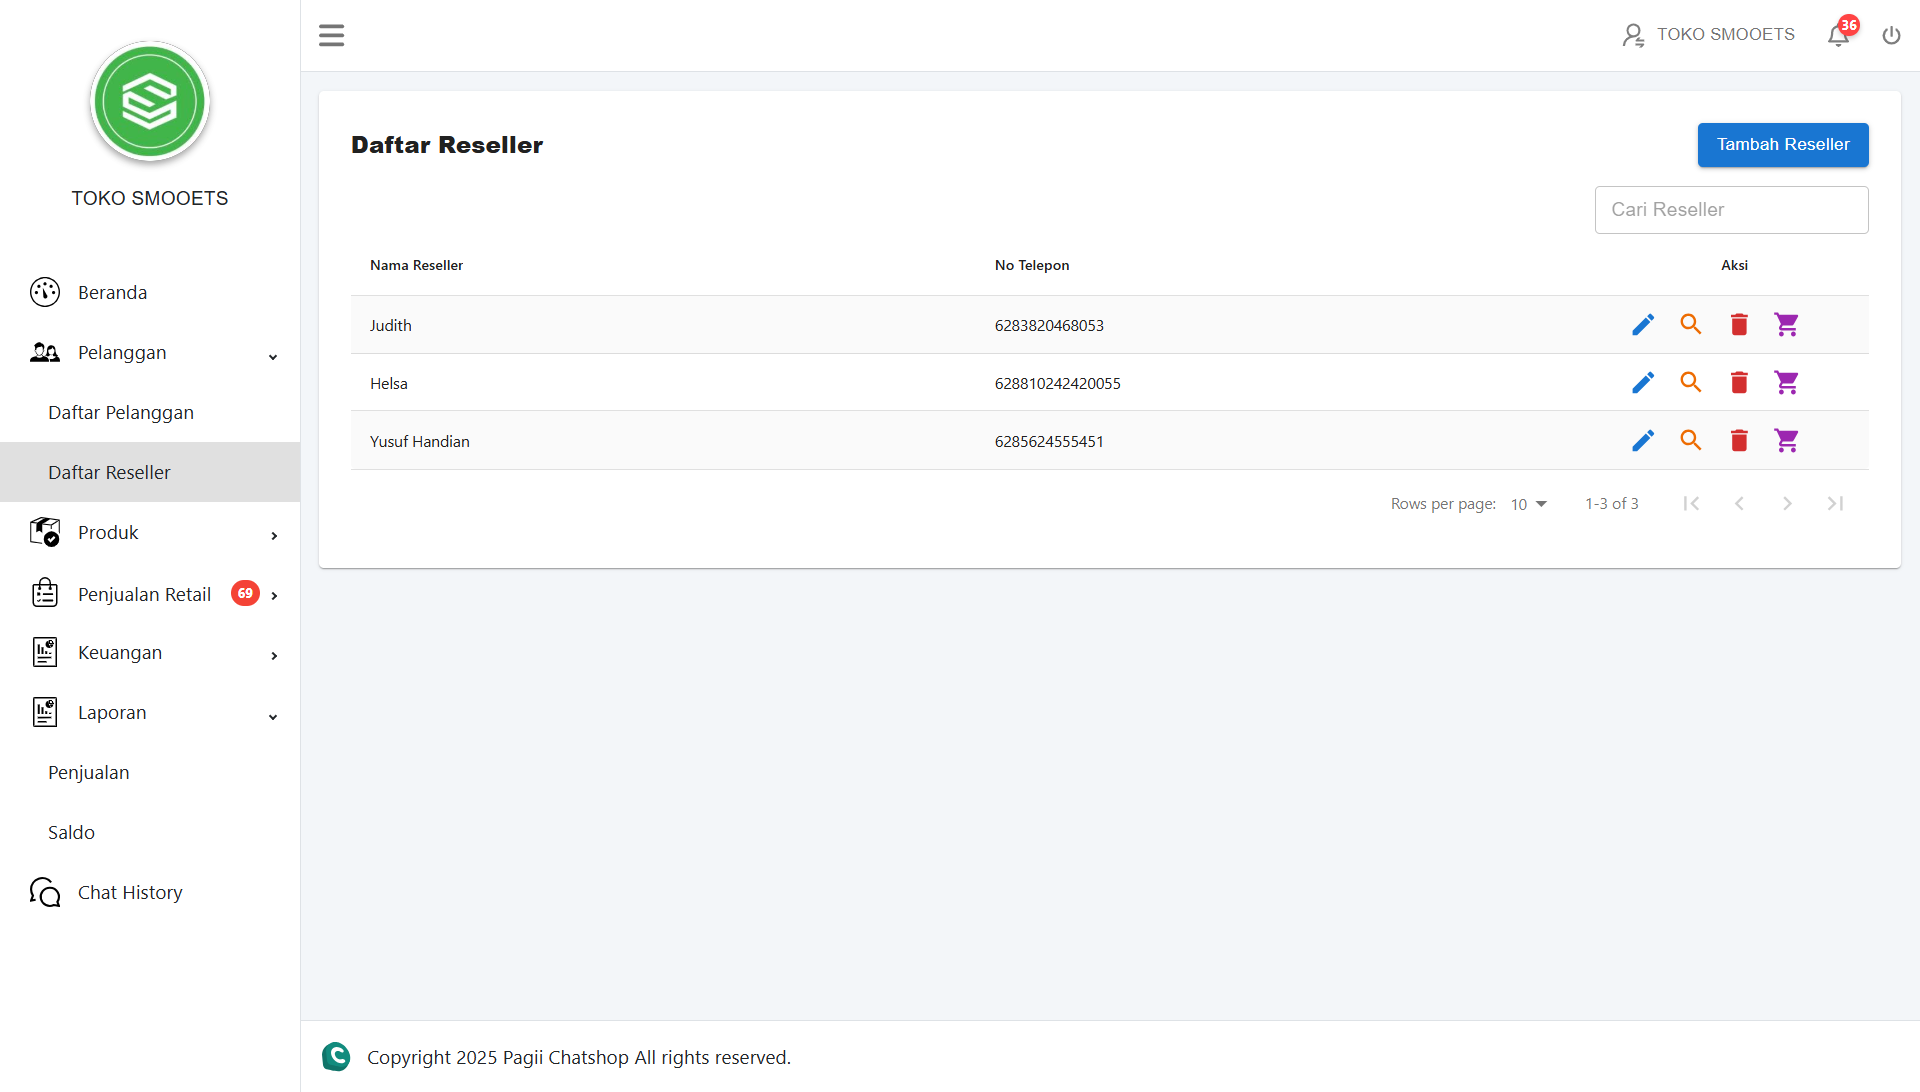
3.2 Reseller List
The Reseller List menu is used to manage reseller data working with the shop. Admins can add new resellers, view detailed information, edit data, and delete resellers.
● Tambah Reseller (Add Reseller)
- Click Tambah Reseller
- Fill in the Reseller Name & Phone Number.
- Click Simpan.
● Edit Reseller
- Click the Edit icon
- Edit the Reseller Name & Phone Number.
- Click Simpan.
● Detail Reseller
- Click the Detail icon
- Check the Reseller Name & Phone Number.
- Click Kembali.
● Delete Reseller
- Click the Delete icon
- Click "Yes" on the deletion confirmation.
● Order
- Click the Cart icon
- Check Total Order.
- Search for reseller order name.
4. Products
The Products menu is used to manage the list of products sold in the store, add Categories, add Brands, and add Providers.
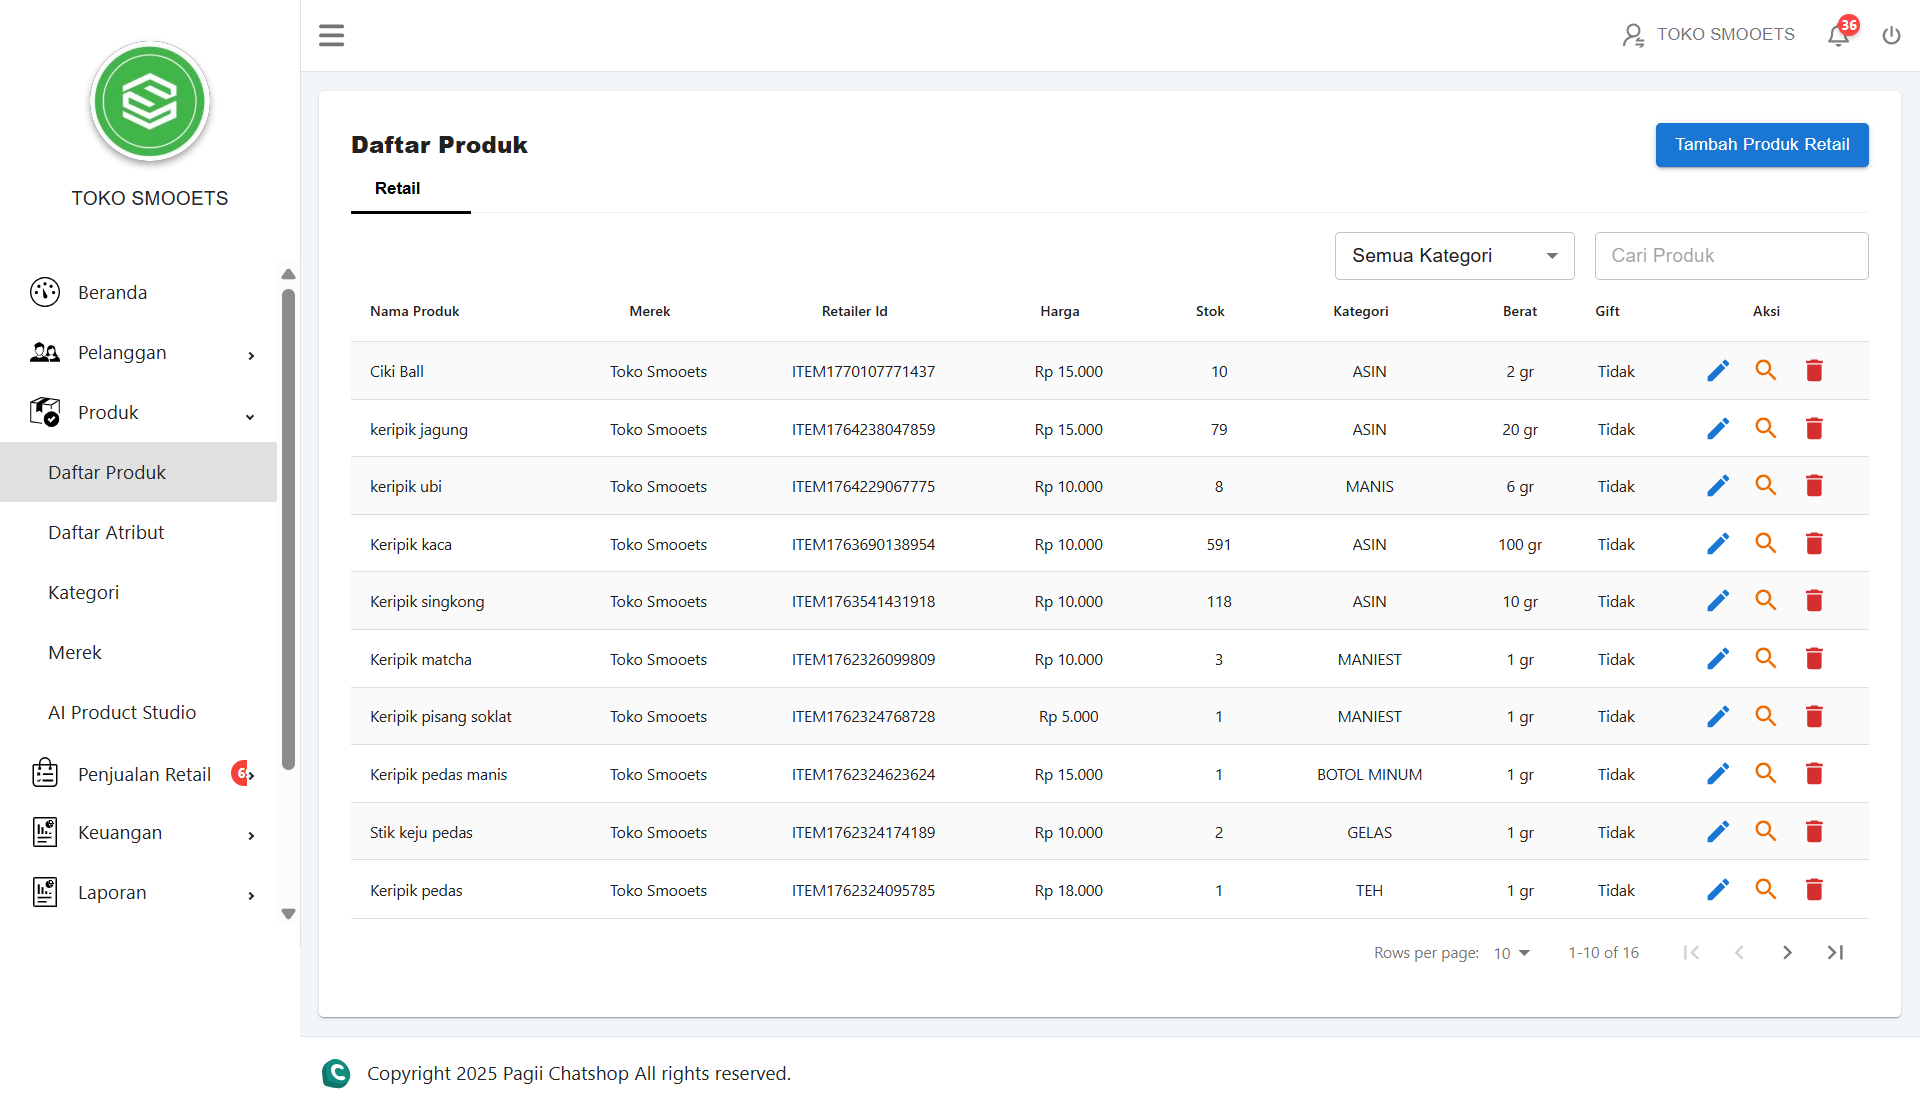
4.1 Product List
The Product List menu is used to manage the products sold. Admins can add new products, edit product details, view information, and delete products.
STEPS TO ADD RETAIL PRODUCT:
- Click the Tambah Produk Retail button.
- Fill in all product data in the form available in the Nama & Kategori tab (Name, Shop Price, Reseller Price, Category, Brand, Stock, Weight, Volume, Unit).
- Click the Selanjutnya button to enter the Deskripsi tab.
- Fill in the product description, then click the Simpan button to save the new product.
- The successfully added product will appear in the product list.
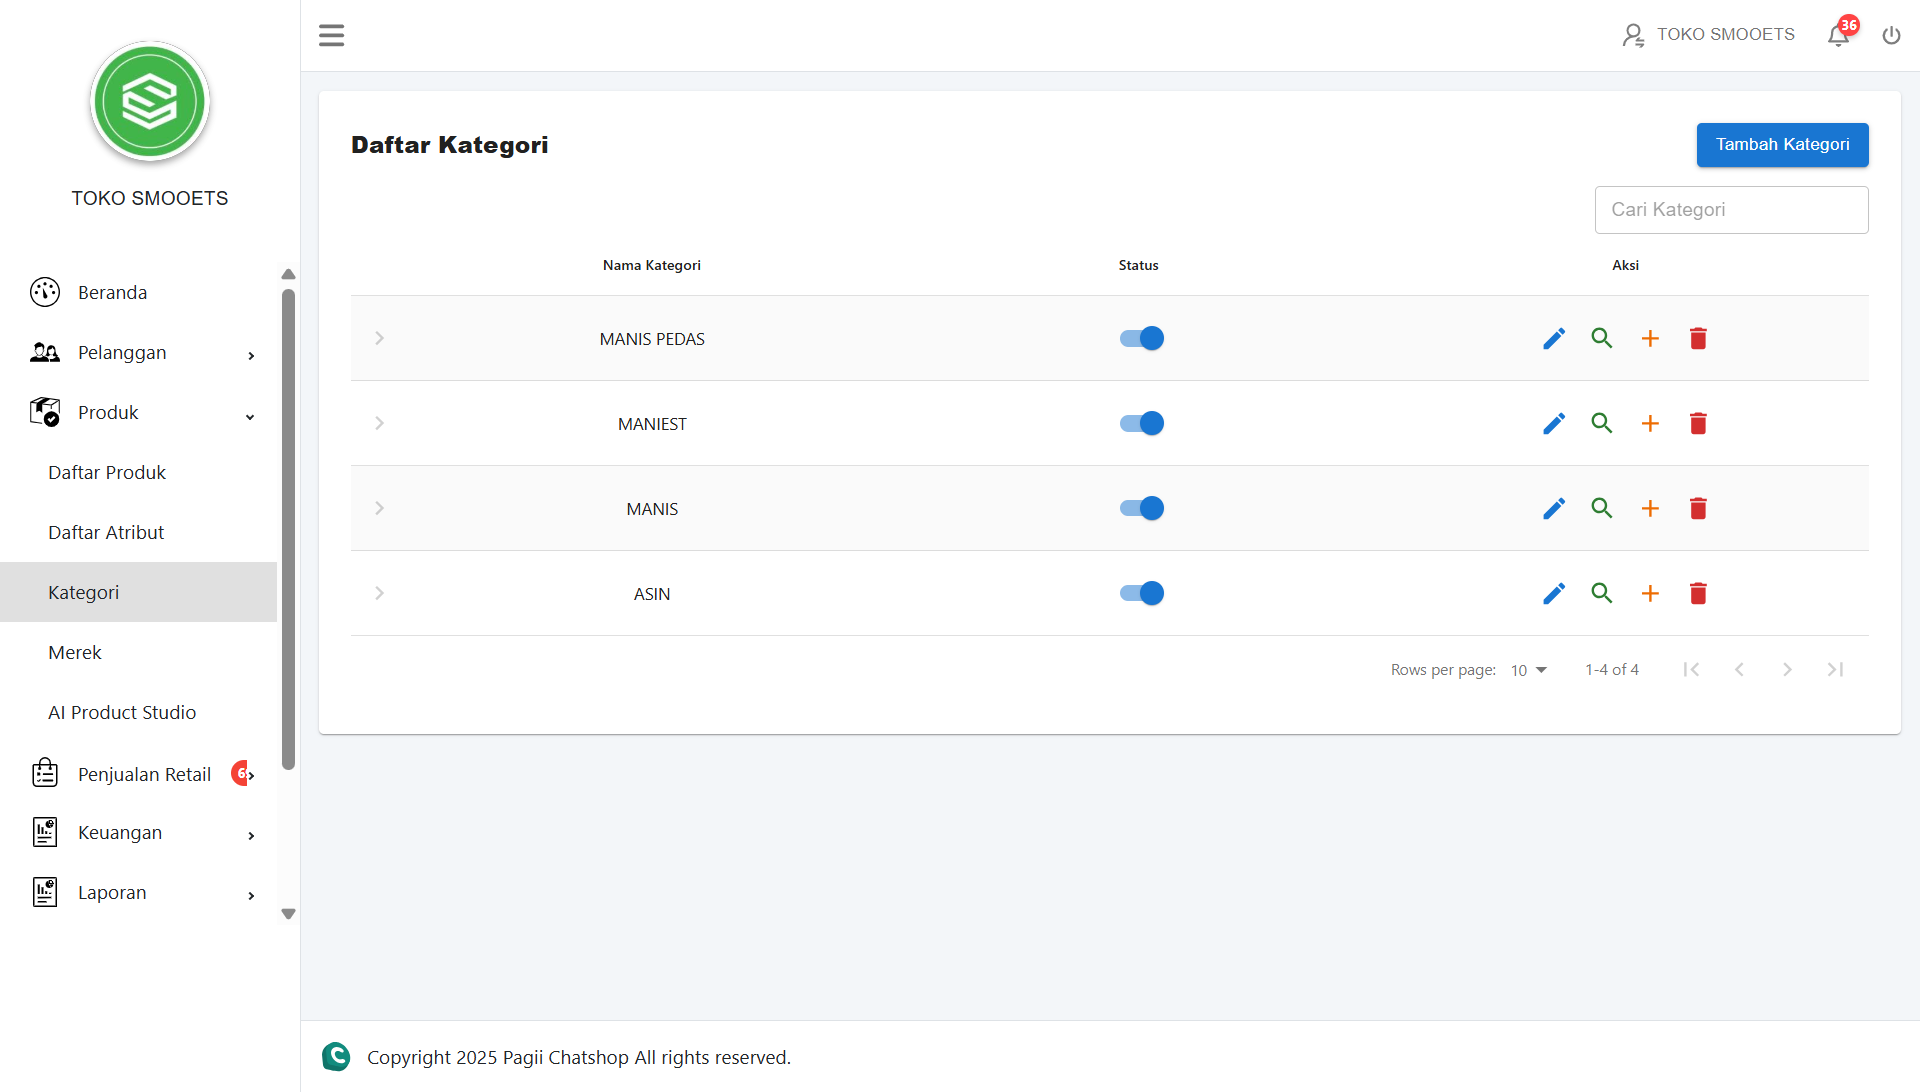
4.2 Categories
The Categories menu is used to manage the list of categories. Admins can add new categories, edit details, view info, delete, and add sub-categories.
● Tambah Kategori (Add Category)
- 1. Click the Tambah Kategori button.
- 2. Fill in the data in the Tambah Kategori tab form.
- 3. Select a category image.
- 4. Click the Simpan button.
● Tambah Sub Kategori (Add Sub-Category)
- 1. Click the Plus "+" icon on the main category row.
- 2. Fill in the Sub-Category Name.
- 3. Select an image.
- 4. Click Simpan.
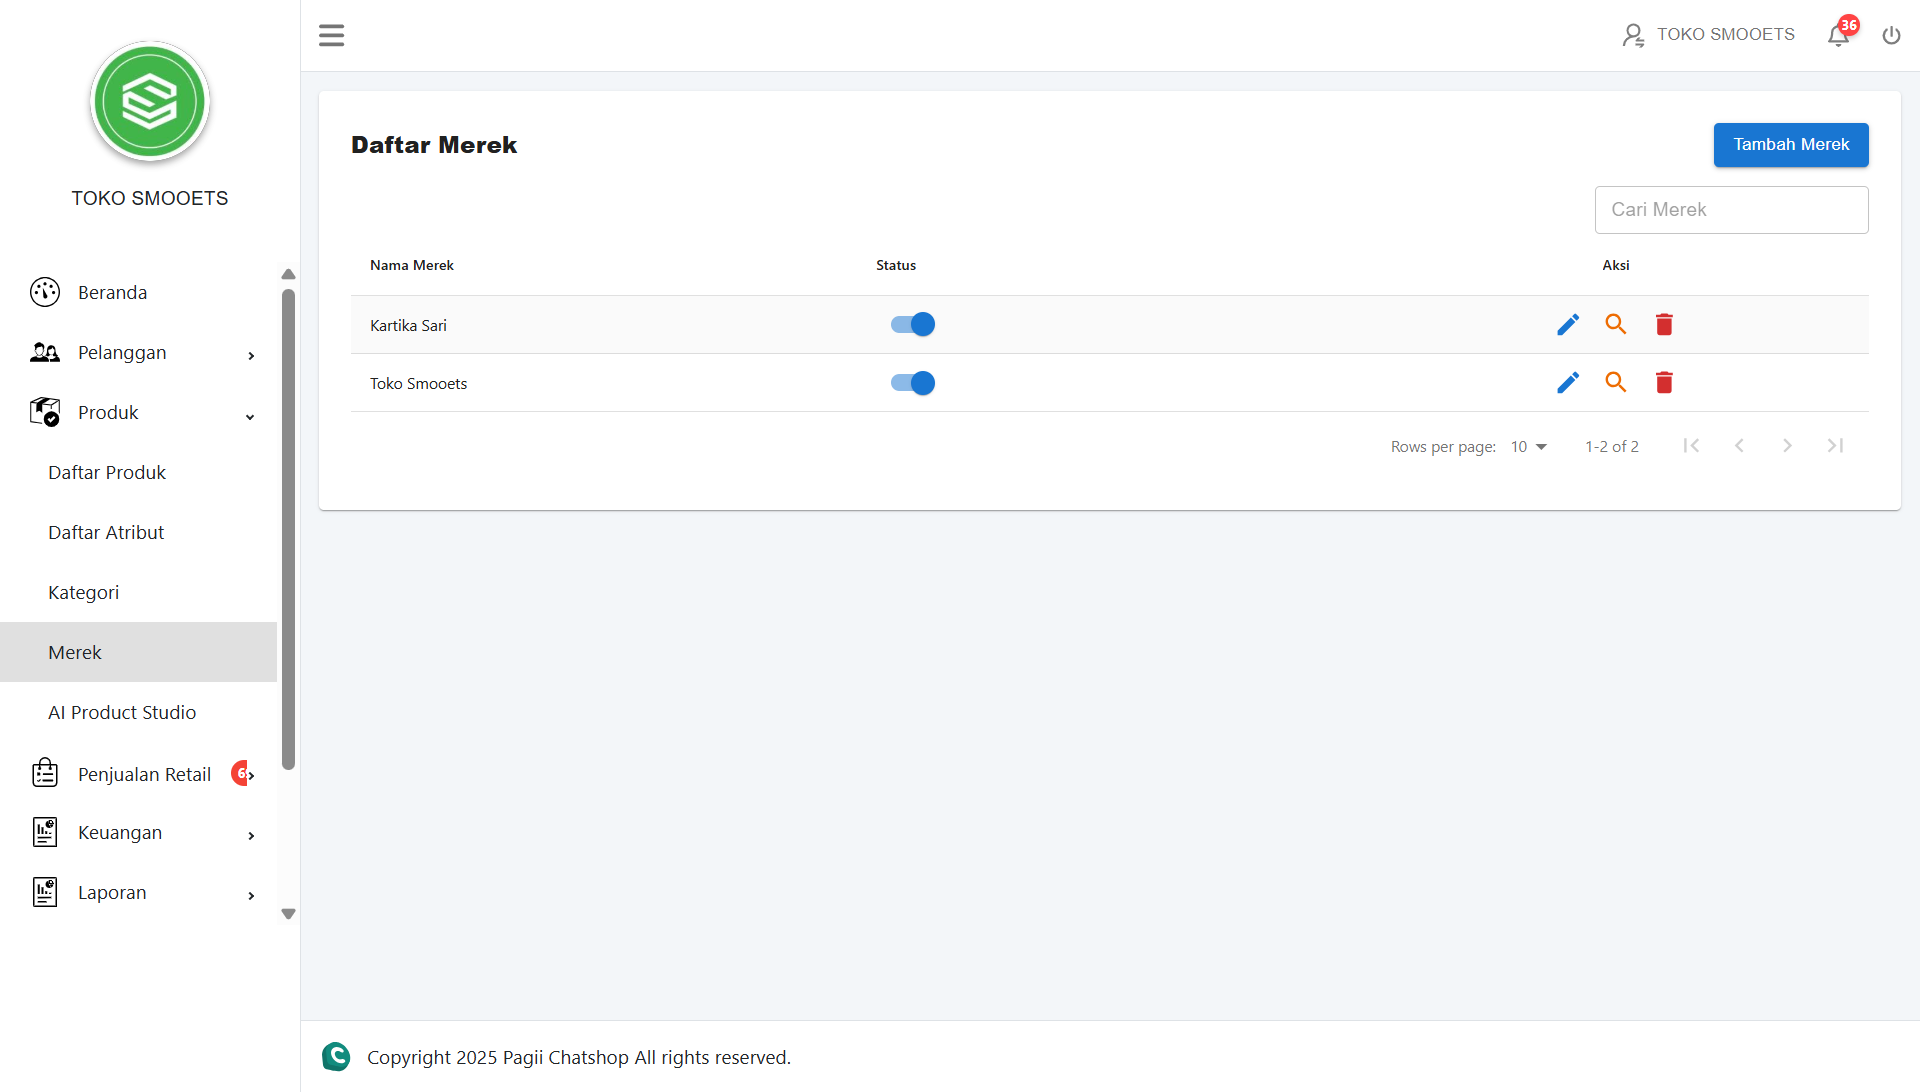
4.3 Brands
The Merk menu is used to manage the list of Brands. Admins can add new Brands, edit details, view info, and delete brands.
STEPS TO ADD BRAND:
- Click the Tambah Brand button.
- Fill in all data in the form available in the Tambah Brand tab (Name, Type, Description).
- Select Images (Ikon Web, Ikon Mobile, Banner Web, Banner Mobile).
- Swipe Status as needed (Aktif/Non-aktif).
- Click the Simpan button.
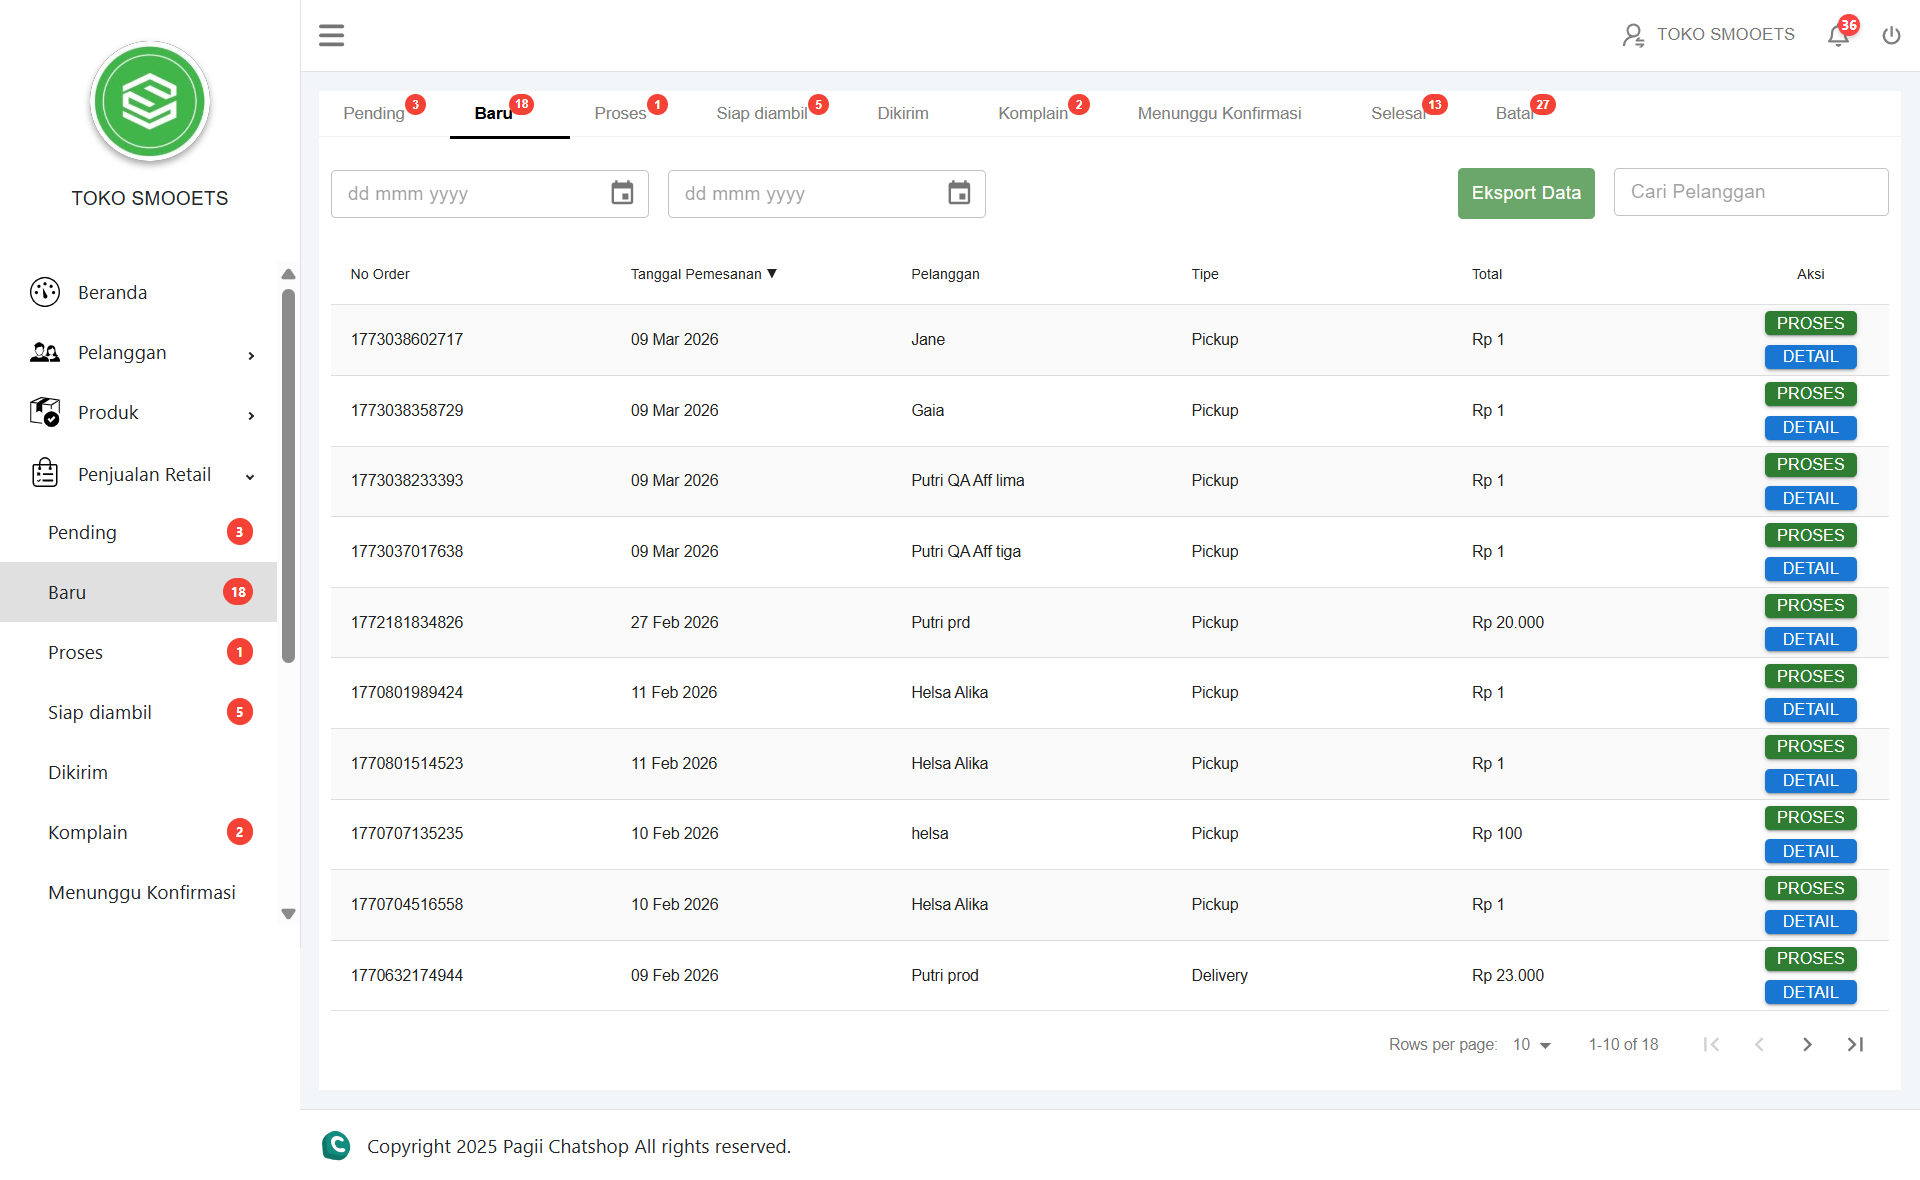
5. Retail Sales
The Sales menu is used by Store Admins to manage all incoming orders from Customers. There are several status sub-menus:
A. Baru (New)
List of new orders that have not been processed.
- Go to the Penjualan Retail → Baru menu.
- Check the list of new orders that appear.
- Click Proses.
- Click Oke on the confirmation.
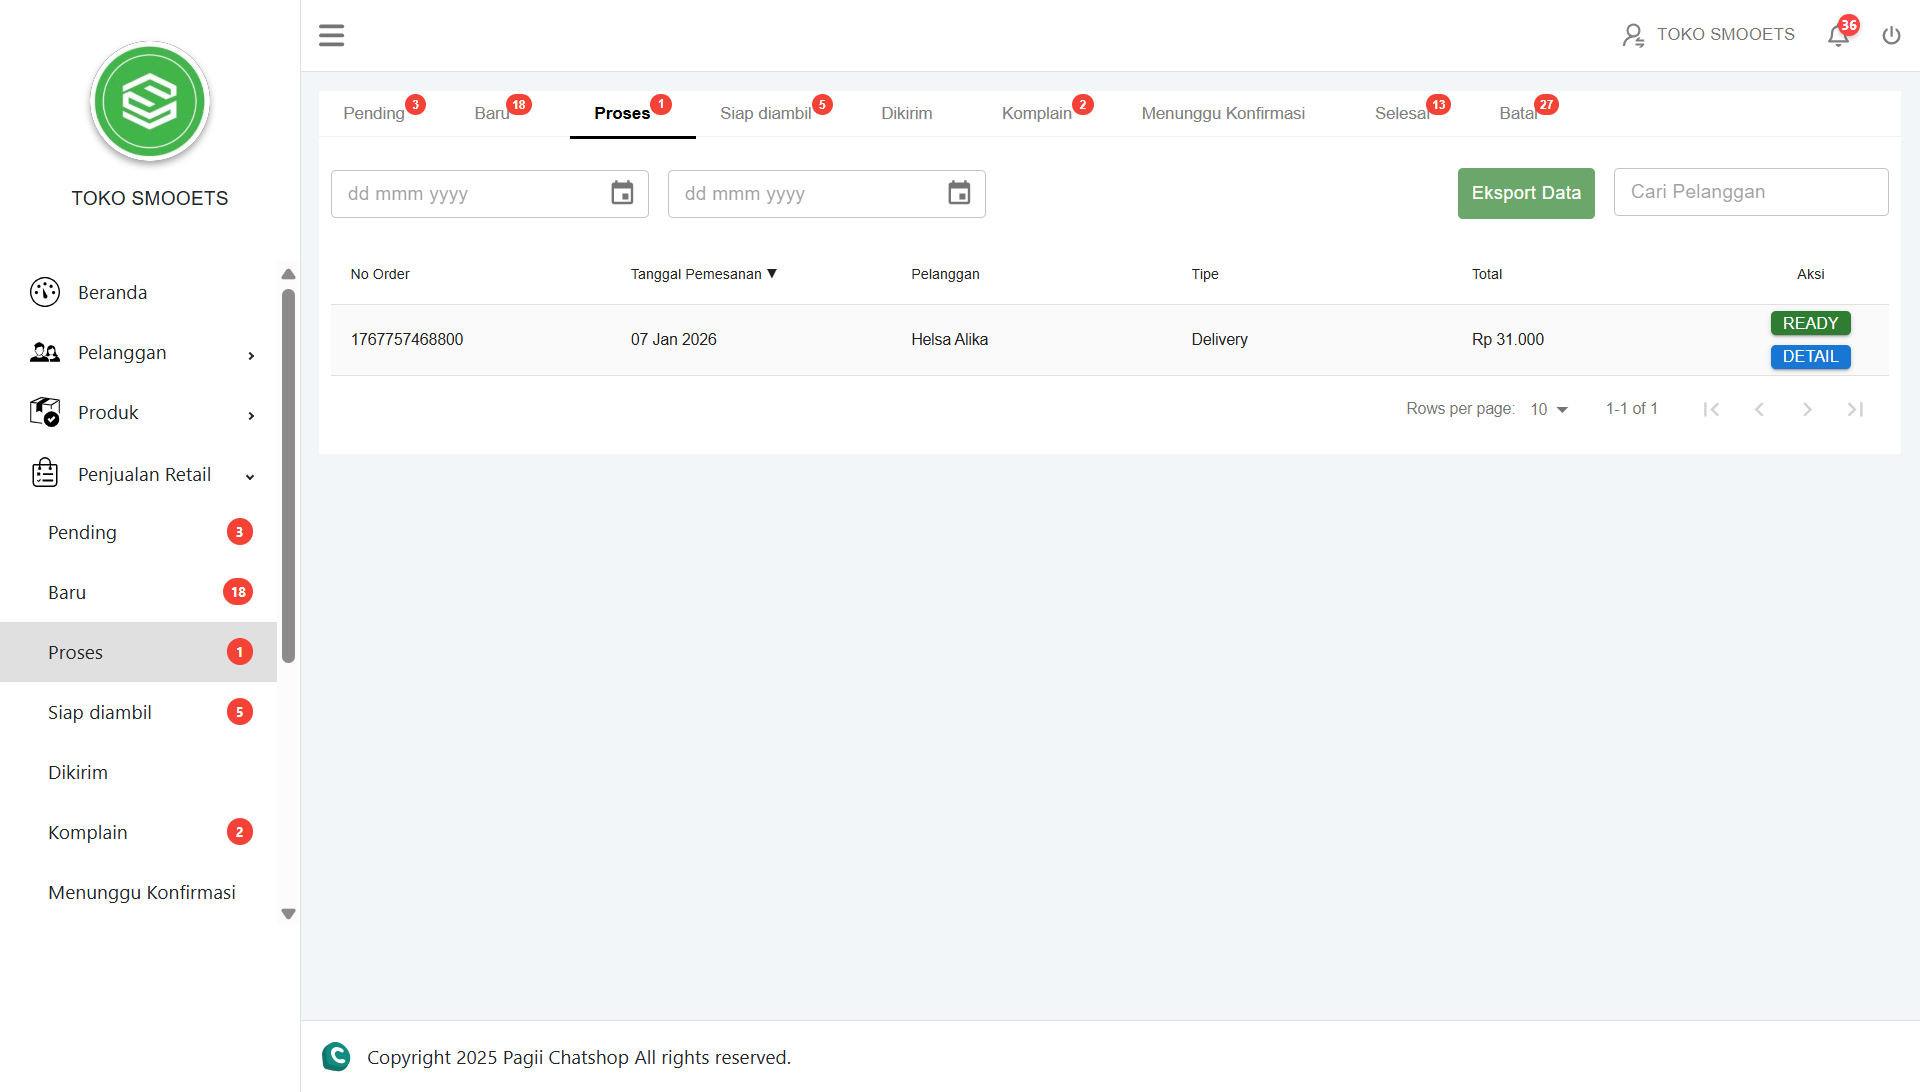
B. Proses (Processing)
Orders currently being prepared by the shop.
- Go to the Penjualan Retail → Proses menu.
- Check order details. If the items are ready, click the Ready button.
- Confirm by clicking Yes.
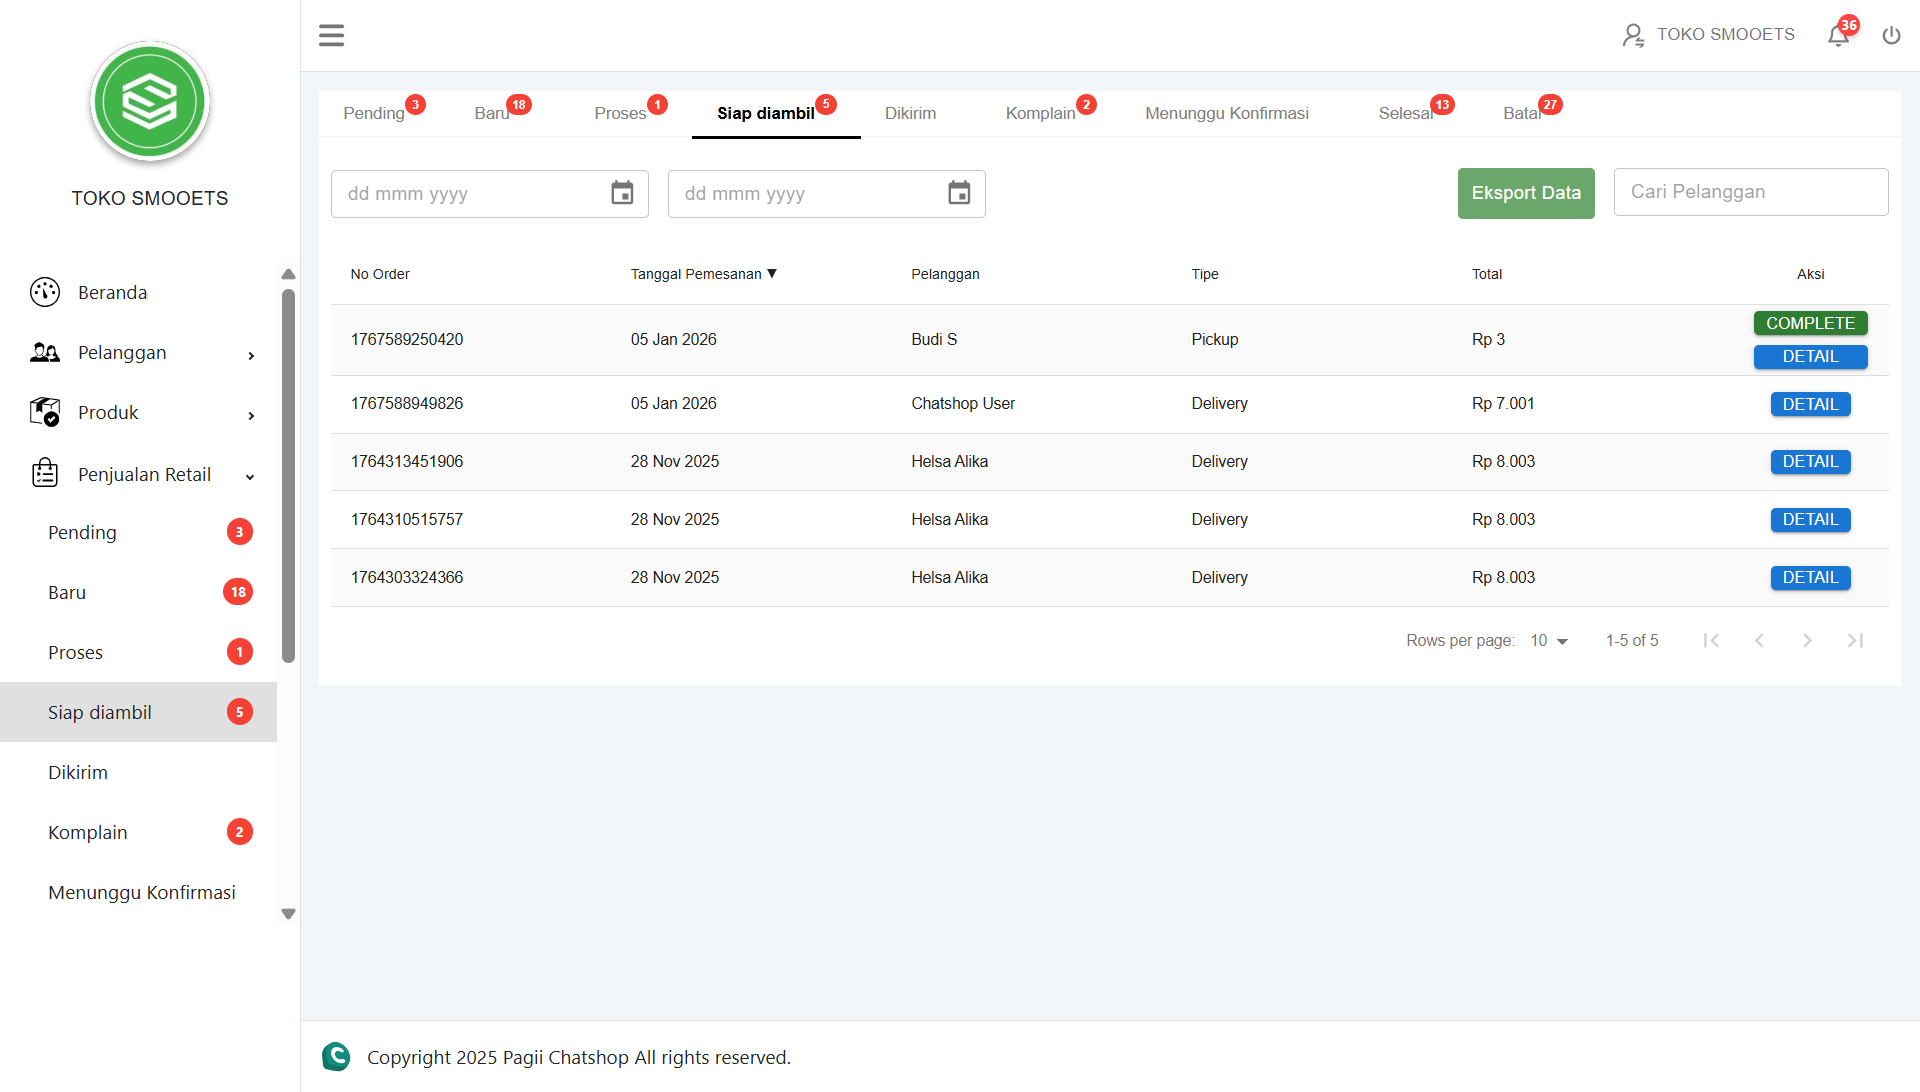
C. Siap Diambil (Ready for Pickup)
Orders waiting to be picked up by a courier or customer.
- Go to the Penjualan Retail → Siap diambil menu.
- Check the list of orders ready for shipment. Click Delivery to process the shipment.
- Confirm by clicking Oke.
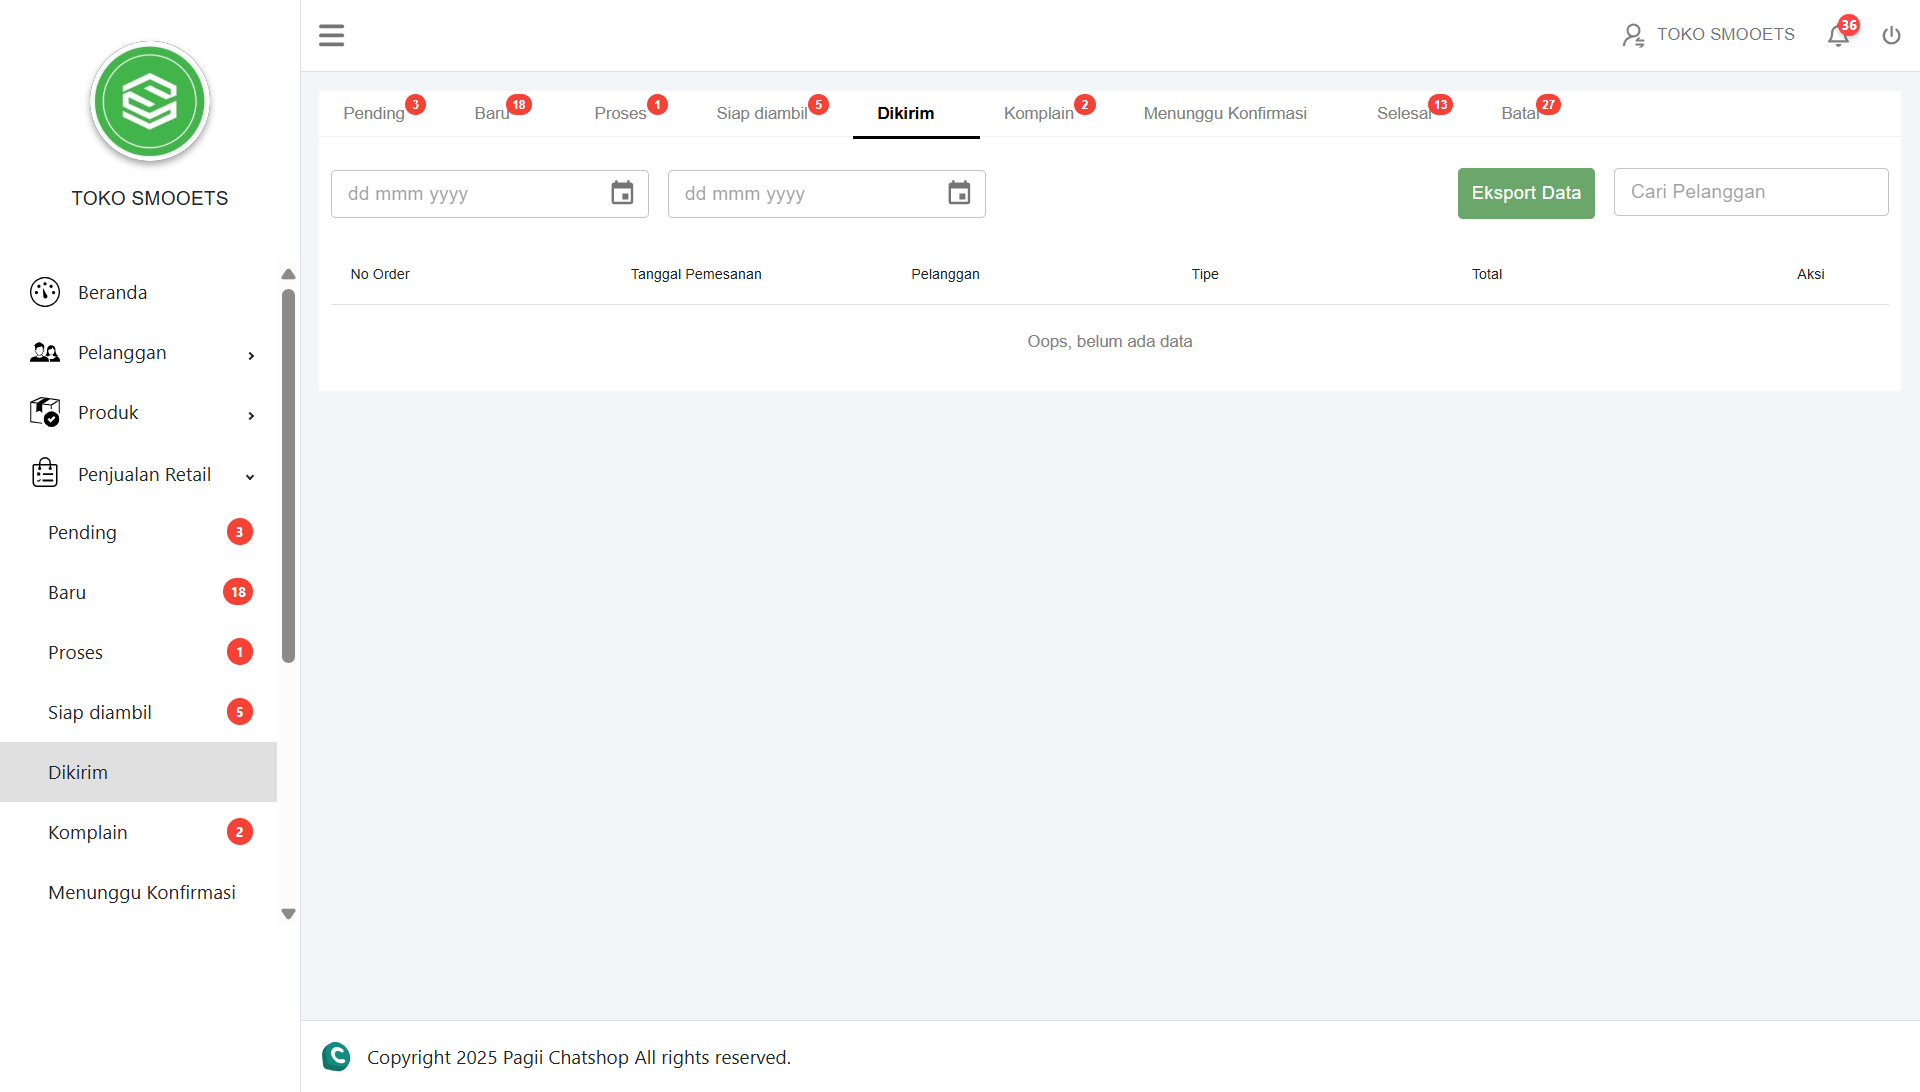
D. Dikirim (Shipped)
Orders are in the process of being delivered by the expedition.
- Go to the Penjualan Retail → Dikirim menu.
- Click Detail to check the receipt/tracking status.
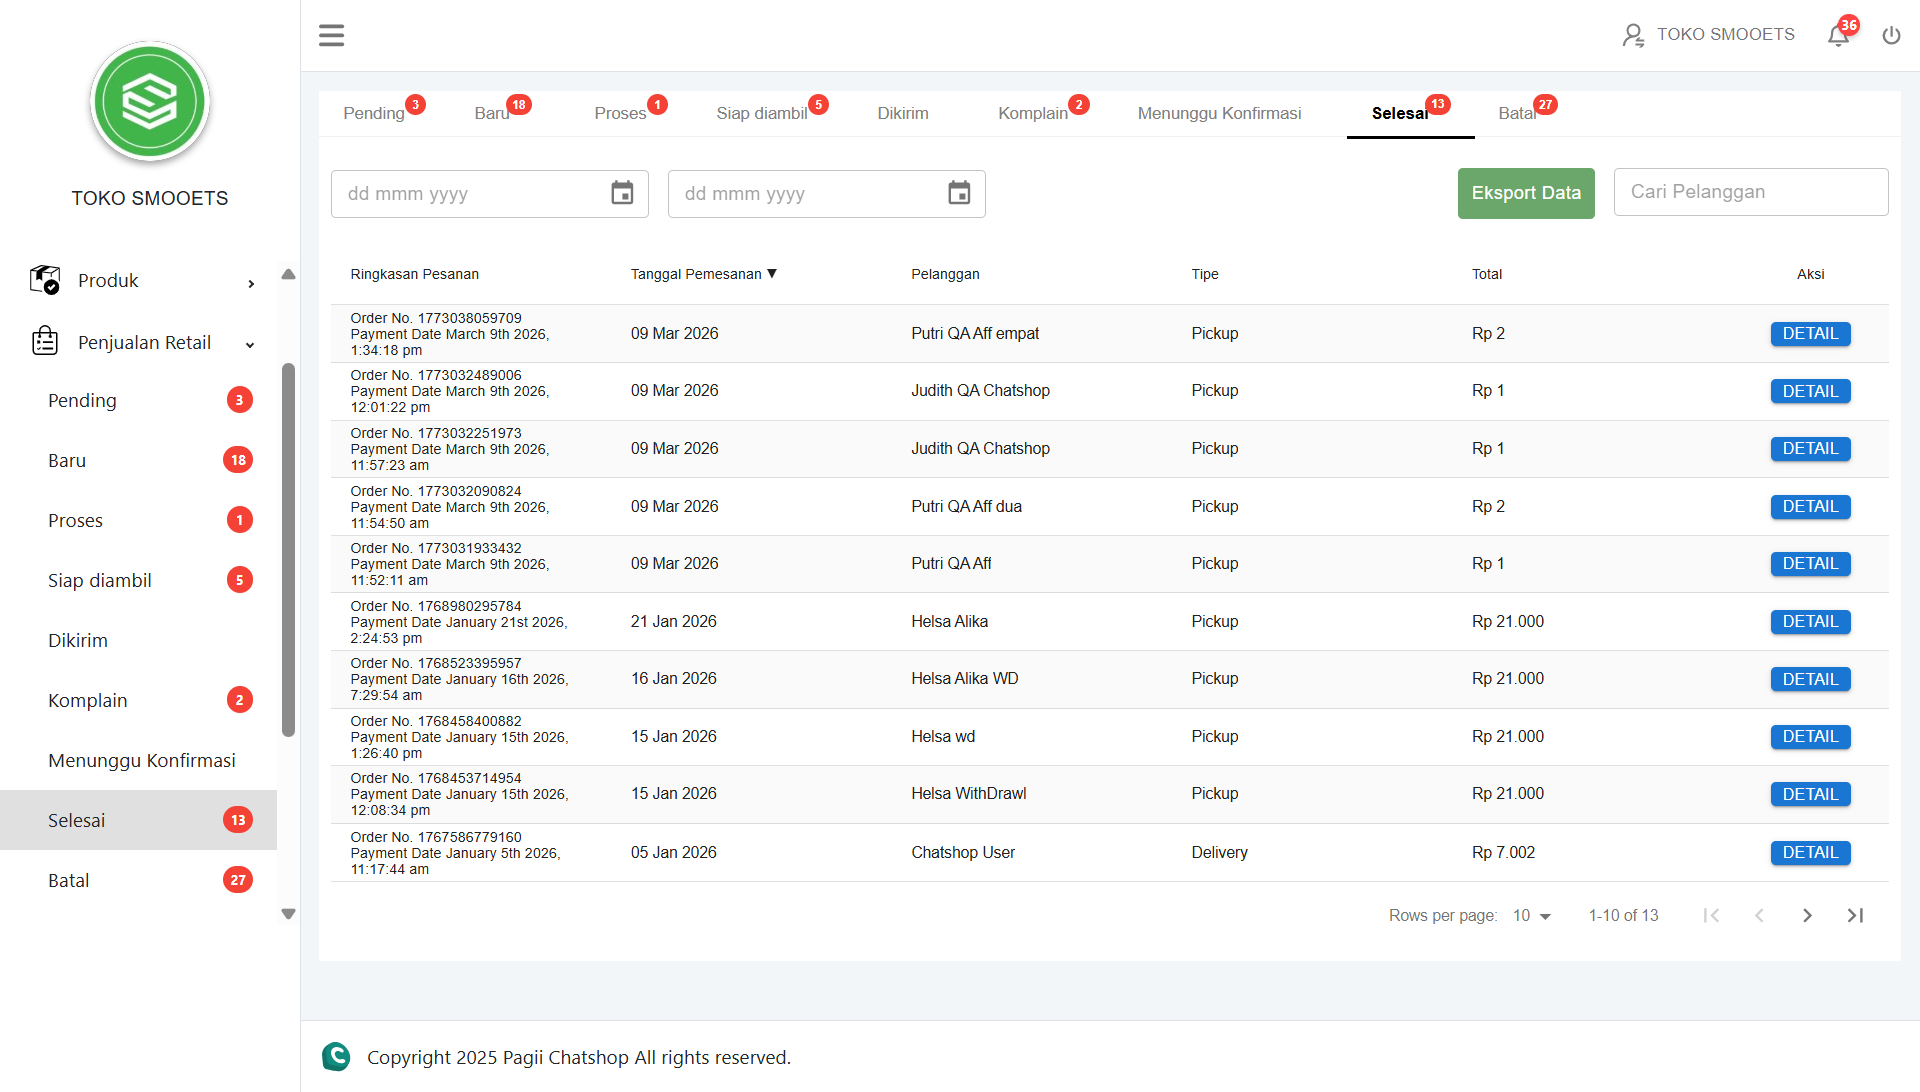
F. Selesai (Completed)
Transactions that have been successfully completed.
- Go to the Penjualan Retail → Selesai menu.
- View the list of successful transactions.
- Click Detail then click Cetak Resi if you need a hardcopy.
6. Finance
The Finance menu is used to manage all aspects of the shop's finances, from bank account information to balance withdrawals.
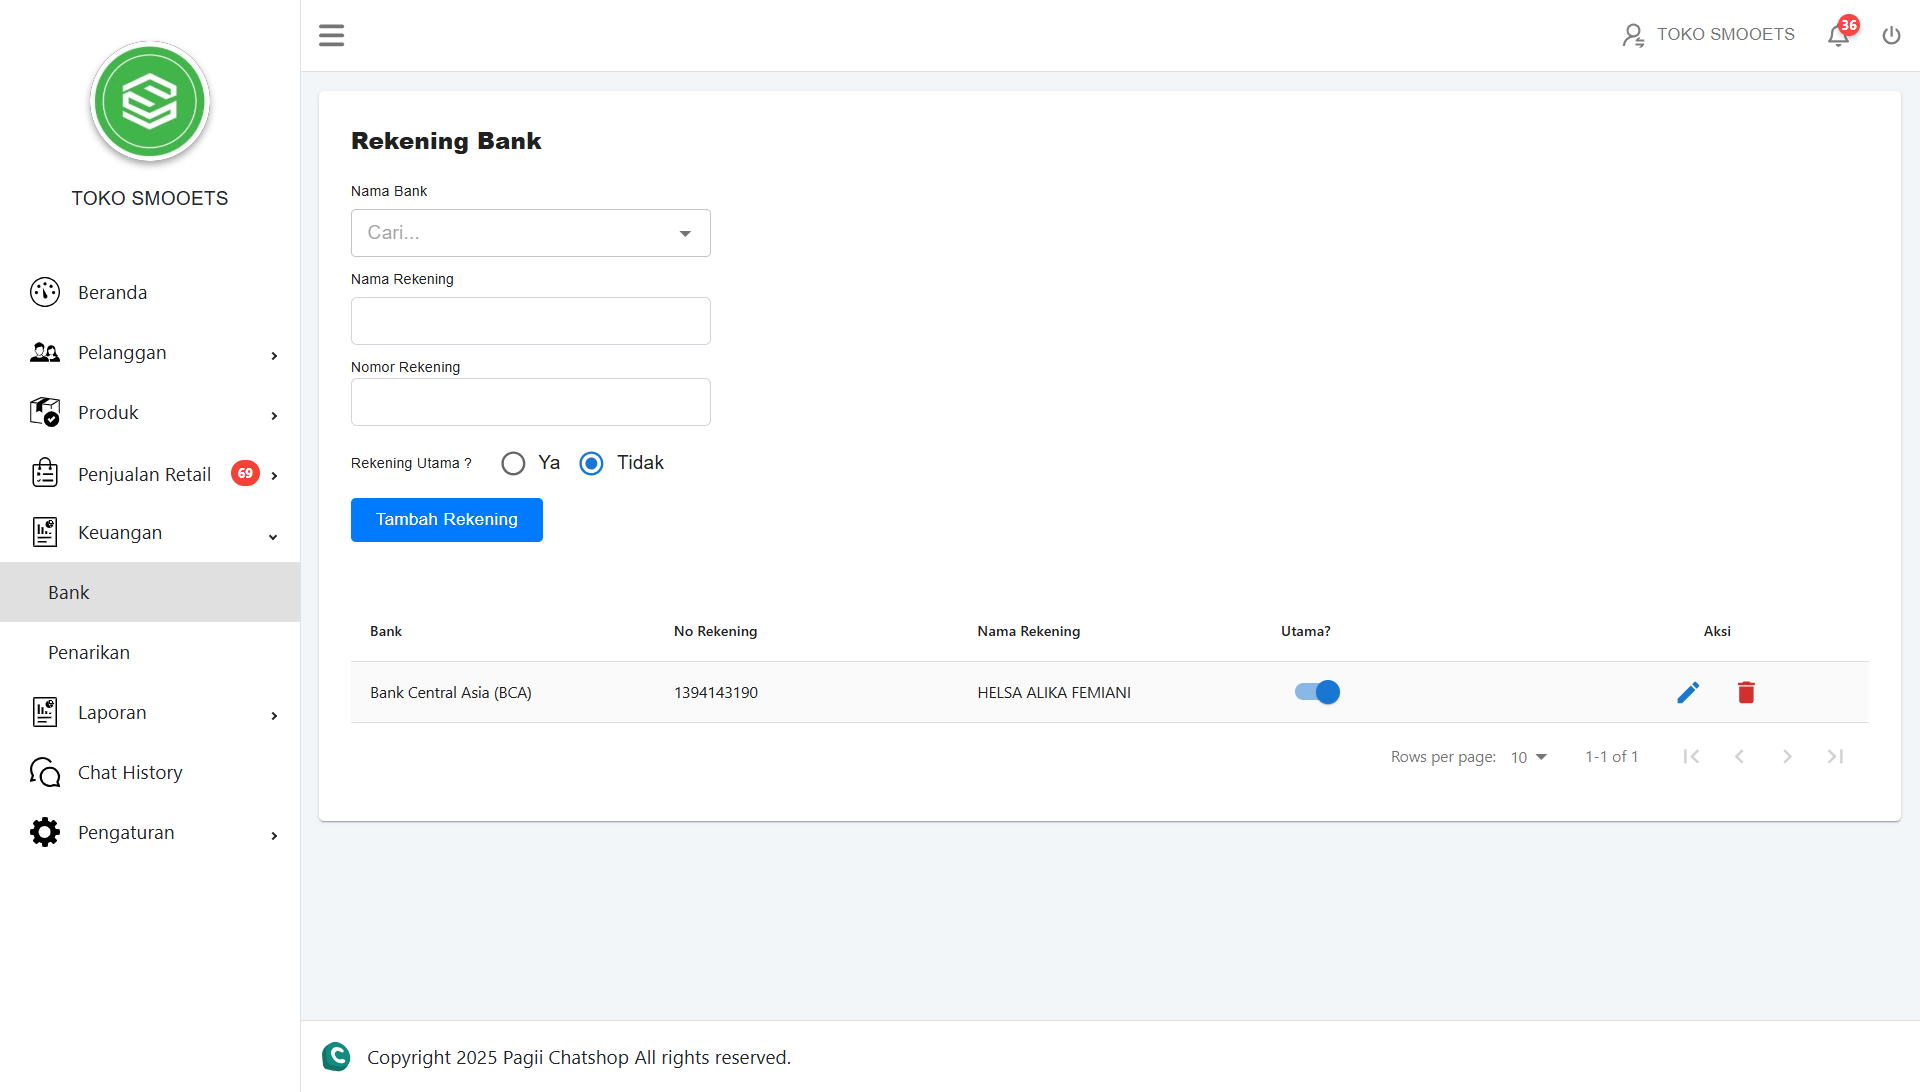
6.1 Bank
The Bank Account page is used to manage the store's bank account list for withdrawal transactions. Admins can also set one as the primary account.
STEPS TO ADD ACCOUNT:
- Click the Keuangan → Bank menu.
- Fill in details: Nama Bank (Bank Name), Nama Rekening (Account Name), and Nomor Rekening (Account Number).
- Select "Ya" (Yes) on the Rekening Utama? (Primary Account?) option if you want it to be default.
- Click the Tambah Rekening button.
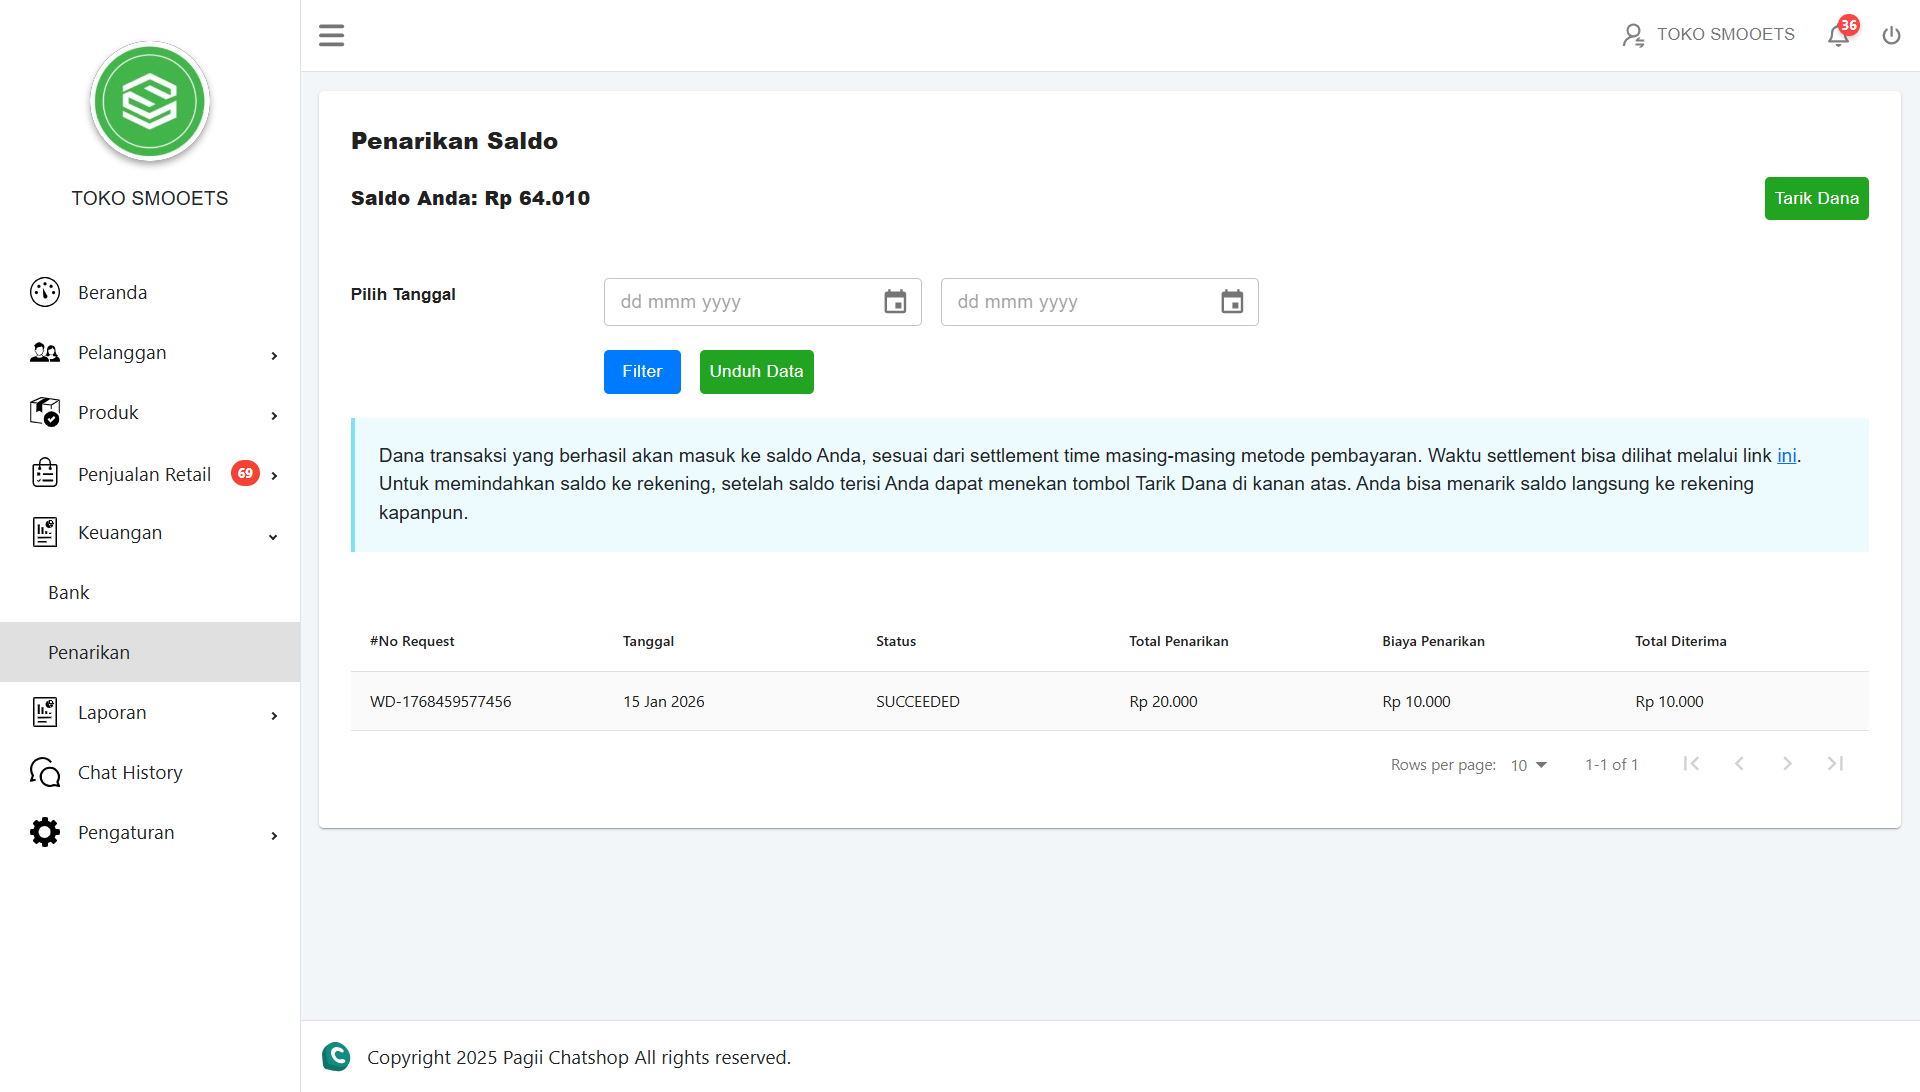
6.2 Penarikan Saldo
6.2 Balance Withdrawal
The Balance Withdrawal page is used to view your total balance and submit fund withdrawal requests (Withdraw). This page also displays the history of previous withdrawals.
FUND WITHDRAWAL PROCEDURE:
- Click the Tarik Dana button in the top right corner of the Penarikan Saldo page.
- Note the Catatan Penting (Minimum withdrawal, processing time, & admin fees).
- Select the destination Nomor Rekening bank (Bank Account Number).
- Fill in the Nominal (Amount) of balance you want to withdraw.
- Click the Buat Permintaan button. Your request will be processed according to the queue.
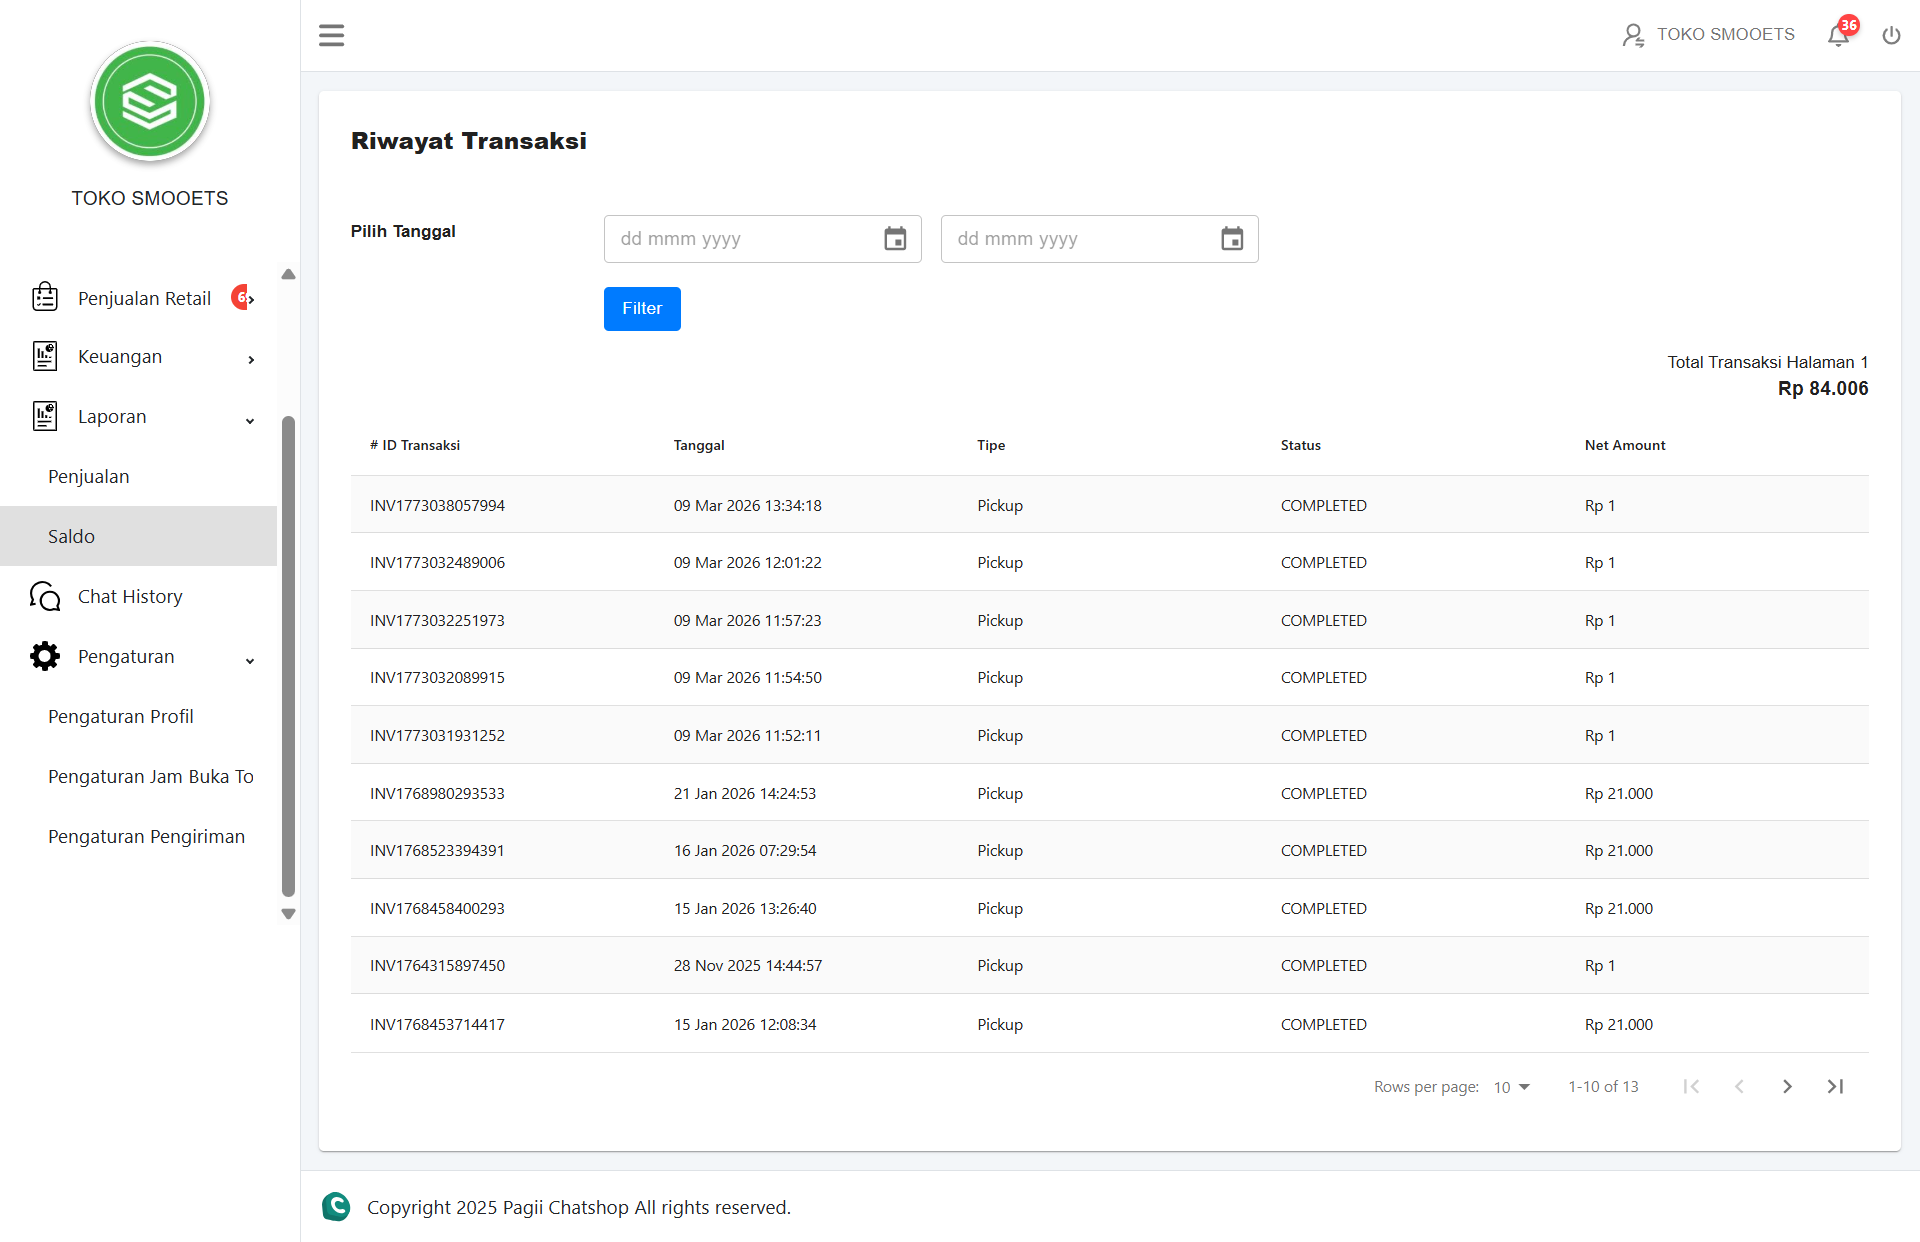
7. Reports
The Reports menu is used to view and manage all store report data, consisting of sales reports and balance transaction history. This feature helps Store Admins monitor sales performance periodically.
STEPS TO DOWNLOAD REPORT:
- Click the Laporan menu → Submenu Penjualan (Sales) or Saldo (Balance).
- Select a date range in the Pilih Tanggal field.
- Click the Filter button to display data according to the period.
- Click the Unduh Laporan / Unduh Data button. The file will be automatically downloaded in CSV format.
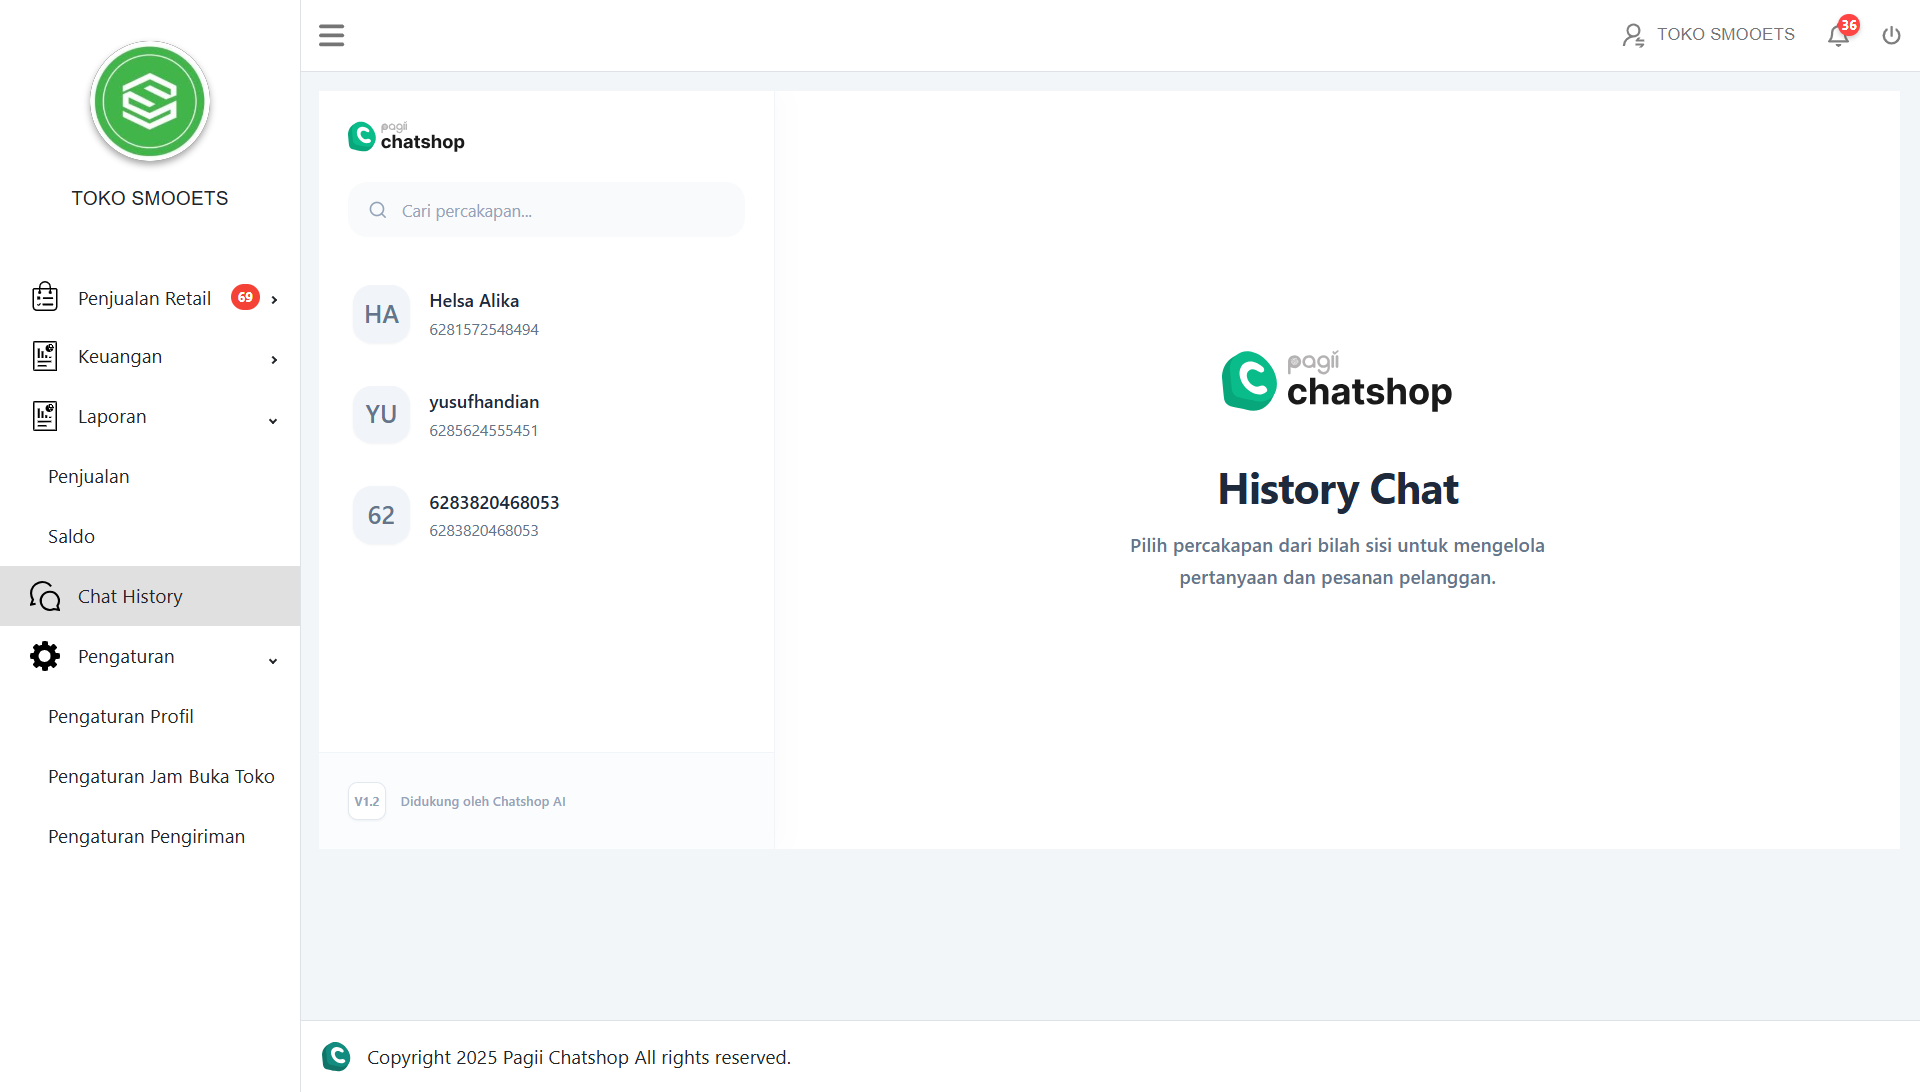
8. Chat History
The Chat History page is used to monitor the conversation history between customers and the store owner via WhatsApp. This feature allows admins to review interactions for better communication control.
CHAT MANAGEMENT
-
1
In the Daftar Session panel, select a customer based on name or WhatsApp number.
-
2
The system will automatically display the chatbot content/conversation in the right panel.
-
3
Use the Refresh (circle arrow) button to load the latest synchronized message details.
9. Settings
The Settings page is used to configure basic store information, operational hours, and shipping methods.
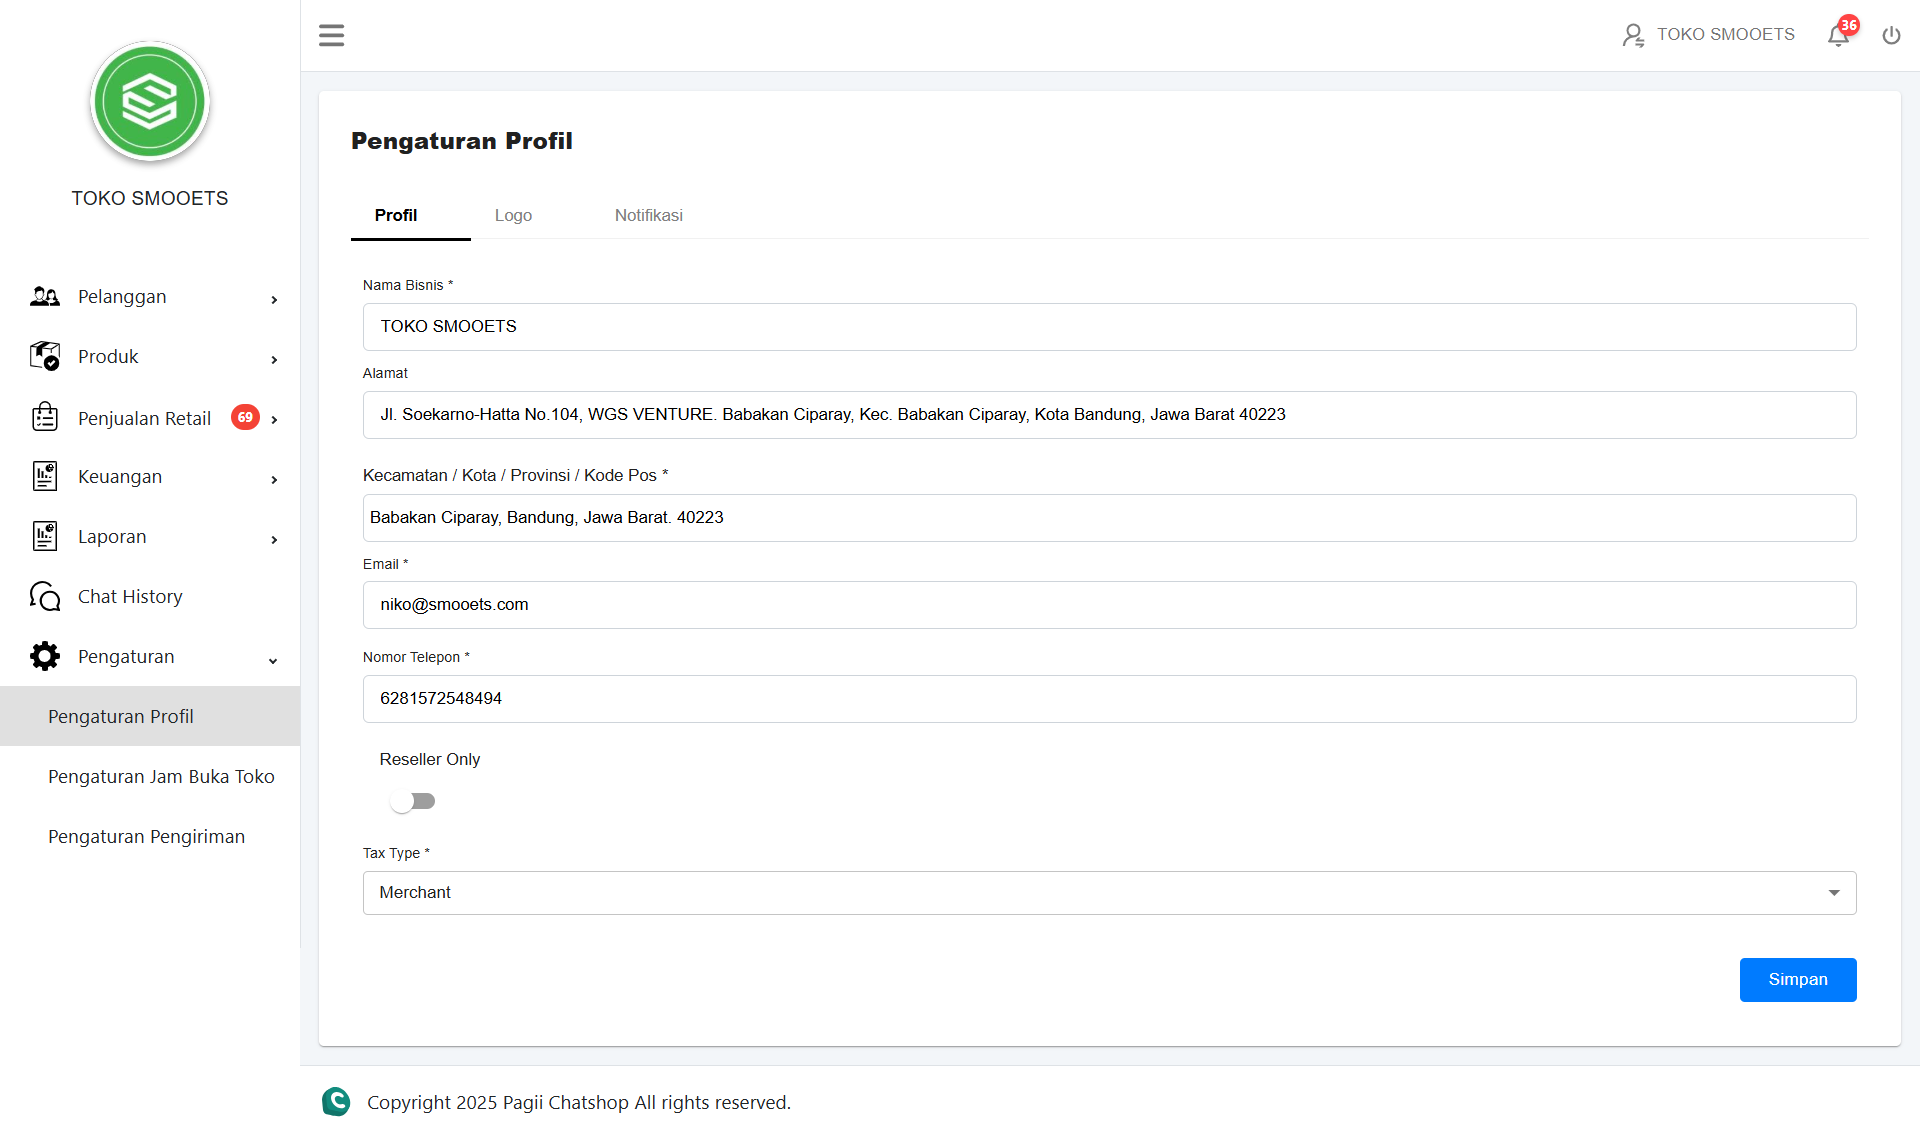
9.1 Profile Settings
Covers settings for Business Name, Address, Email, Phone Number, Store Logo (Res 1000x1000px), and Reseller Only preferences.
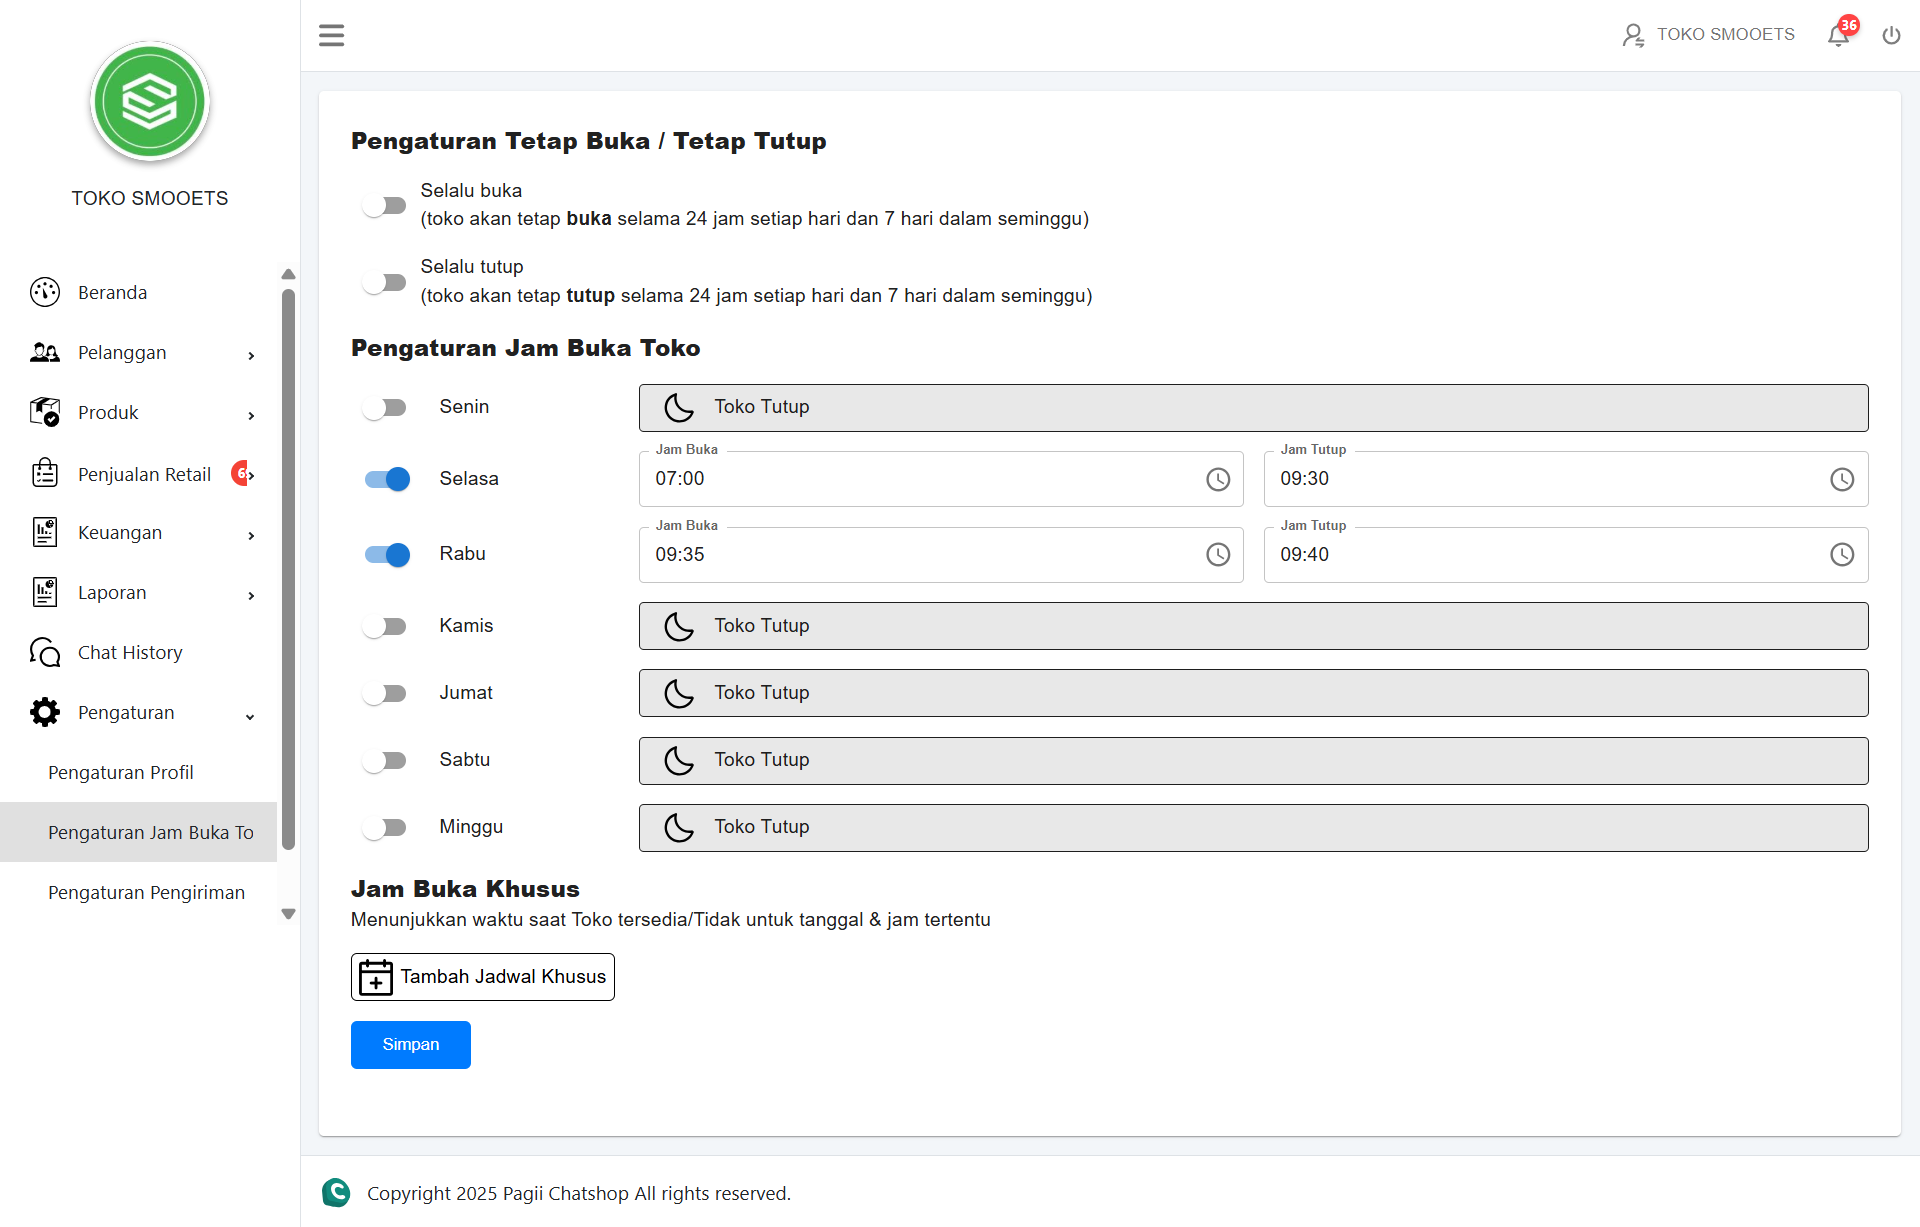
9.2 Operating Hours Settings
Consists of three main modes:
- Selalu Buka (Always Open): Store is open 24 hours every day.
- Jam Buka Harian (Daily Hours): Set specific open/close hours per day (Mon-Sun).
- Jadwal Khusus (Special Schedule): Setting holidays or special hours on specific dates.
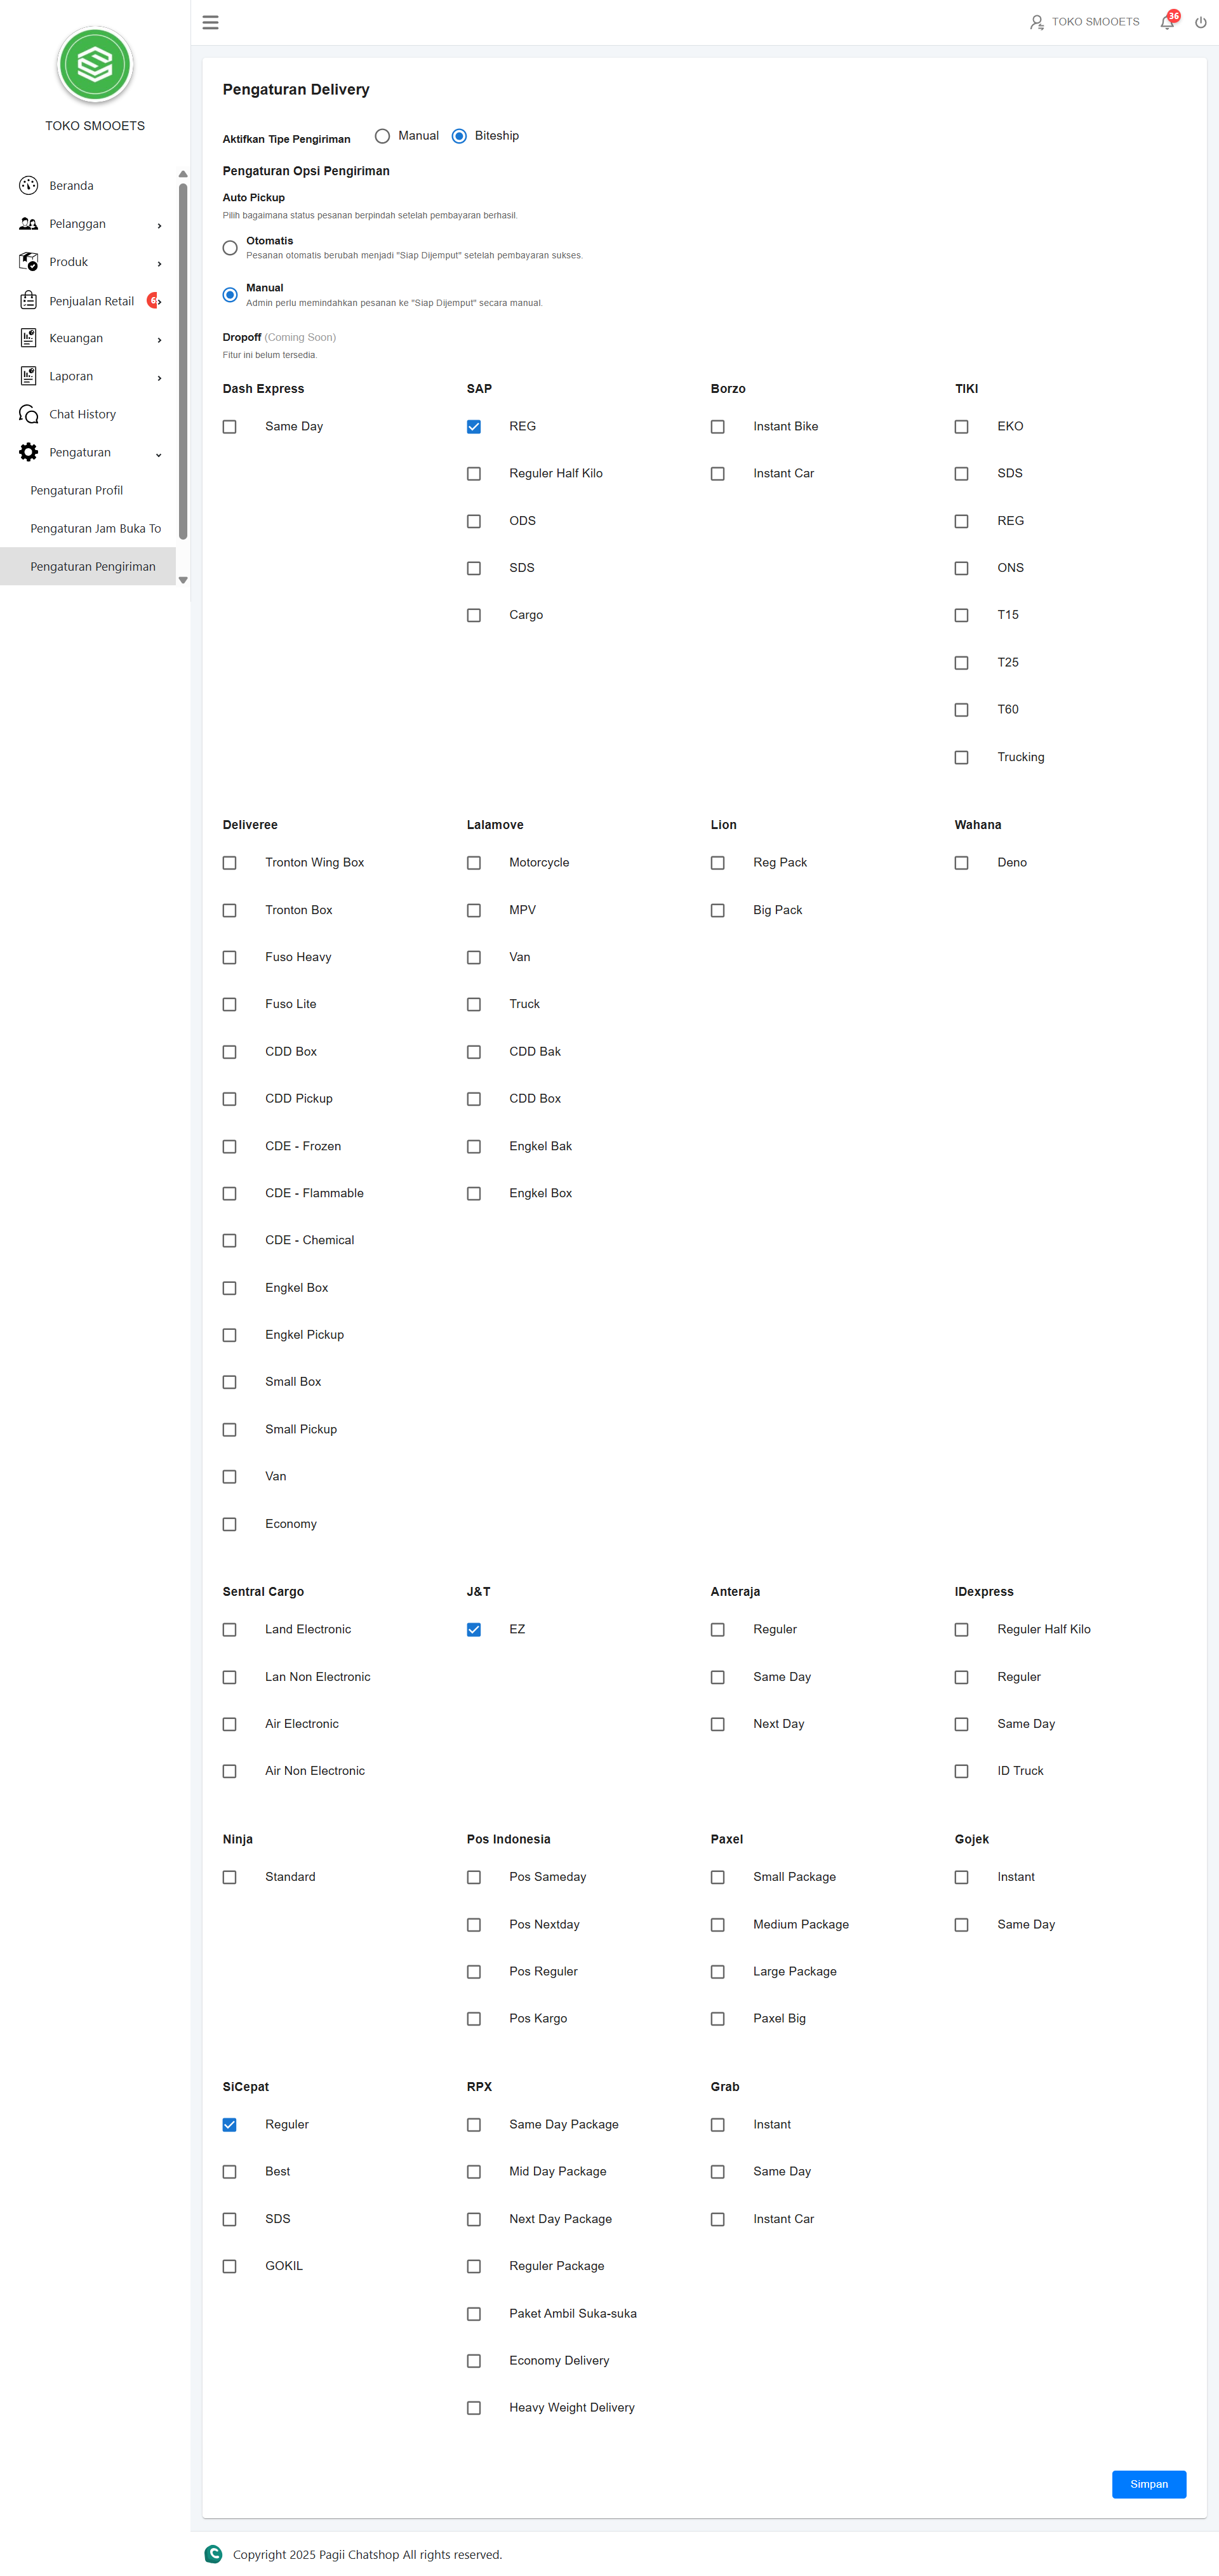
9.3 Delivery Settings
A. Biteship Option (Automatic)
Select JNE, SAP, Borzo, or TIKI courier. The system will calculate shipping rates automatically during customer checkout.
B. Manual Option (Custom)
Set a flat rate or cost per KM independently for your store's own delivery.
Need Further Assistance?
If anything is unclear or you need direct technical guidance, contact us: