
Chatshop Affiliate User Guide
Comprehensive guide for Affiliates in operating the Chatshop Affiliate Dashboard.
Overview
This document contains a guide for using the features of the Chatshop Affiliate System, especially from the Affiliate perspective. Through this system, affiliates can select products they want to promote, share affiliate links, and monitor performance and commissions earned.
AFFILIATE SYSTEM WORKFLOW:
- Choosing Products: Affiliates choose products through the Browse Produk or My Produk features.
- Sharing Links: Copying and sharing unique affiliate links to social media or chat.
- Ordering: Customers place orders through the shared link.
- Recorded in Dashboard: Transactions are automatically recorded in the affiliate dashboard for monitoring.
- Commission: Affiliates earn a commission from every valid order.
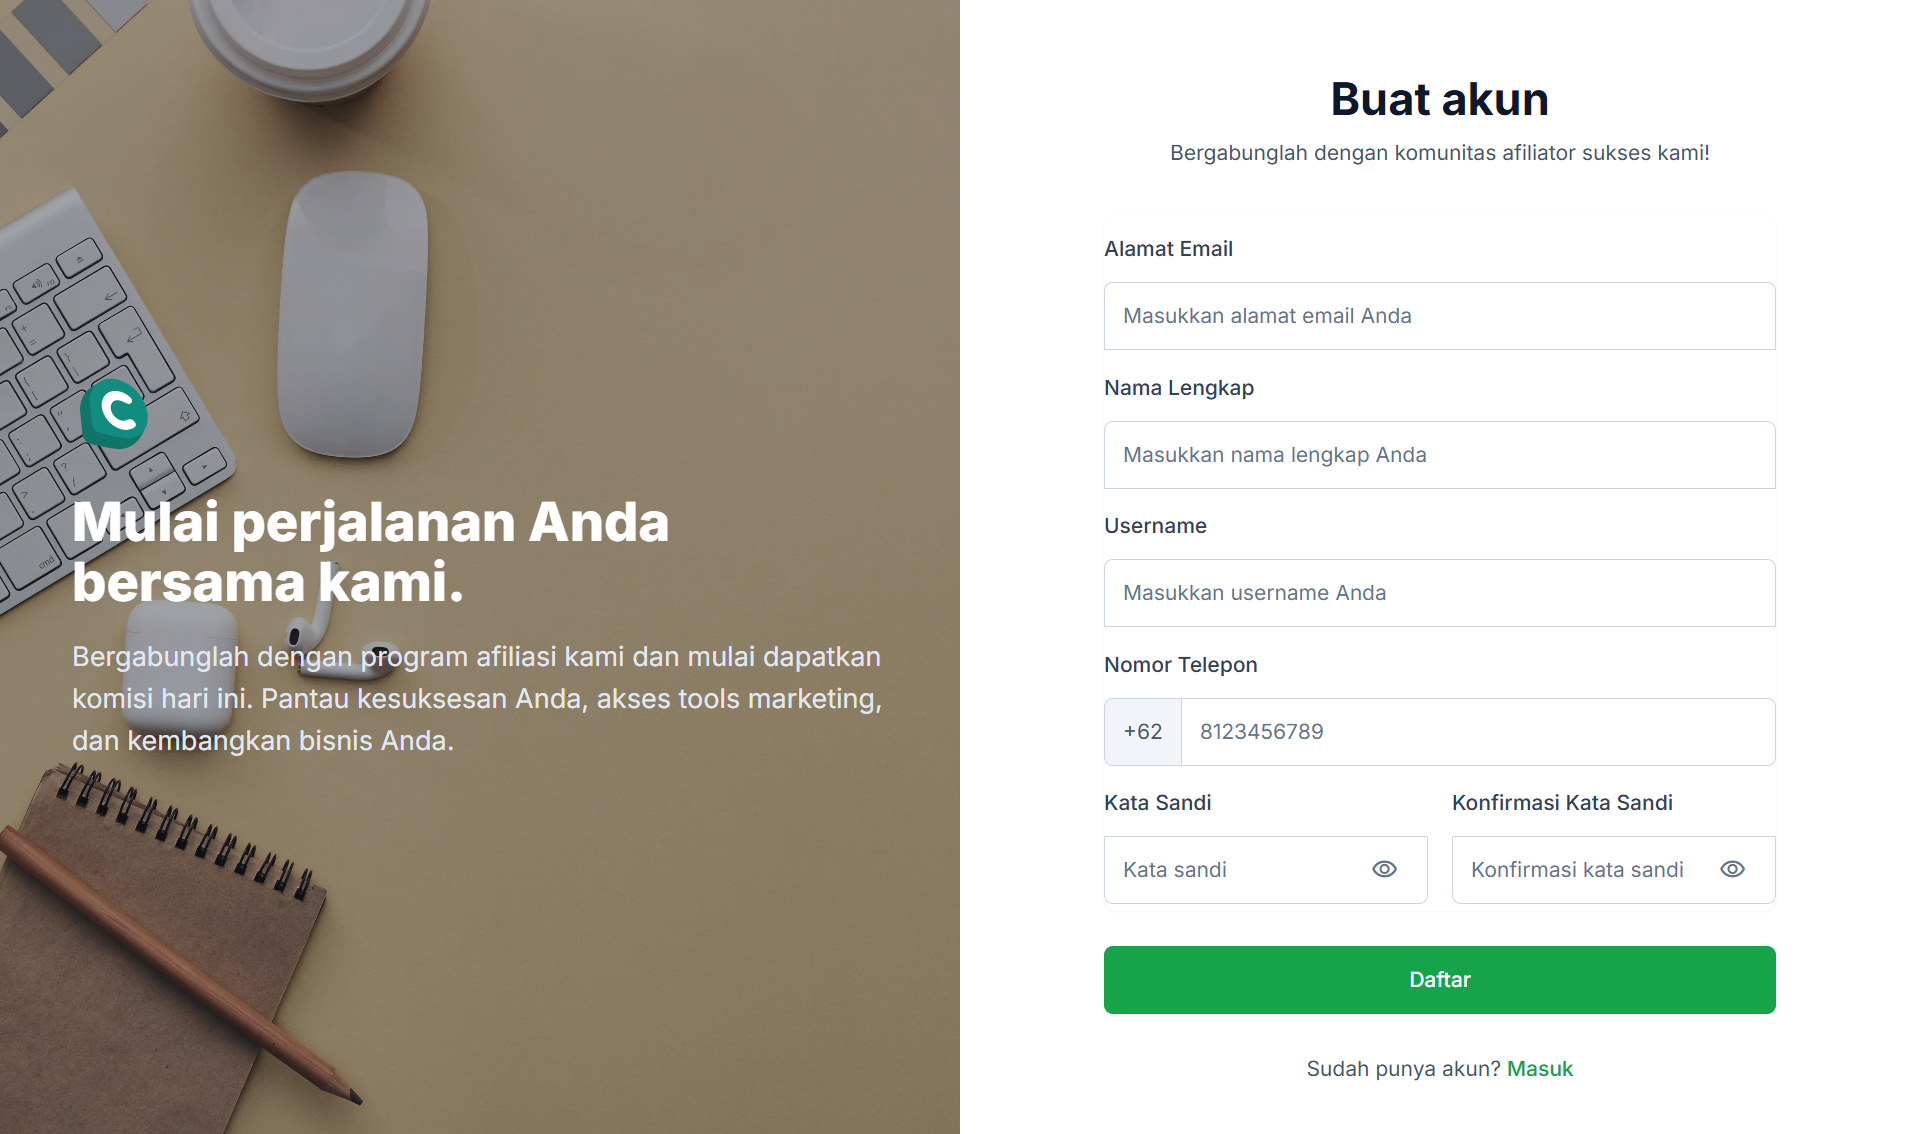
1. Affiliate Sign Up
Register as an affiliate and start your journey. Earn commission from every sale, manage products, and monitor your performance results.
Sign Up Steps:
- Open the Sign Up Affiliate page.
- Fill in the data: Email Address, Full Name, Username, Phone Number, and Password.
- Ensure the password and password confirmation are the same.
- Click the Sign Up button.
- After success, the account will be automatically activated and can be used to login.
2. Affiliate Dashboard Login
Use your registered account to access the main performance monitoring dashboard.
LOGIN STEPS:
- Open your browser and visit the Affiliate Dashboard URL.
- Enter your Username and Password.
- Check Remember me if needed.
- Click the Sign In button.

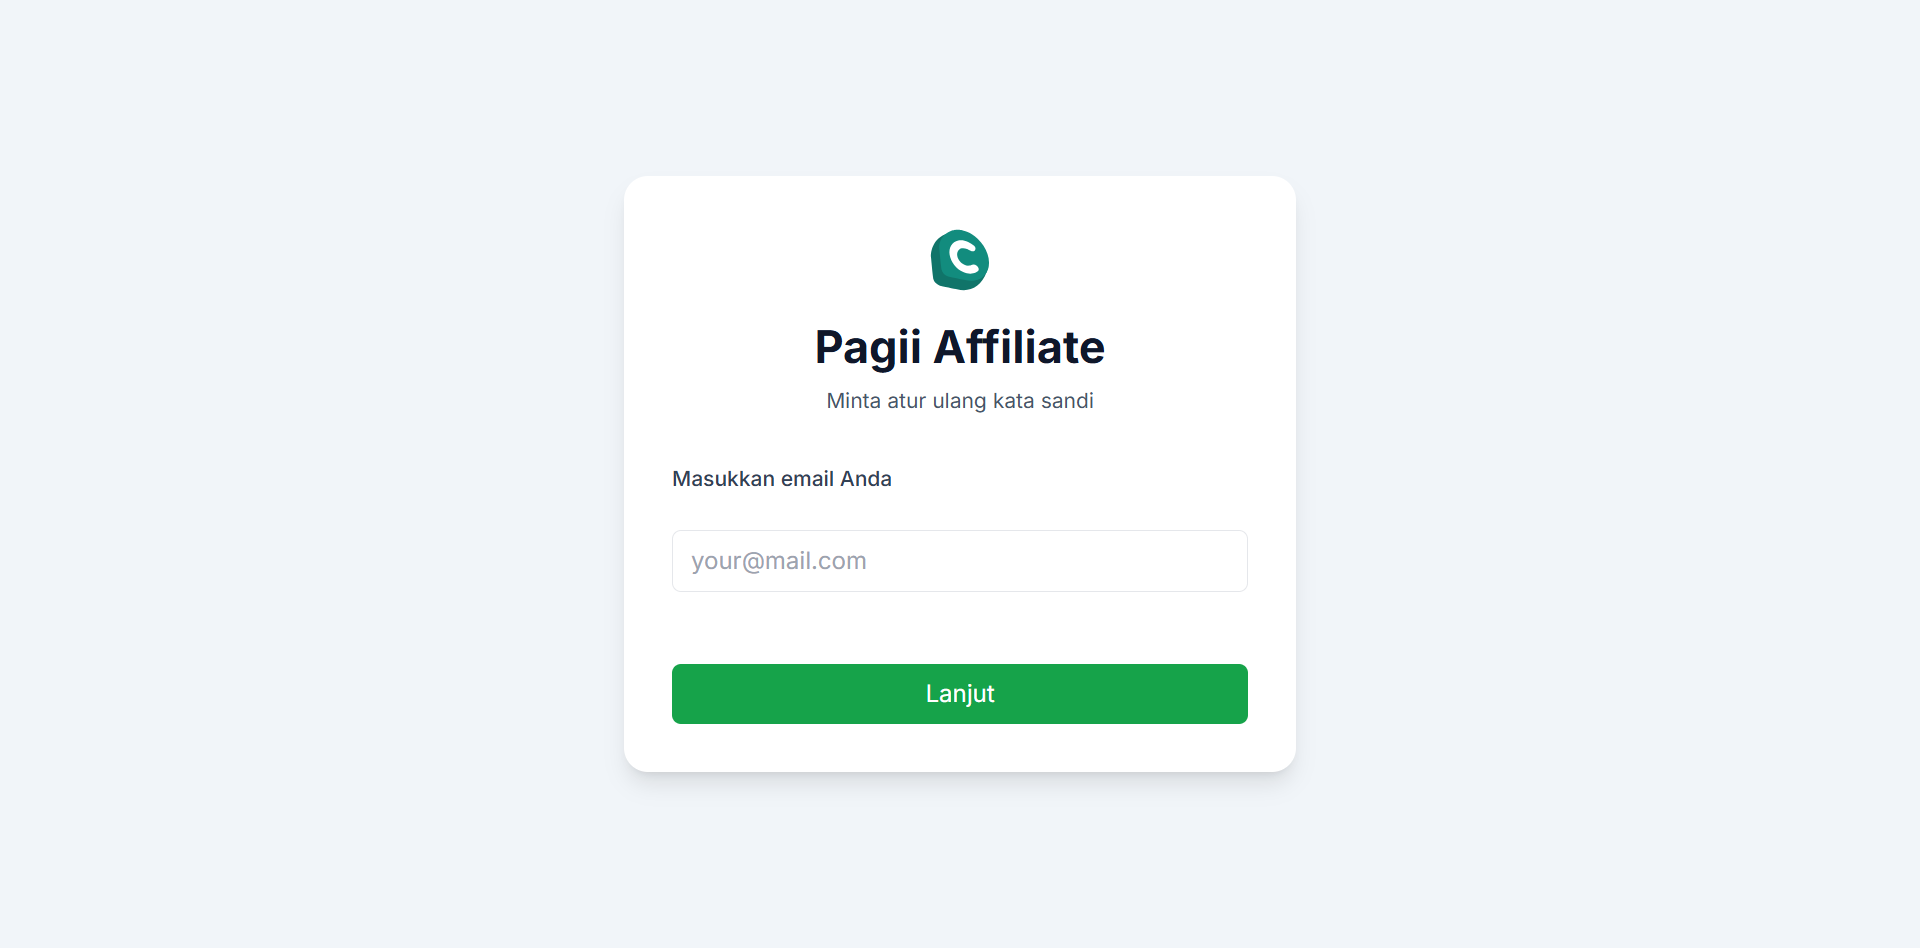
3. Forgot Password
RESET PASSWORD:
- On the Login page, click Forgot Password?.
- Enter your registered Email.
- Click the Next button.
- The system will send an email containing a password reset link.
- Open the email, click the link, and enter your New Password.
- Click Submit to update.
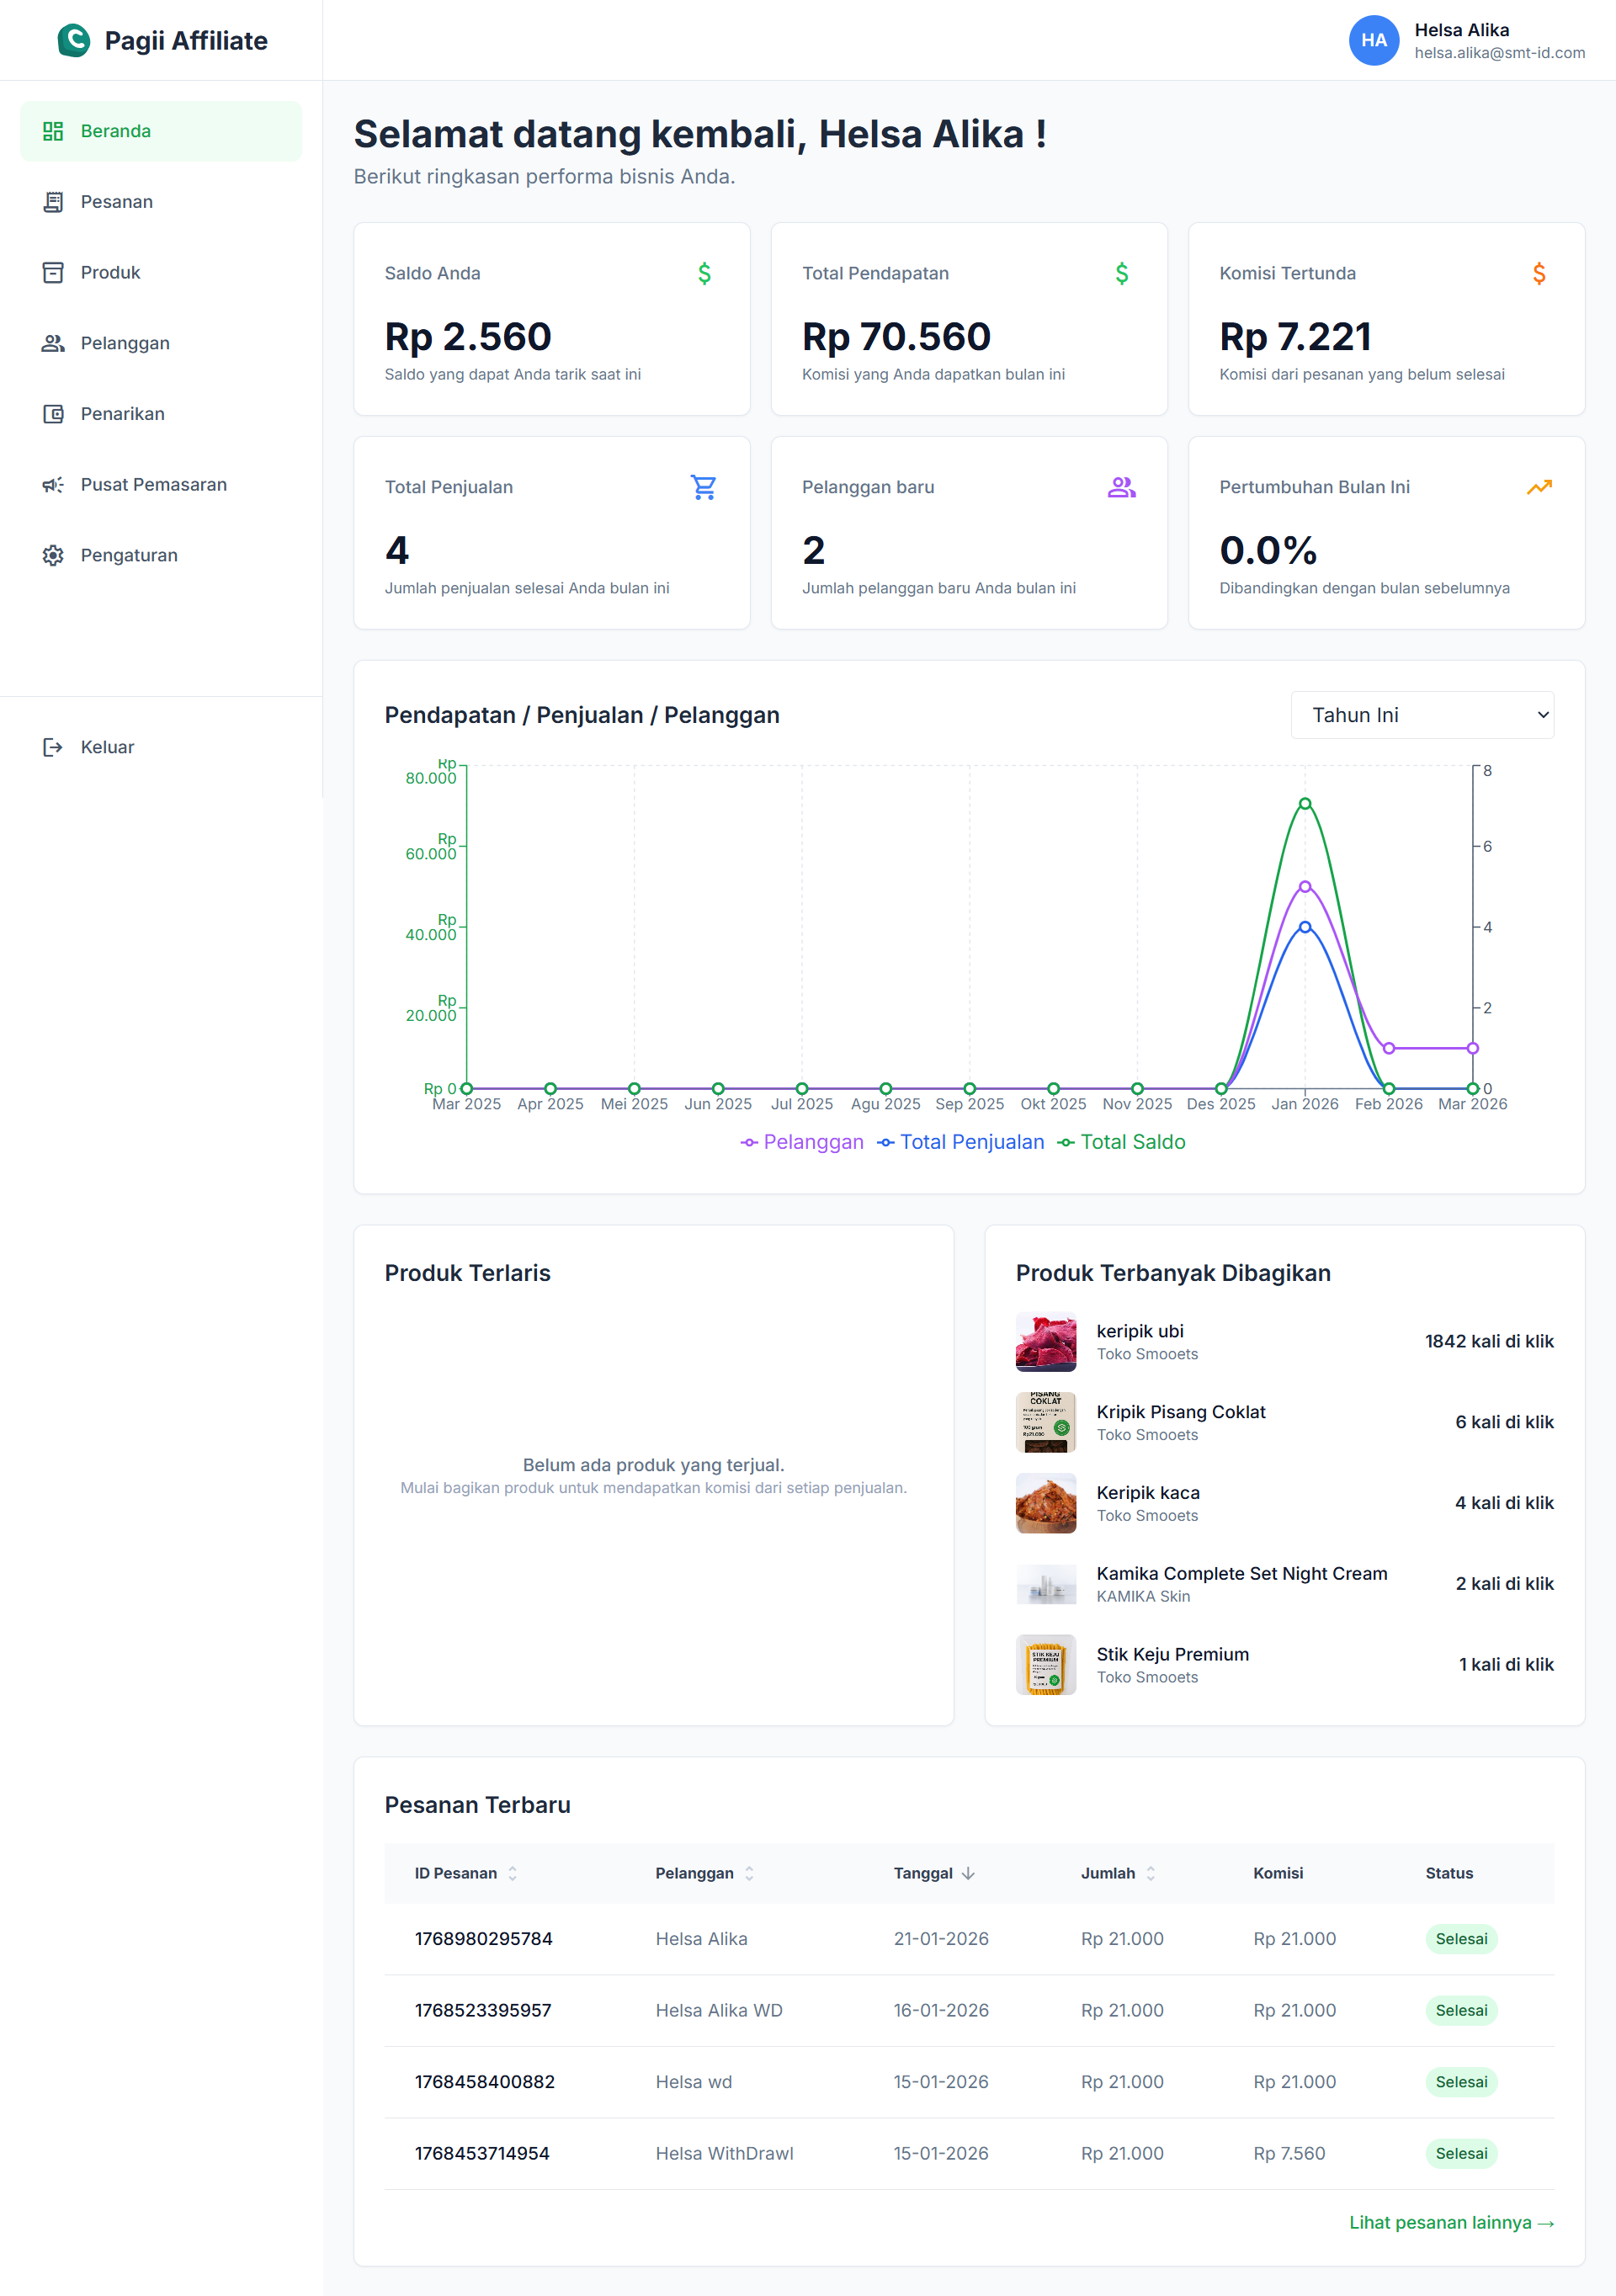
4. Affiliate Dashboard
The main information center for monitoring performance, affiliate links, commissions, and fund withdrawals.
● Card Summary
- Your Balance: Total balance ready to be withdrawn.
- Total Revenue: Accumulated commissions generated.
- Pending Commission: Commission from unfinished transactions.
- Total Sales: Number of transactions via your link.
● Statistics & Top Products
- Performance Chart: 12-month performance graph.
- Top Selling: Top selling products.
- Top Shared: Most shared/clicked products.
- Recent Orders: List of recent orders.
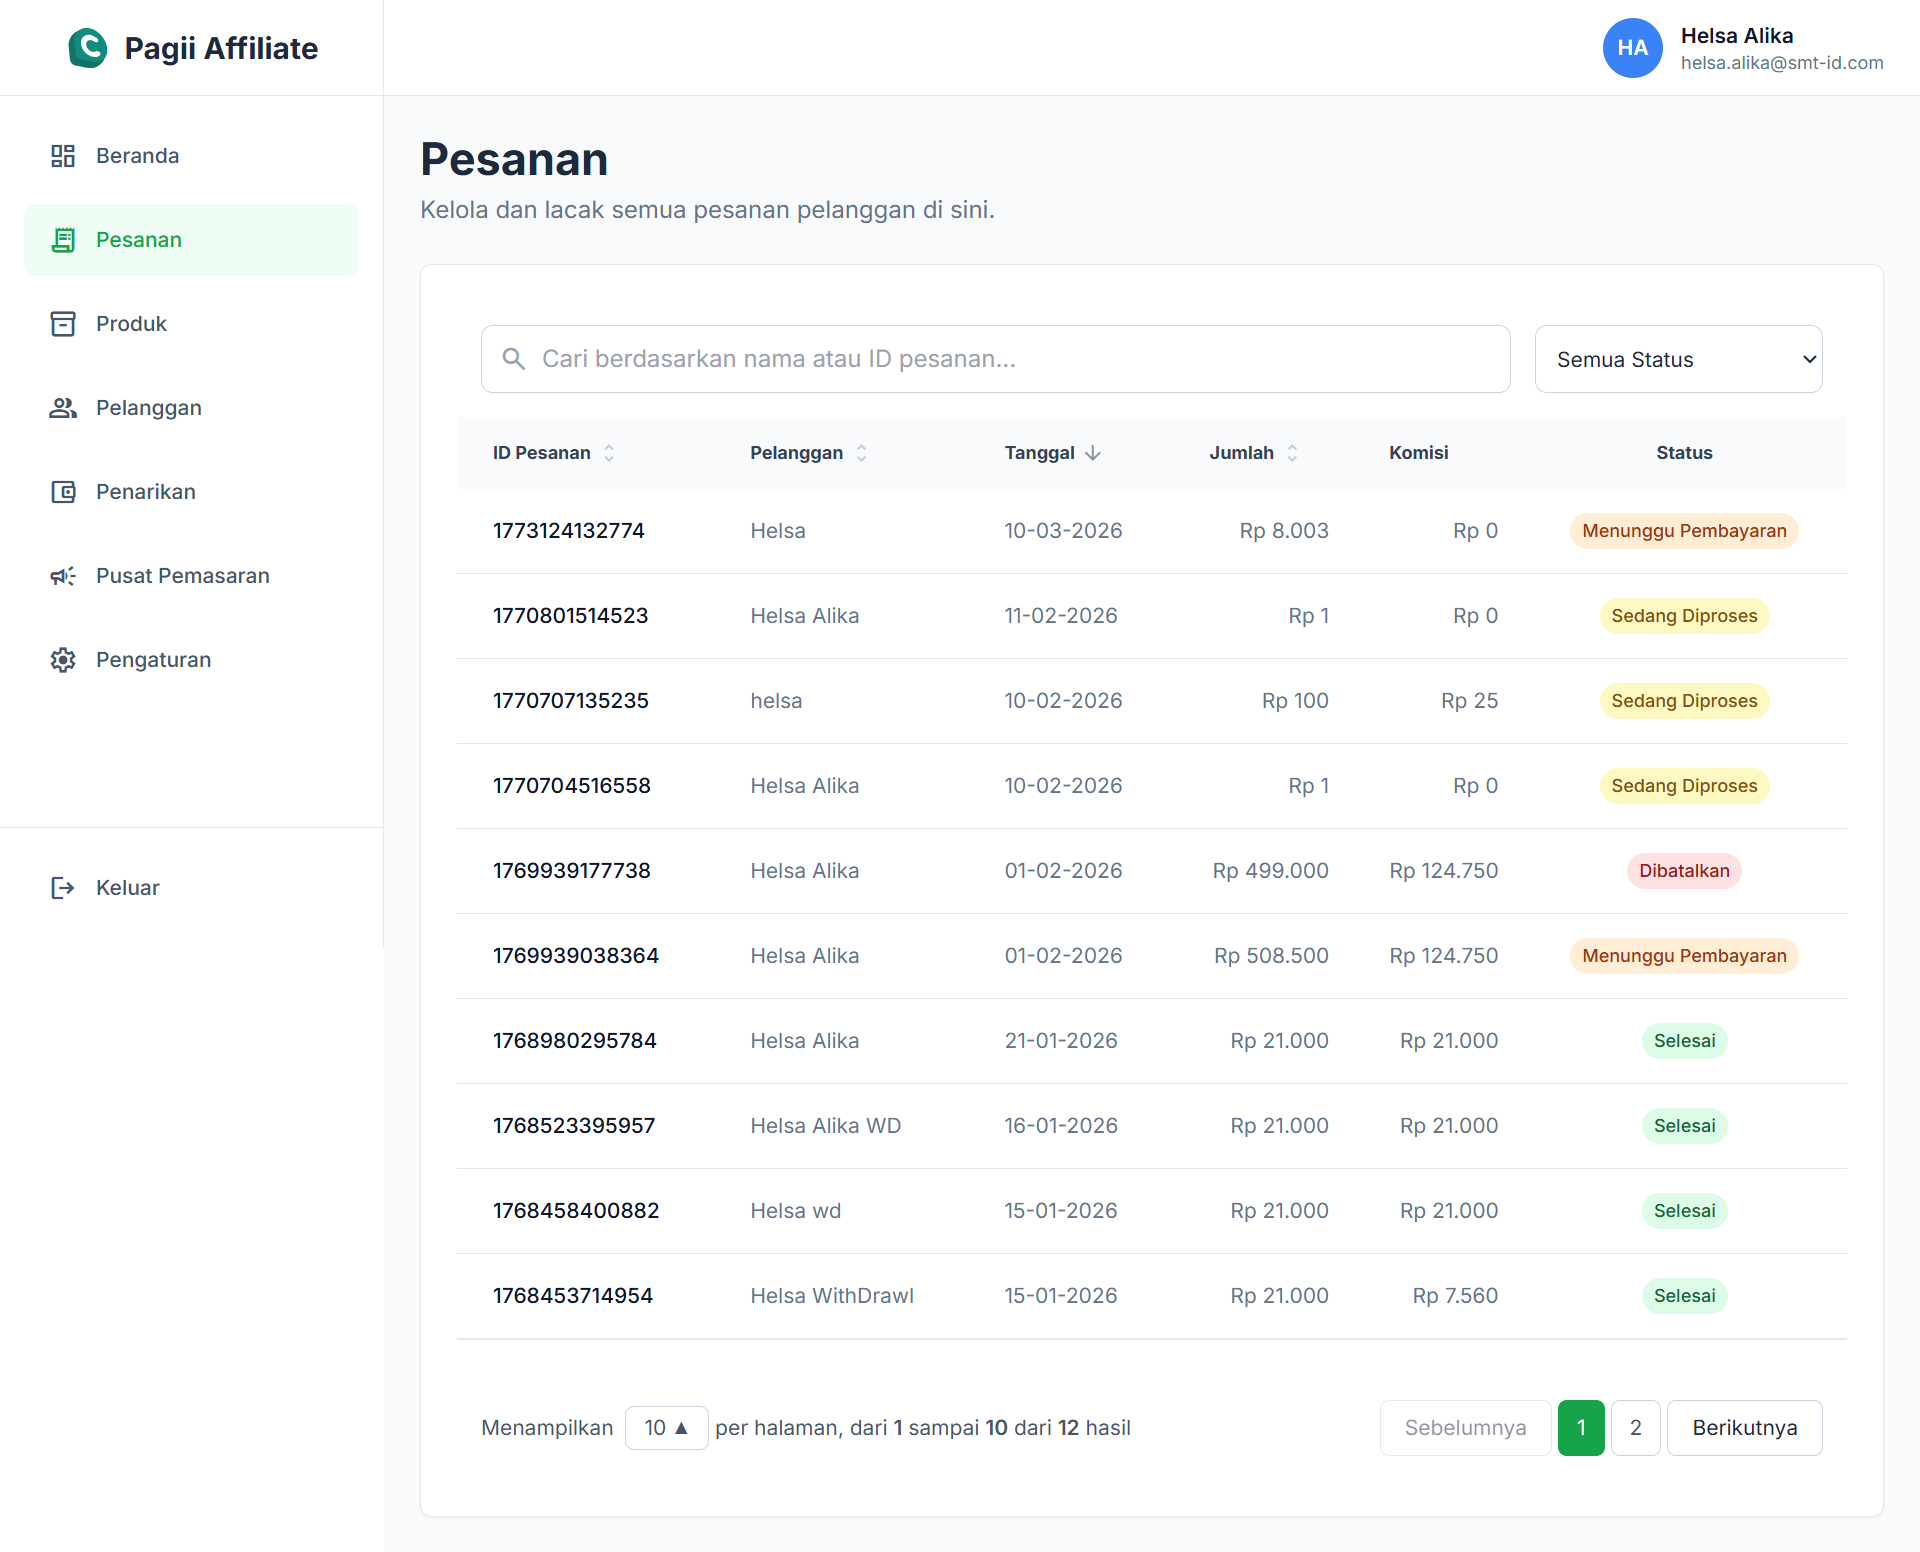
5. Order List
Displays the entire list of orders received through your affiliate link.
ORDER MANAGEMENT FEATURES:
-
1
Search: Search orders by customer name or Order ID.
-
2
Filter Status: Filter the view by Processing, Completed, or Canceled statuses.
-
3
Detail: View transaction amount and the commission earned.
6. Affiliate Products
The Products menu is divided into two main tabs to facilitate the selection and distribution of promotional links.
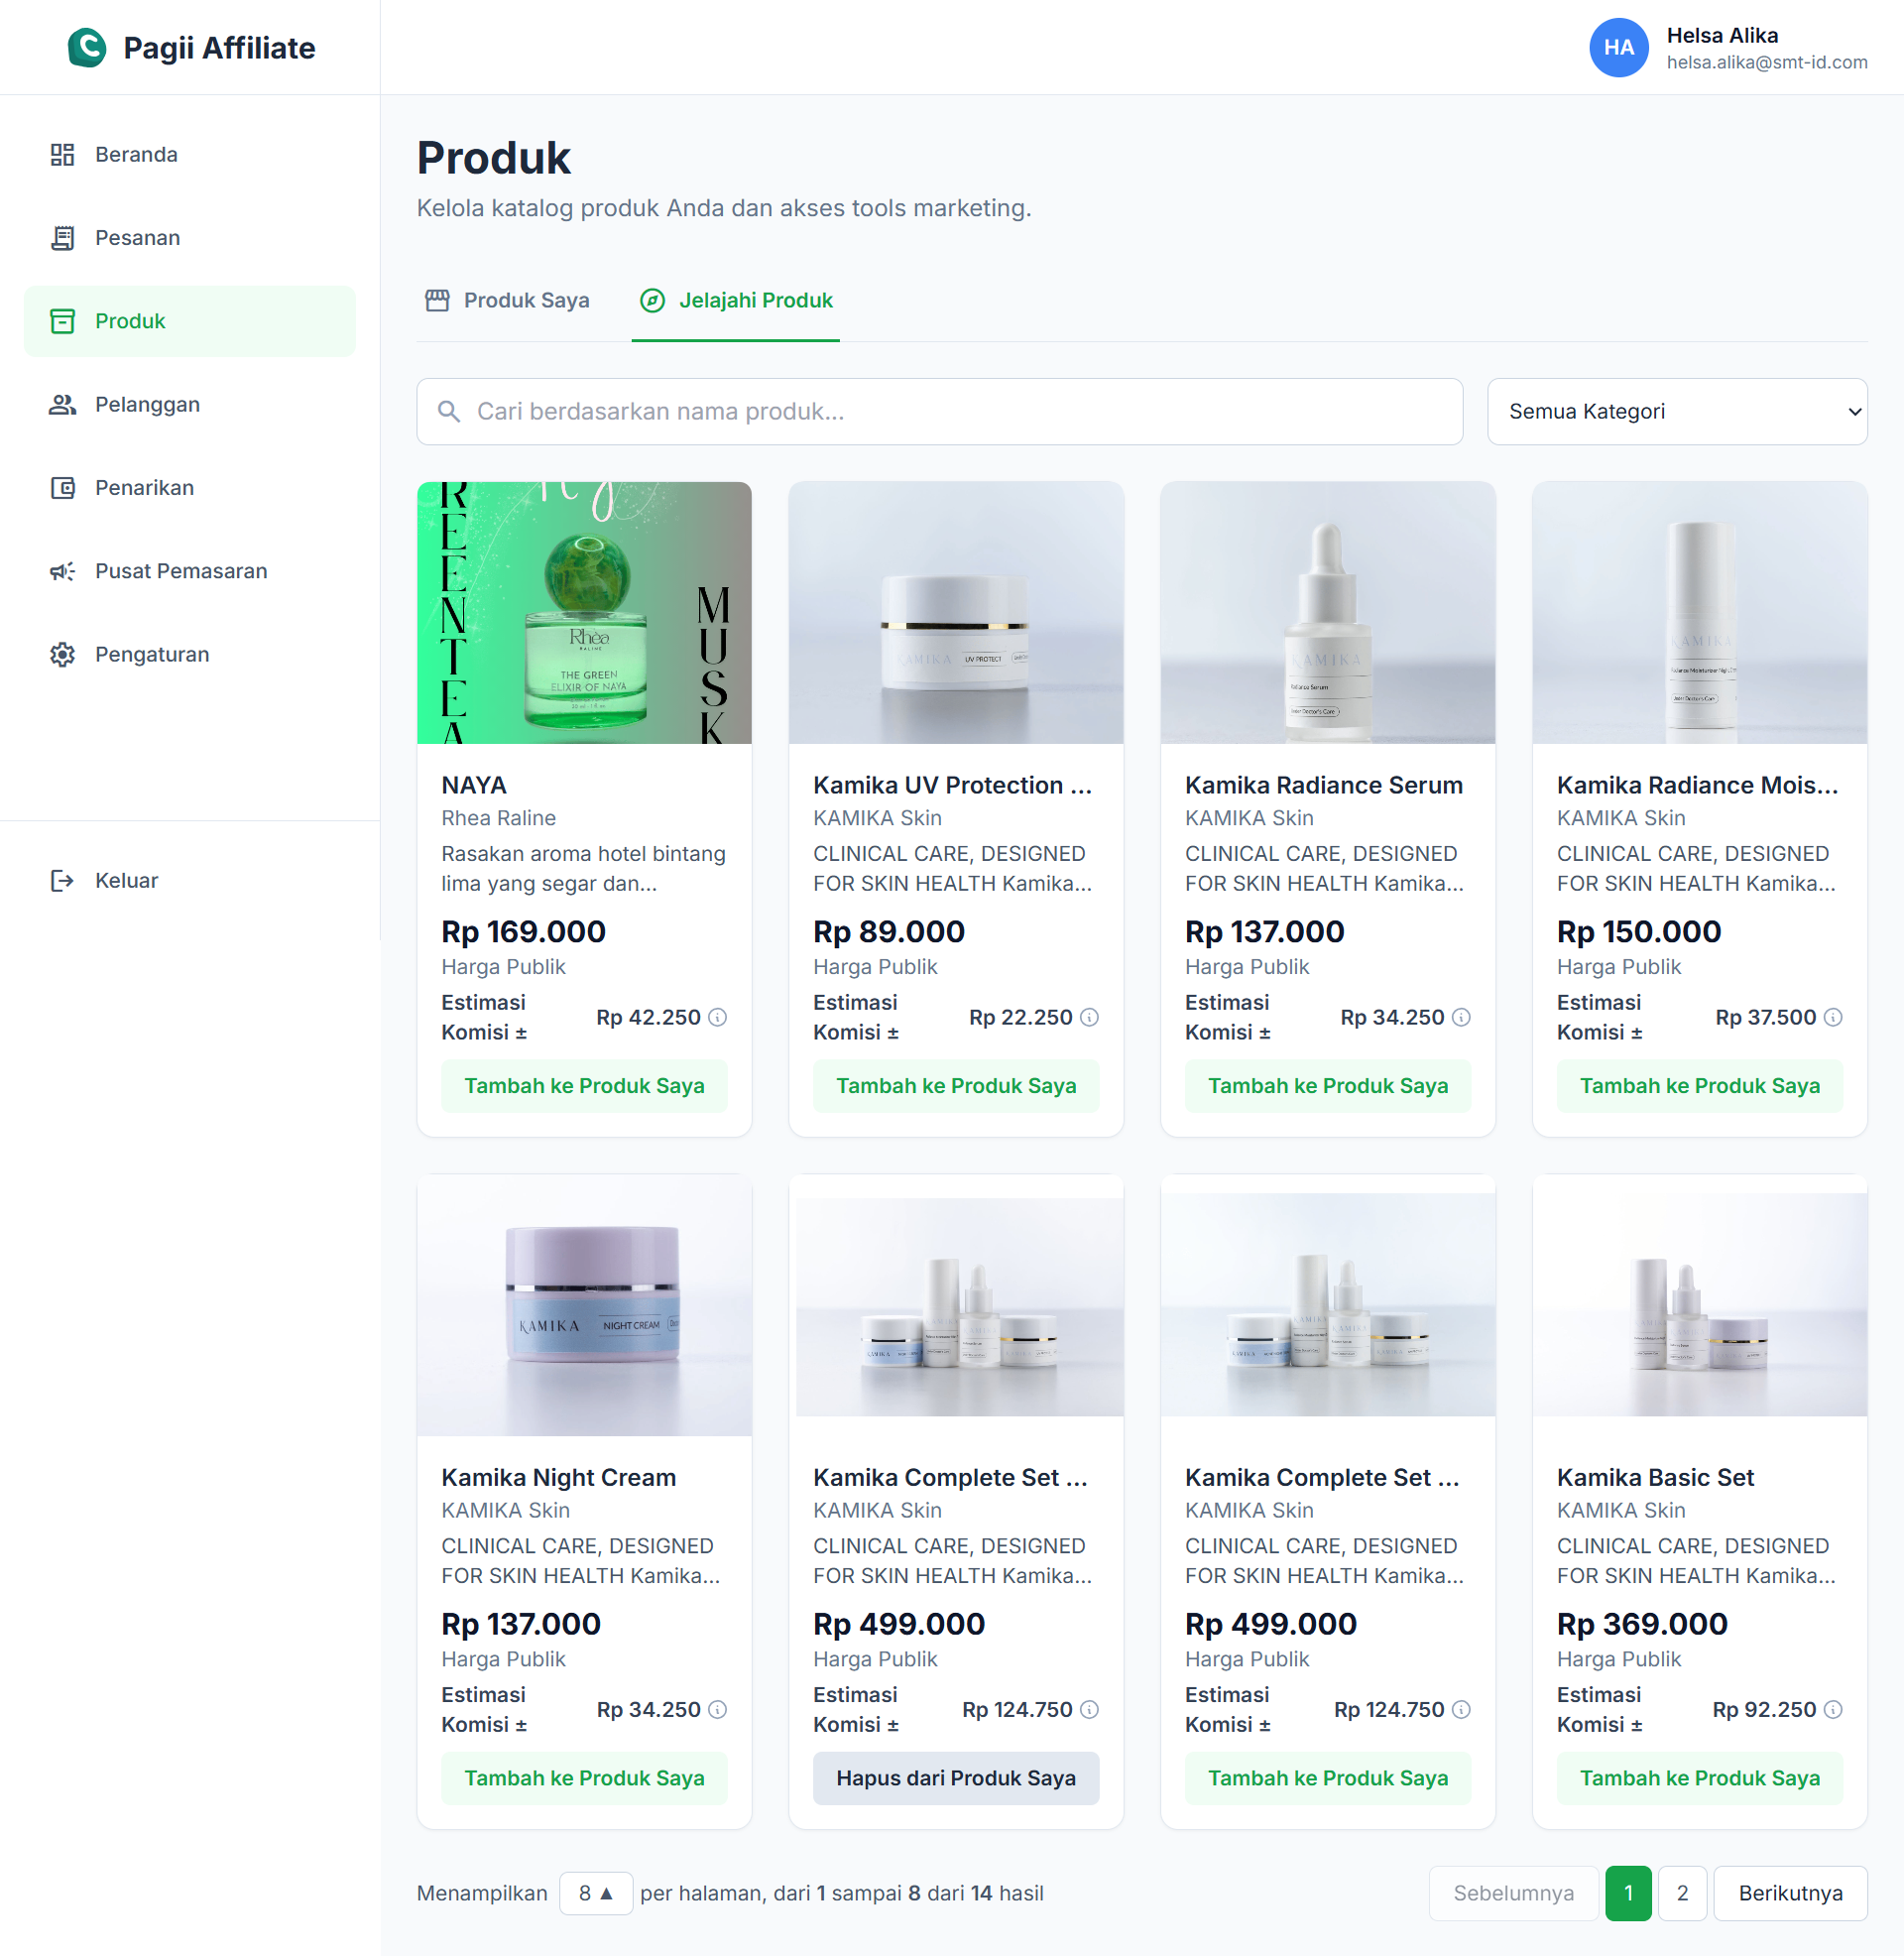
6.1 Browse Products
Where to find new products to affiliate. Click the "Add to My Products" button to add products to your promotional list.
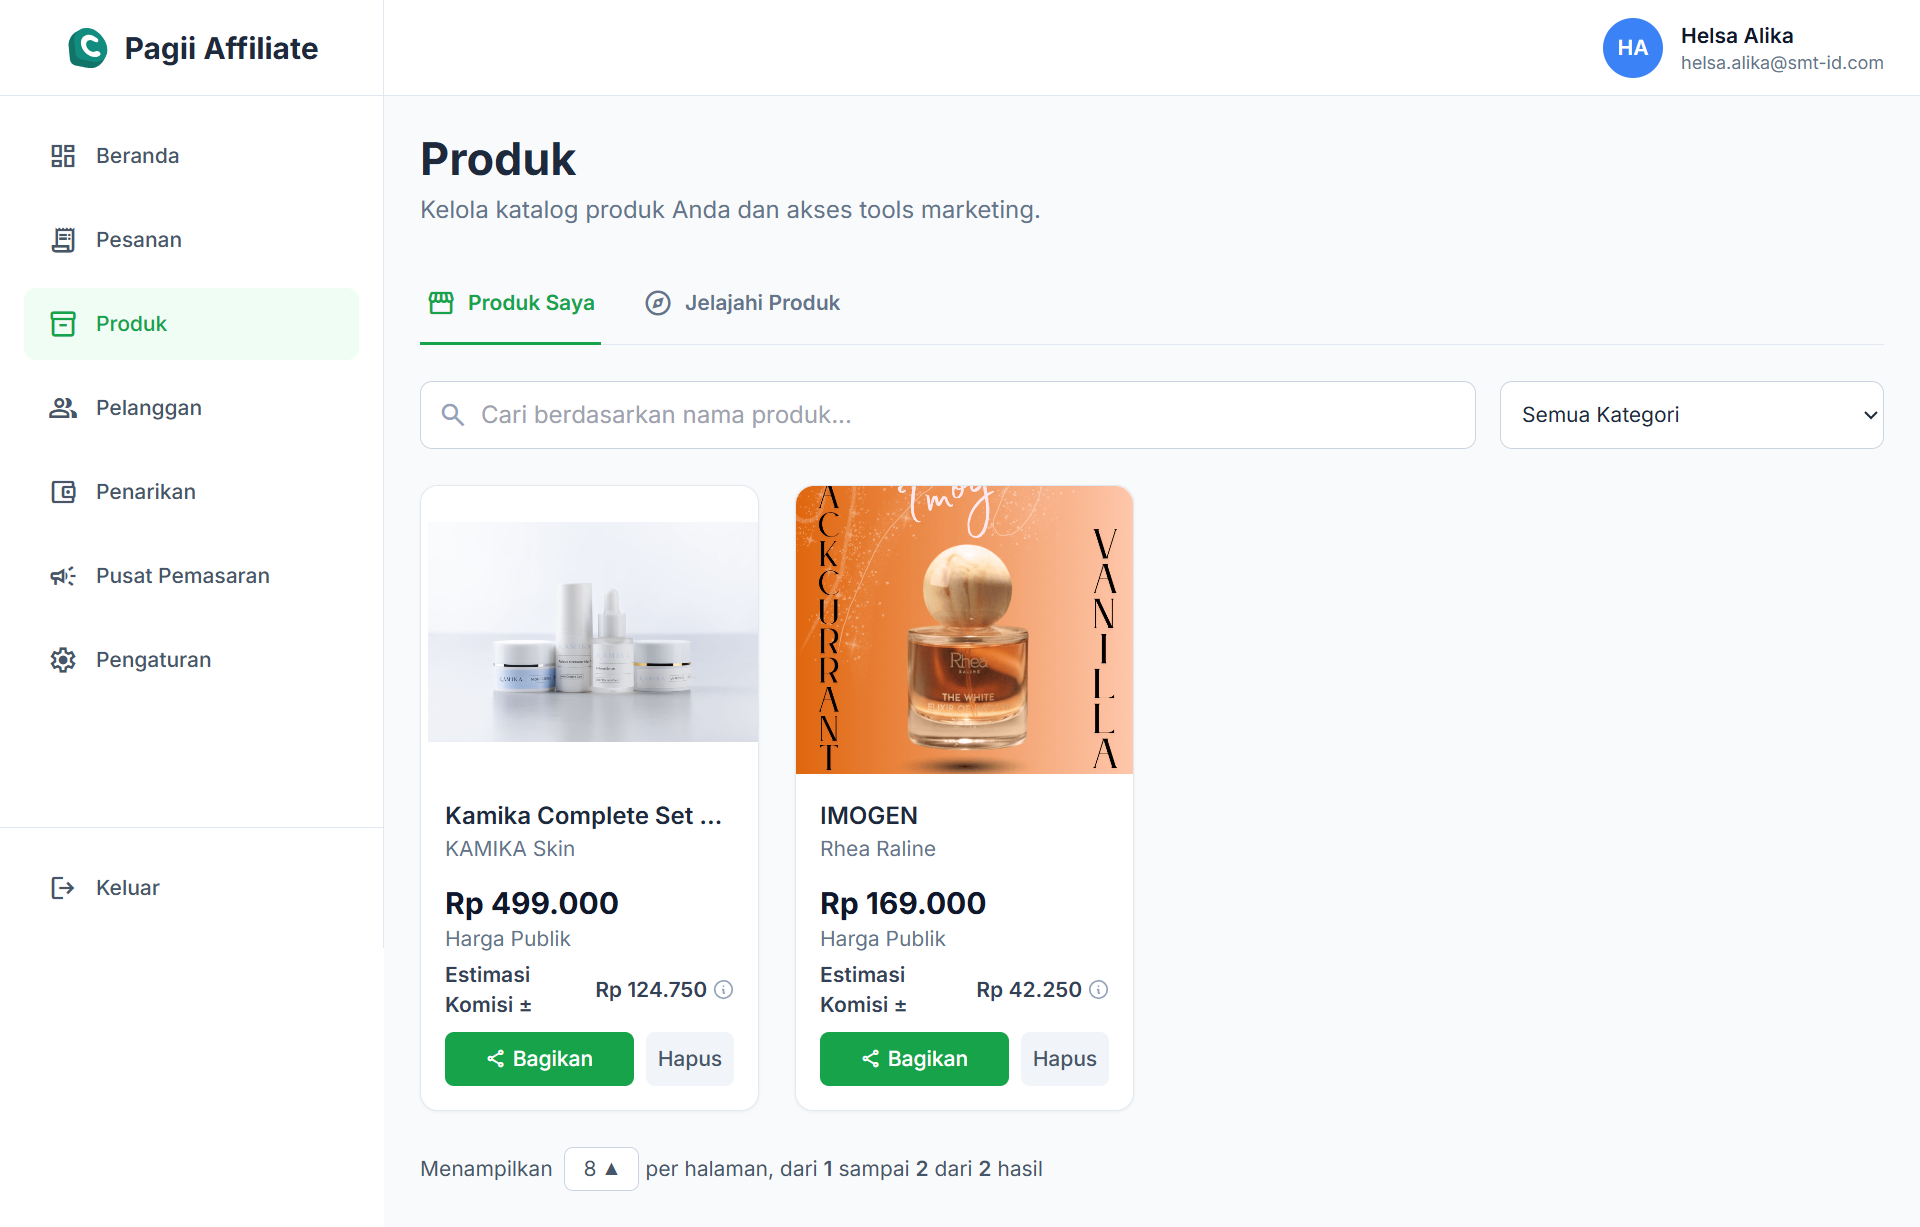
6.2 My Products & Share Link
List of your selected products ready to be promoted.
- Go to the My Products tab.
- Select a product, then click the "Share / Copy Link" button.
- Share that unique link to WhatsApp, Instagram, TikTok, etc.
- Every purchase via this link is automatically recorded as your commission.
Share Link Feature:
Every product has a Share feature that will open a "Bagikan & Lacak" (Share & Track) modal. Here you can copy a unique link that leads directly to the product page with your affiliate ID.
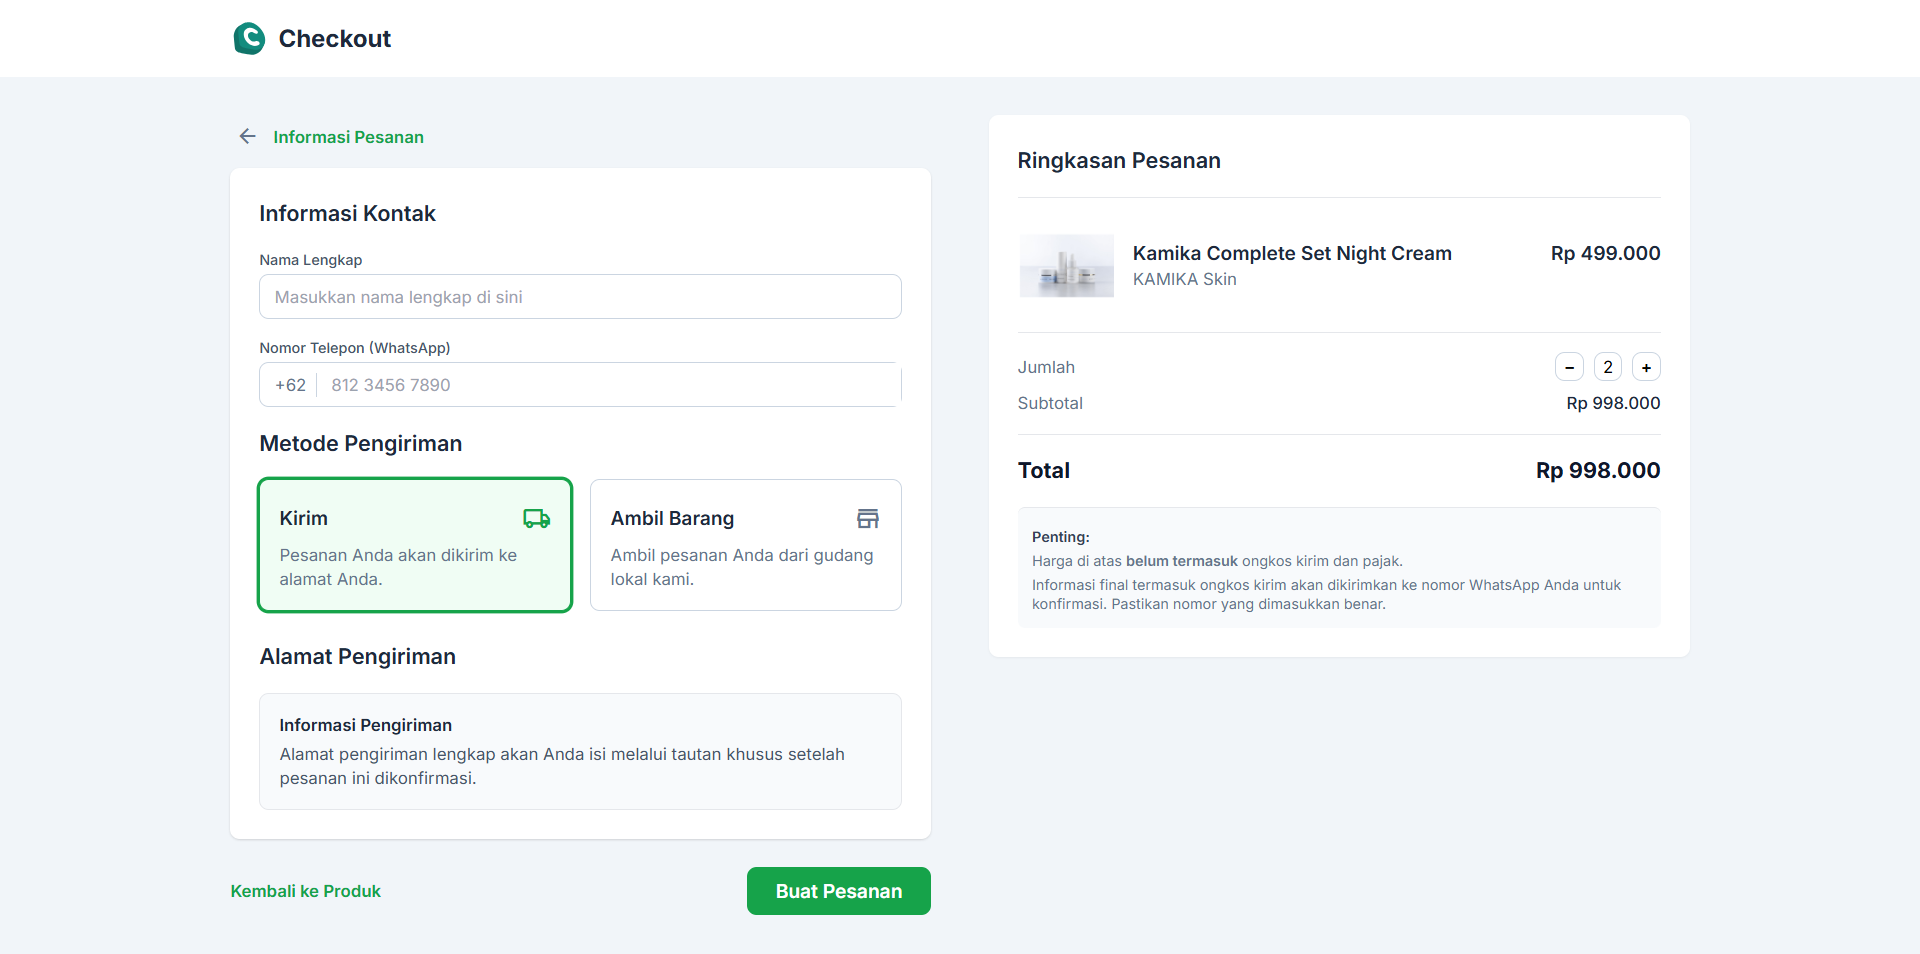
Customer Purchase Workflow
1. Access product link shared by affiliate
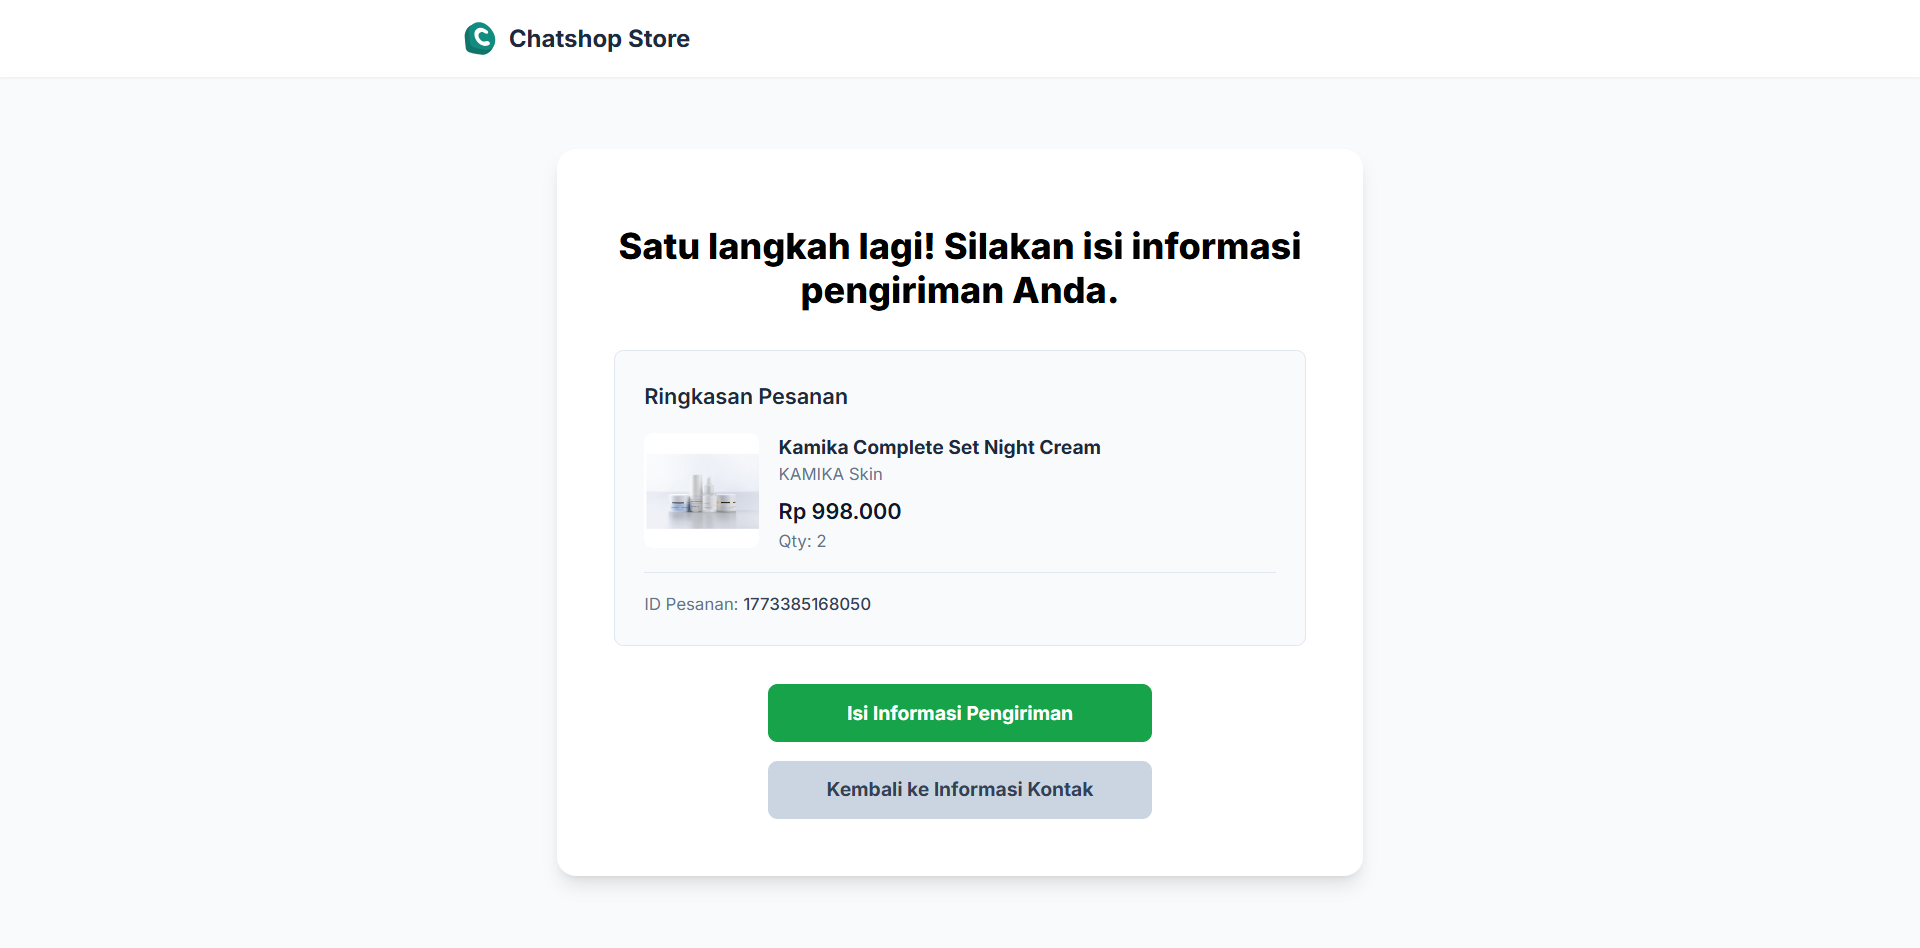
2. Enter contact info and select shipping
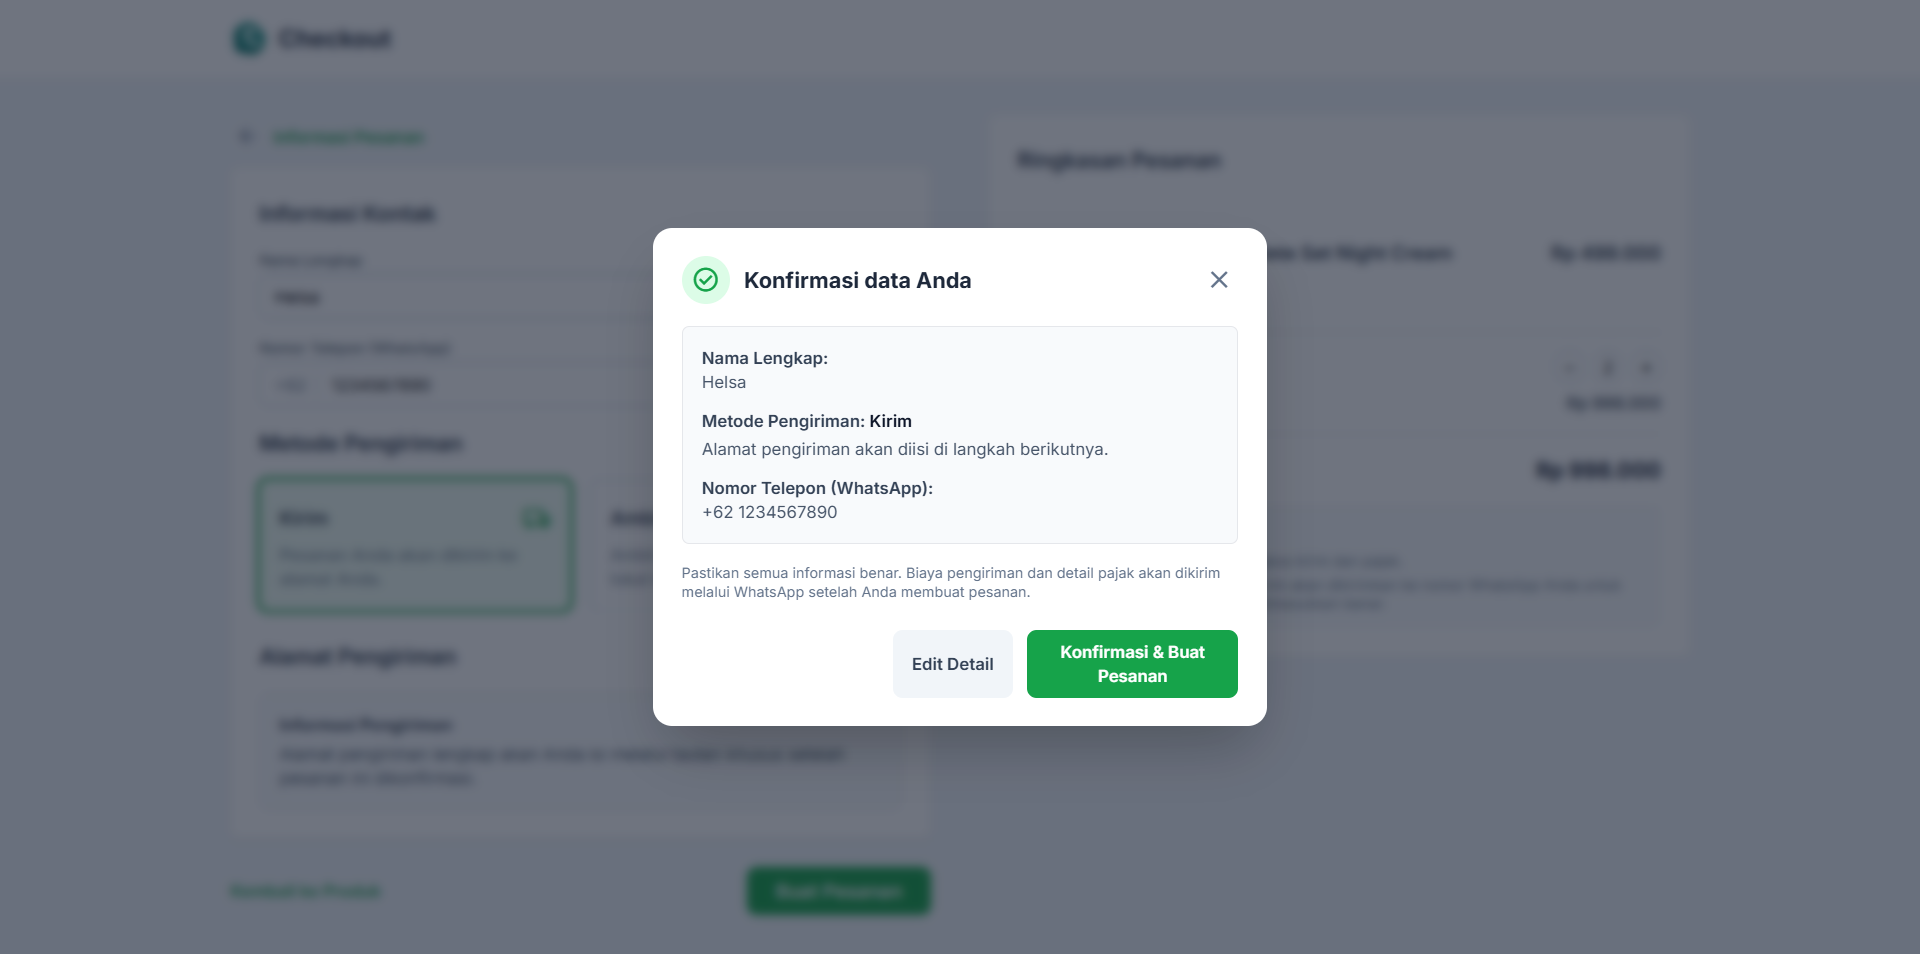
3. Data confirmation
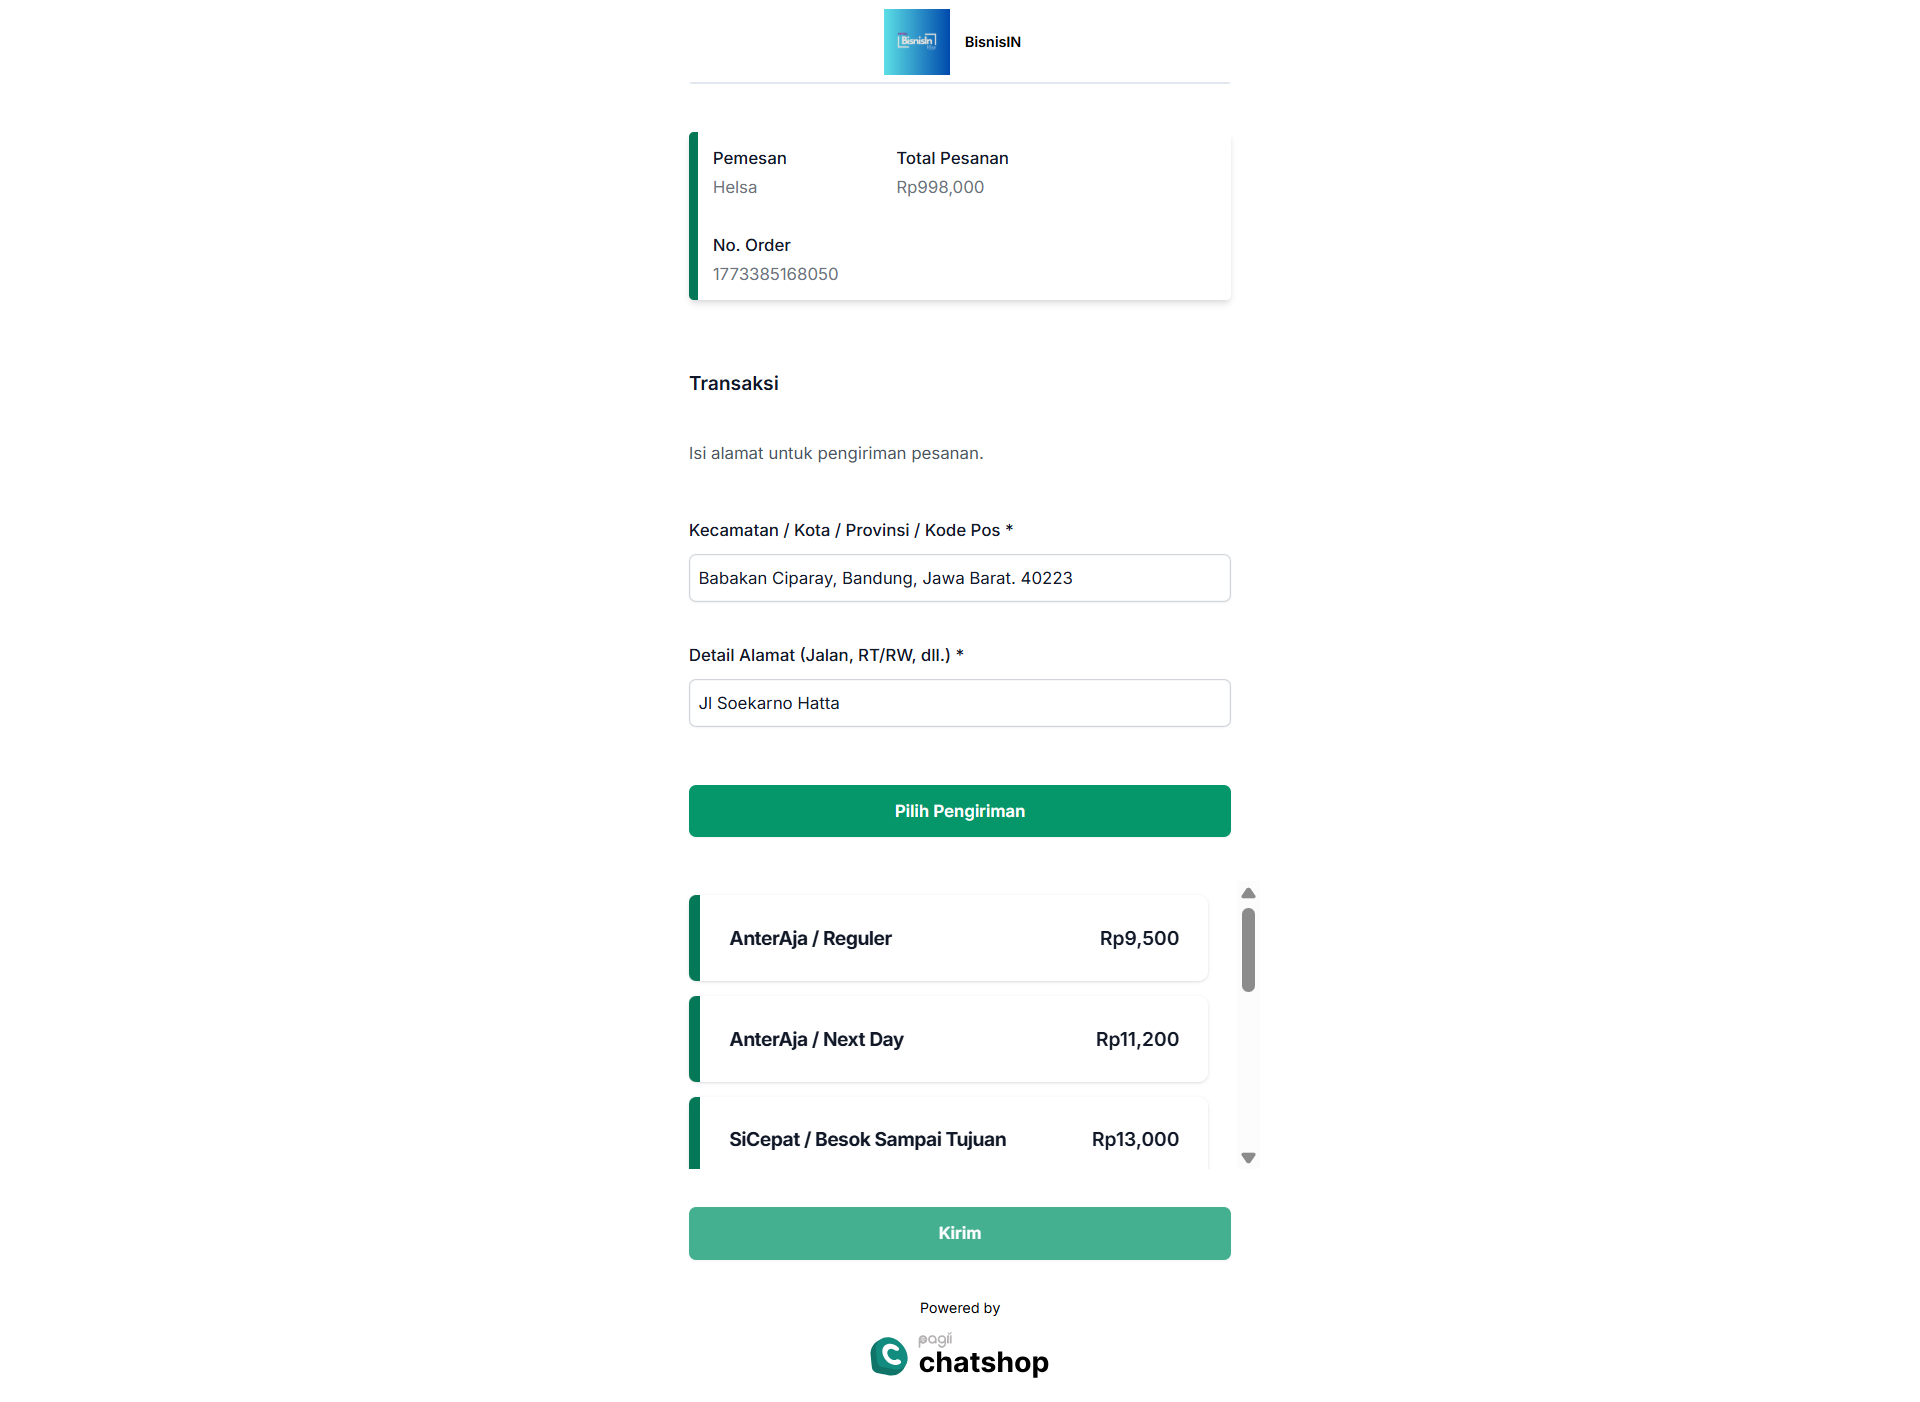
4. Select shipping
5. Payment
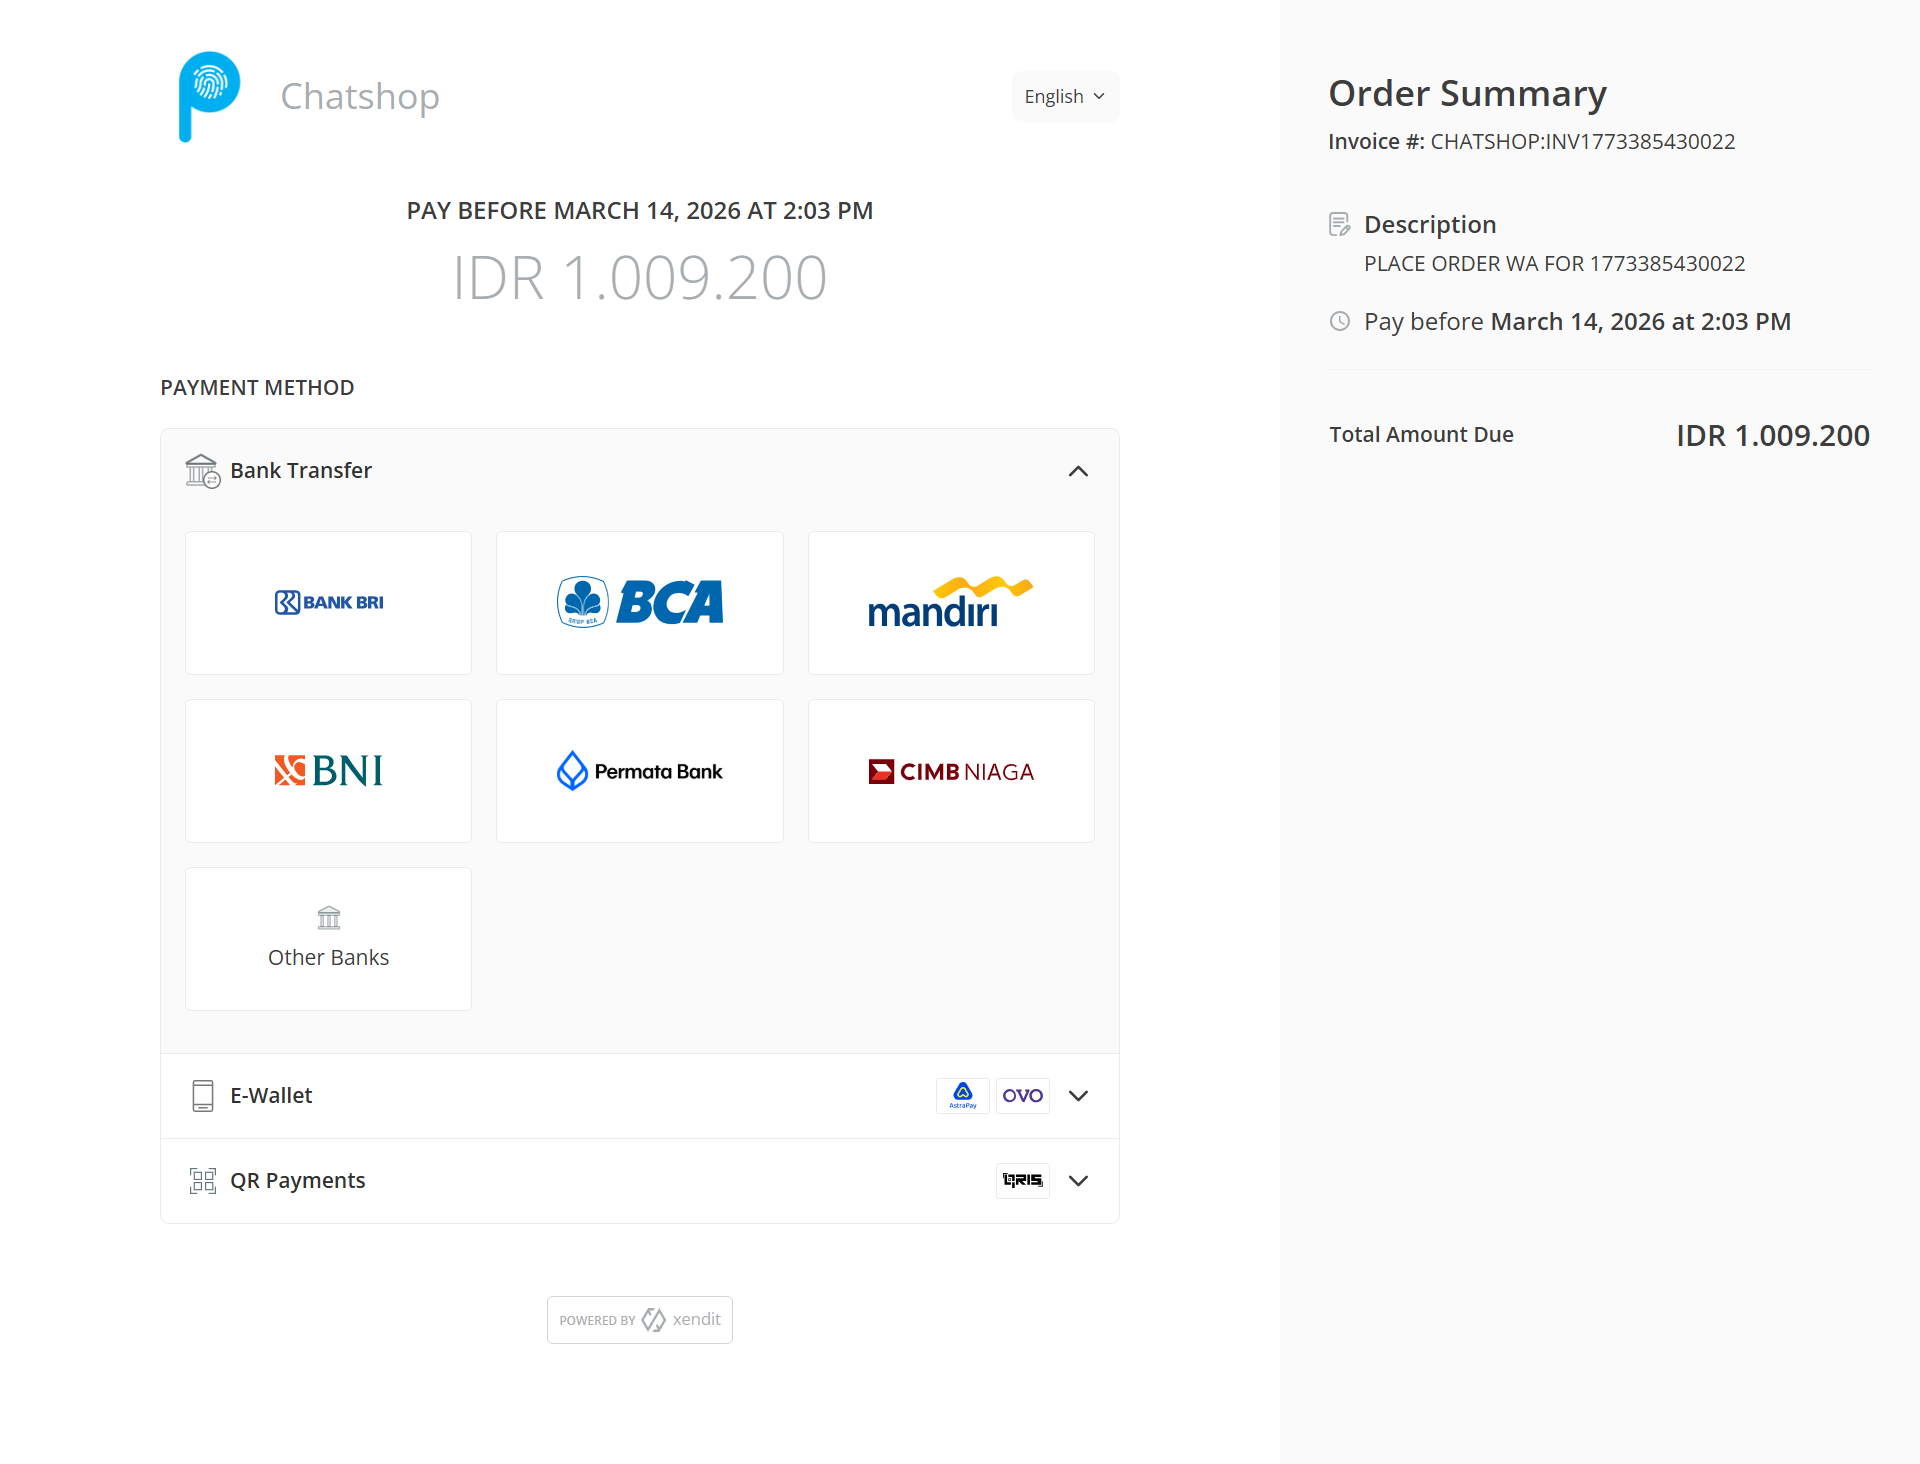
Once payment is verified, the system automatically records the commission in the Affiliate dashboard.
1. Access product link shared by affiliate
2. Enter contact info and select shipping
3. Data confirmation
4. Select shipping
5. Payment
Once payment is verified, the system automatically records the commission in the Affiliate dashboard.
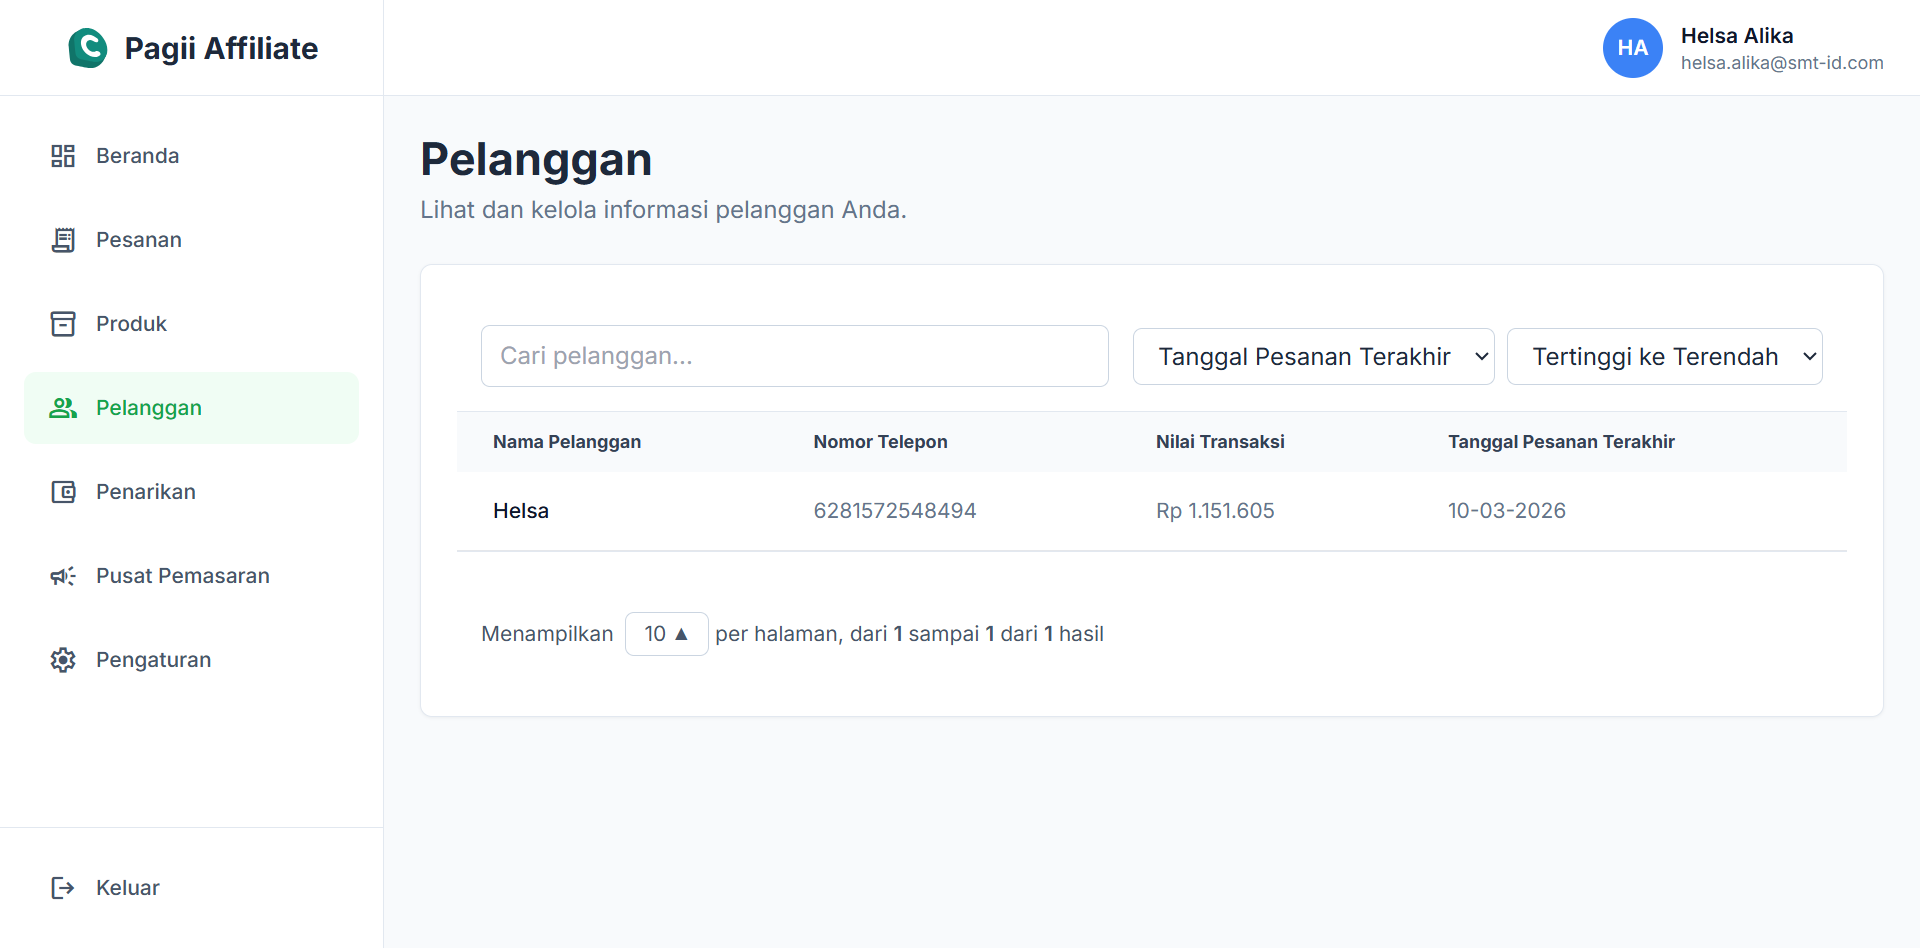
7. Customer List
Information center for monitoring customers you've brought in and their transaction history.
- Customer Name & Phone Number.
- Lifetime Value (LTV): Total transaction value of that customer.
- Last Order Date: Last date the customer made a purchase.
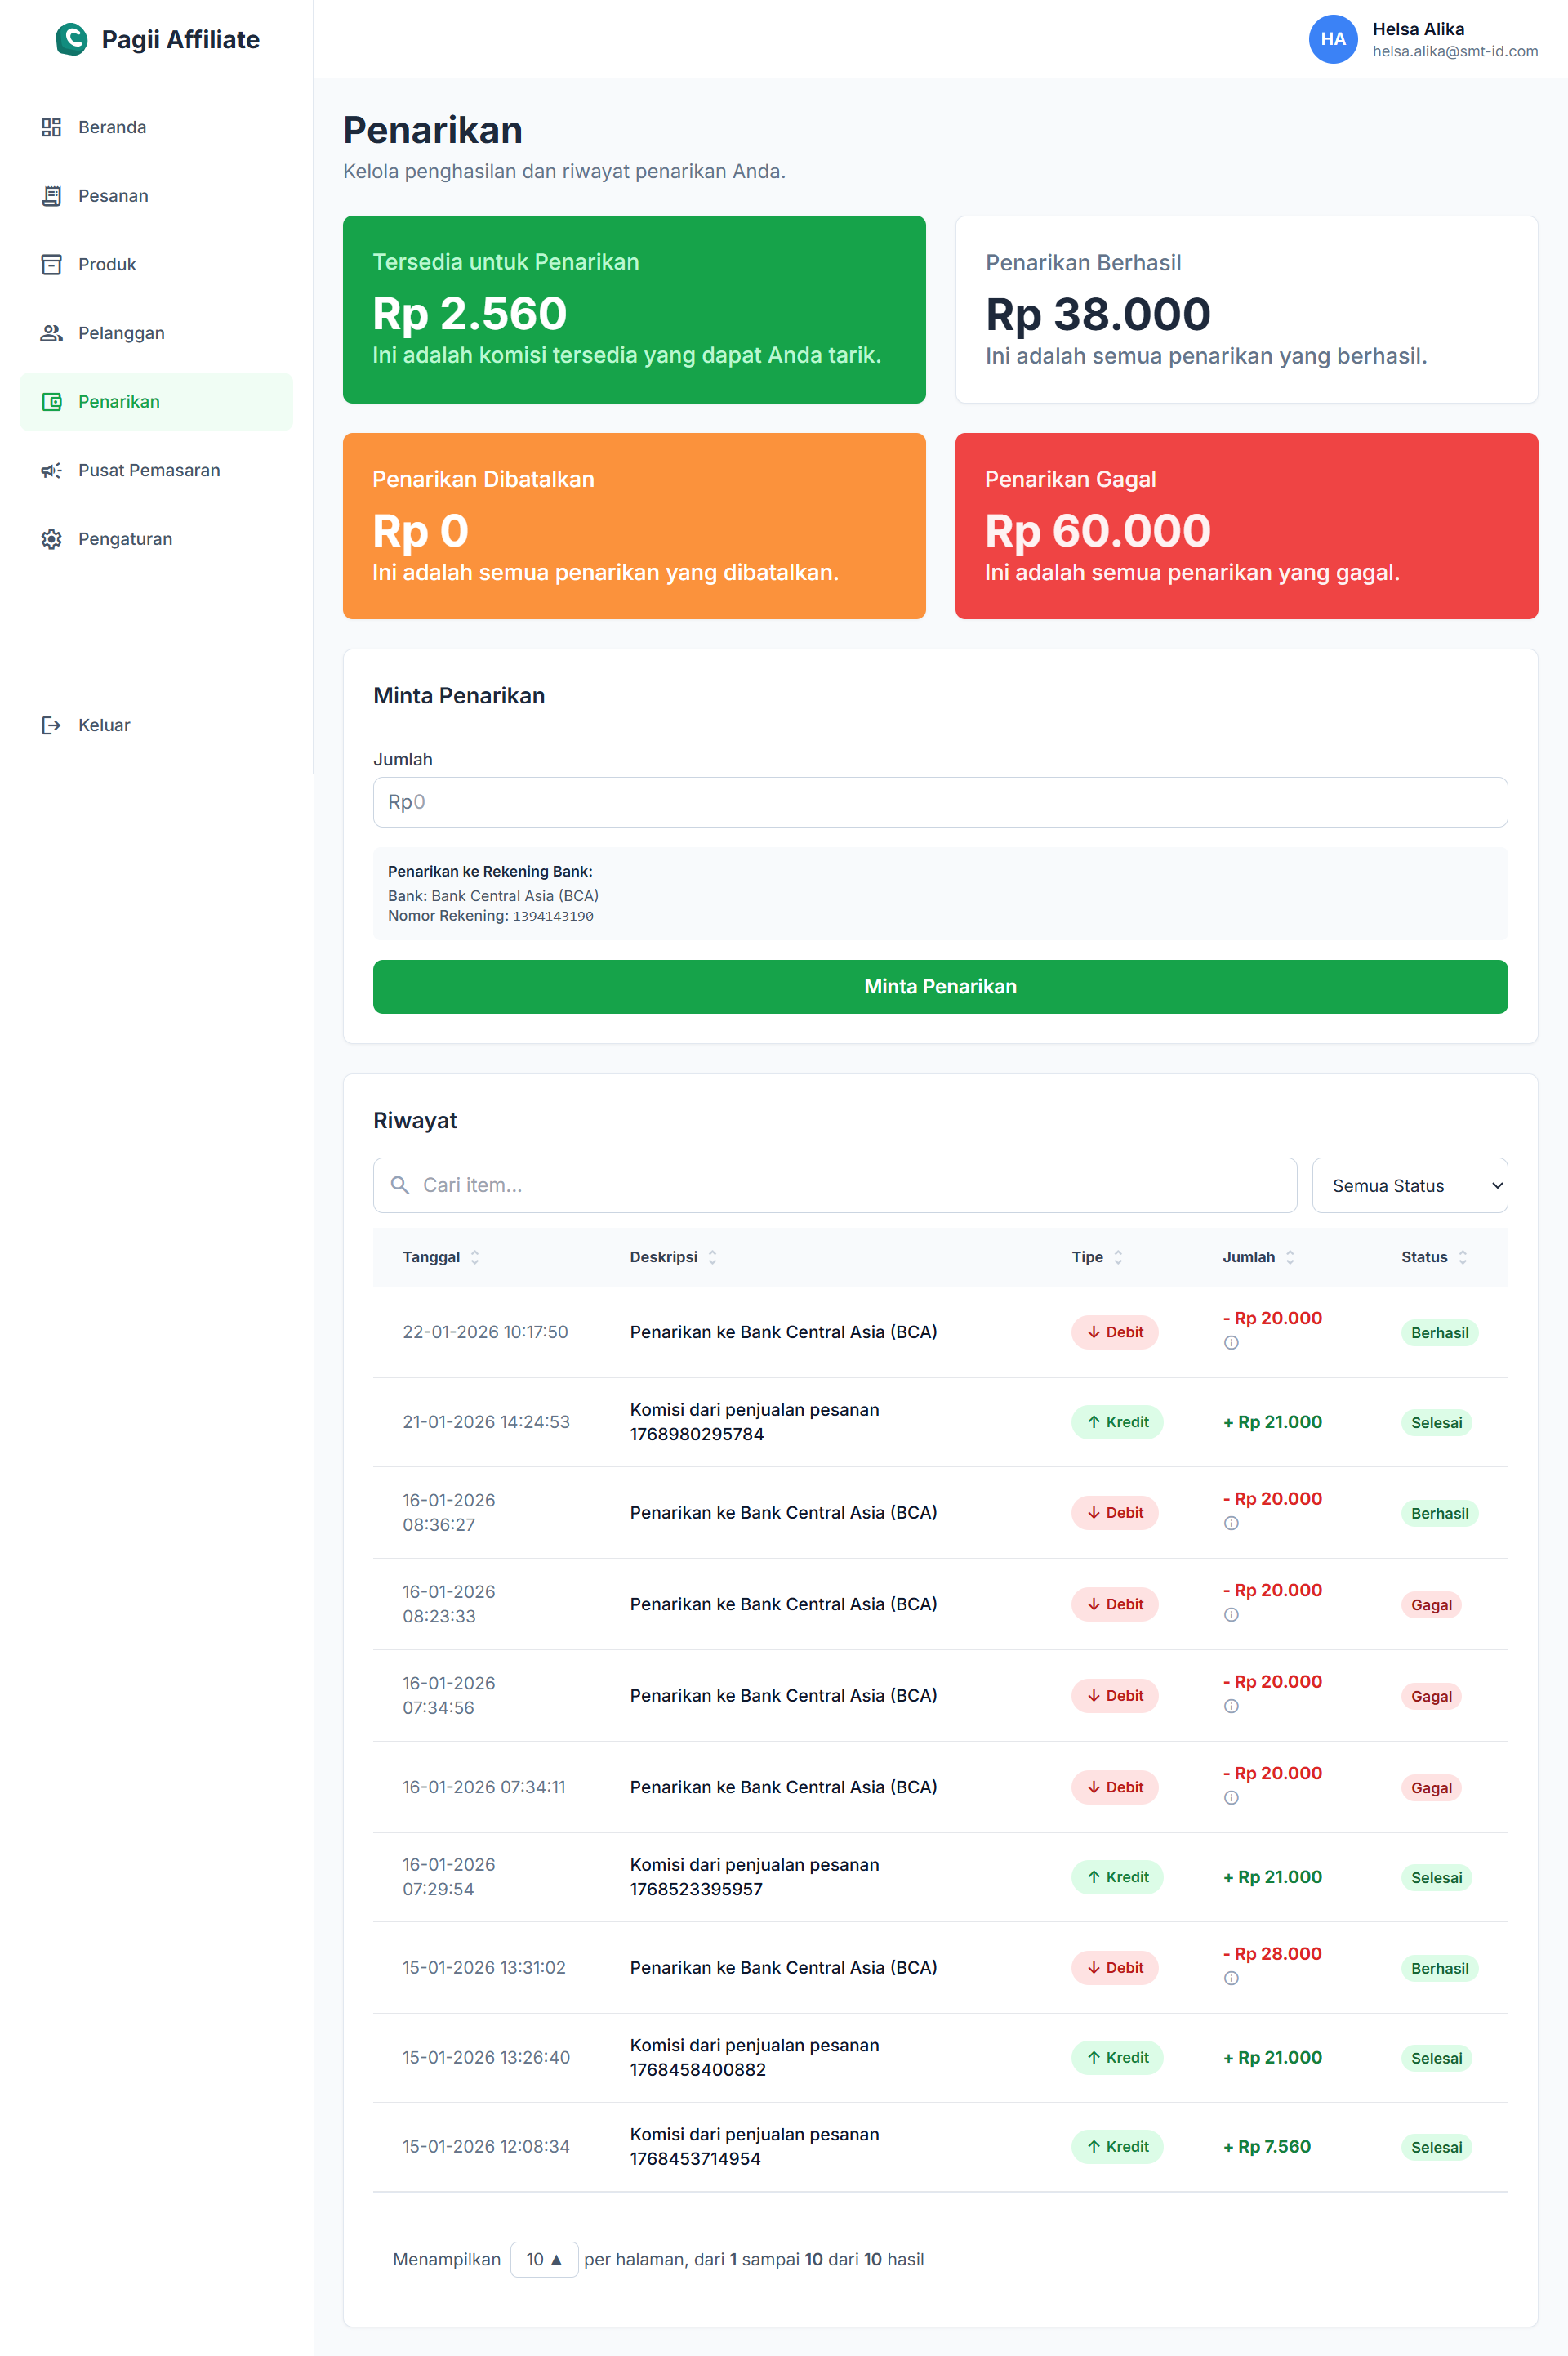
8. Fund Withdrawal
Manage earnings history and requests for commission withdrawal to your bank account.
WITHDRAWAL PROCEDURE:
- Go to the Withdrawals menu.
- Check your balance in Available for Withdrawal.
- Fill in the withdrawal amount in the Amount field.
- Click the Request Withdrawal button.
STATUS SUMMARY:
- ● Succeeded: Funds successfully received at the bank.
- ● Processing: Request is being reviewed.
- ● Canceled/Failed: Withdrawal rejected or issues found.
9. Marketing Hub (AI Integration)
"Use the power of AI to maximize your promotions."
Marketing Hub feature provides direct access to Gemini AI (Google) to help you create promotional content much faster and more professionally.
- Create daily promotional content ideas.
- Write social media captions (IG/TikTok).
- Write engaging product copywriting.
- Click the Marketing Hub menu in the sidebar.
- The system will open a new tab to gemini.ai.
- Use product data to create promotions.
10. Profile & Bank Settings
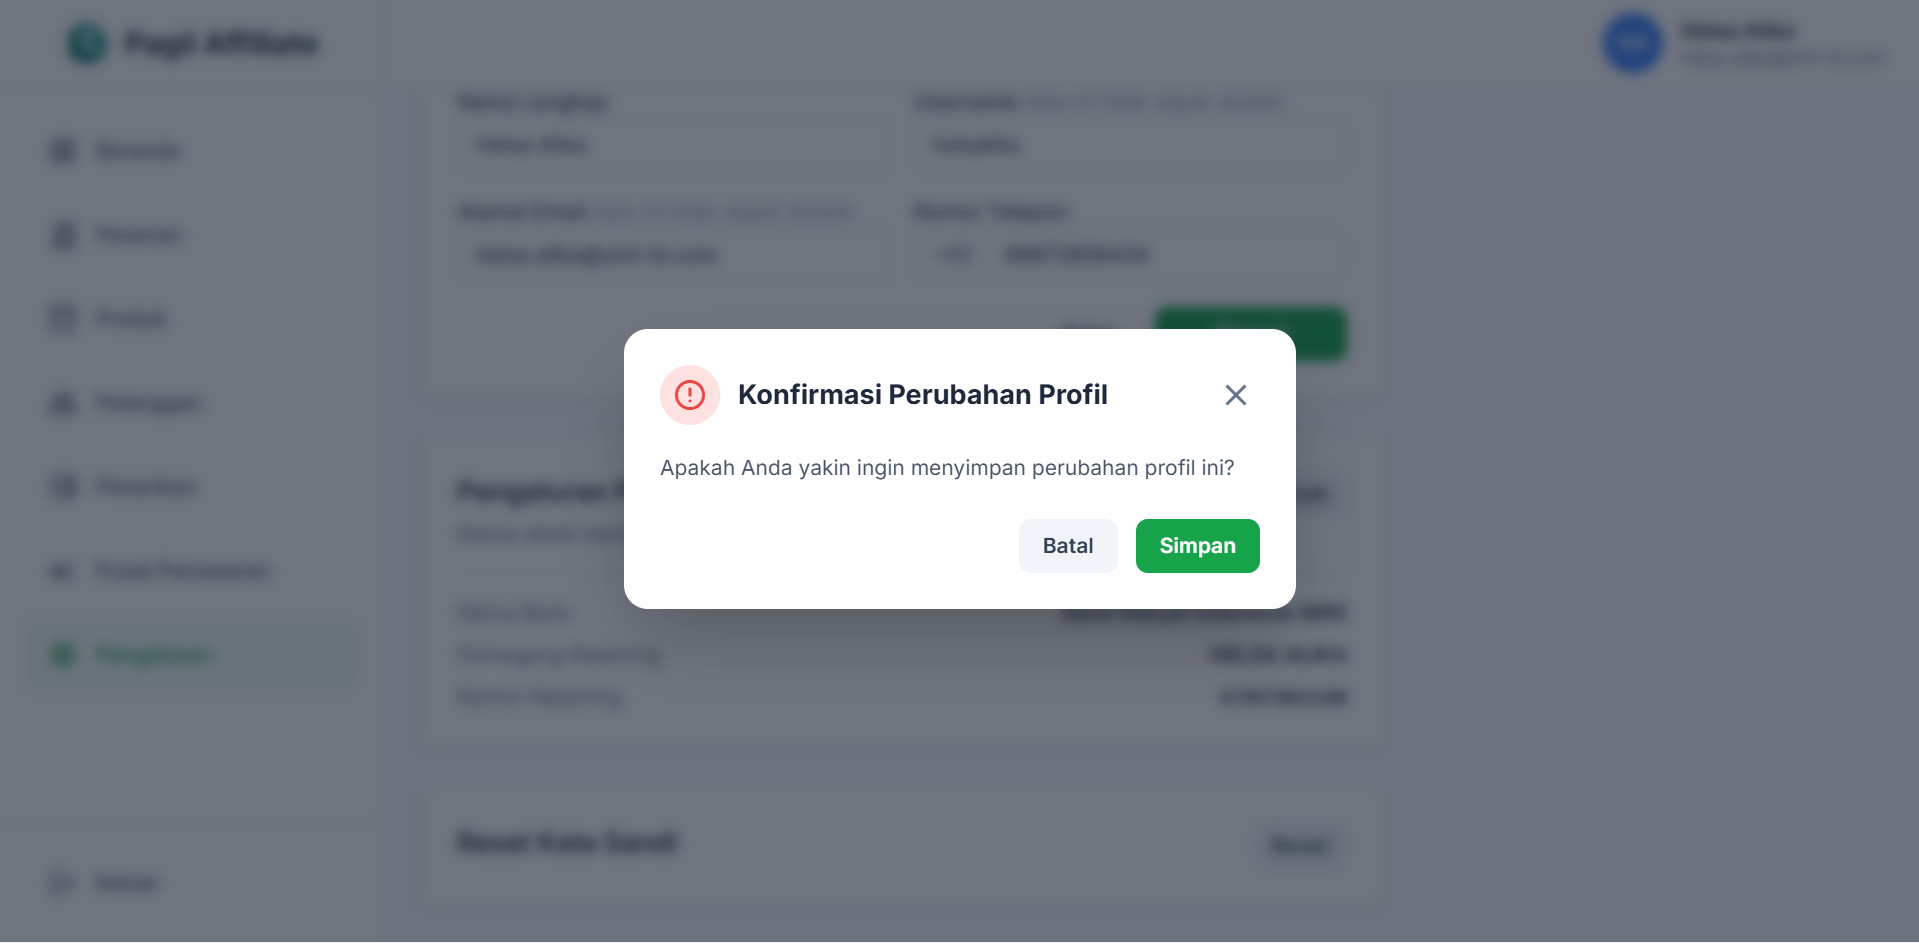
10.1 Edit Profile & Payout
Click the Settings menu in the sidebar to manage your basic information.
- PROFIL: Can edit Full Name. Username and Email are fixed.
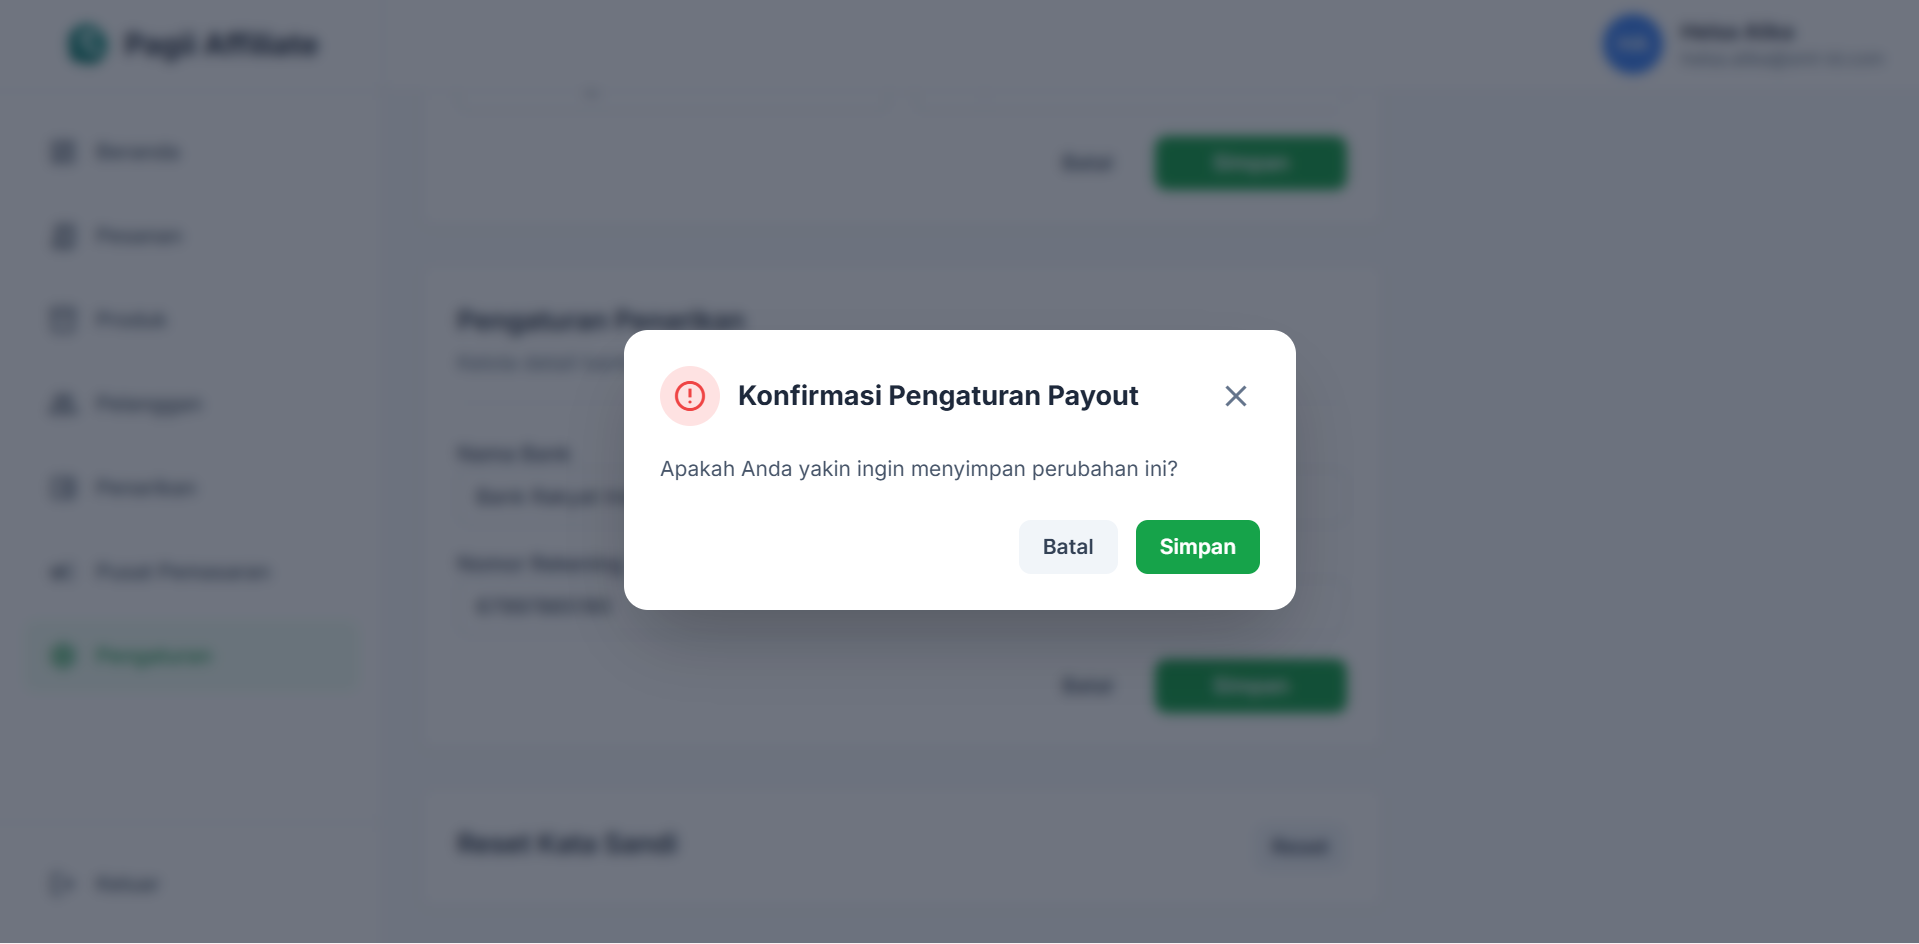
- PAYOUT SETTINGS: Mandatory to fill in to withdraw funds. Enter Bank Name, Account Holder Name, and Account Number.
Settings Visualization:
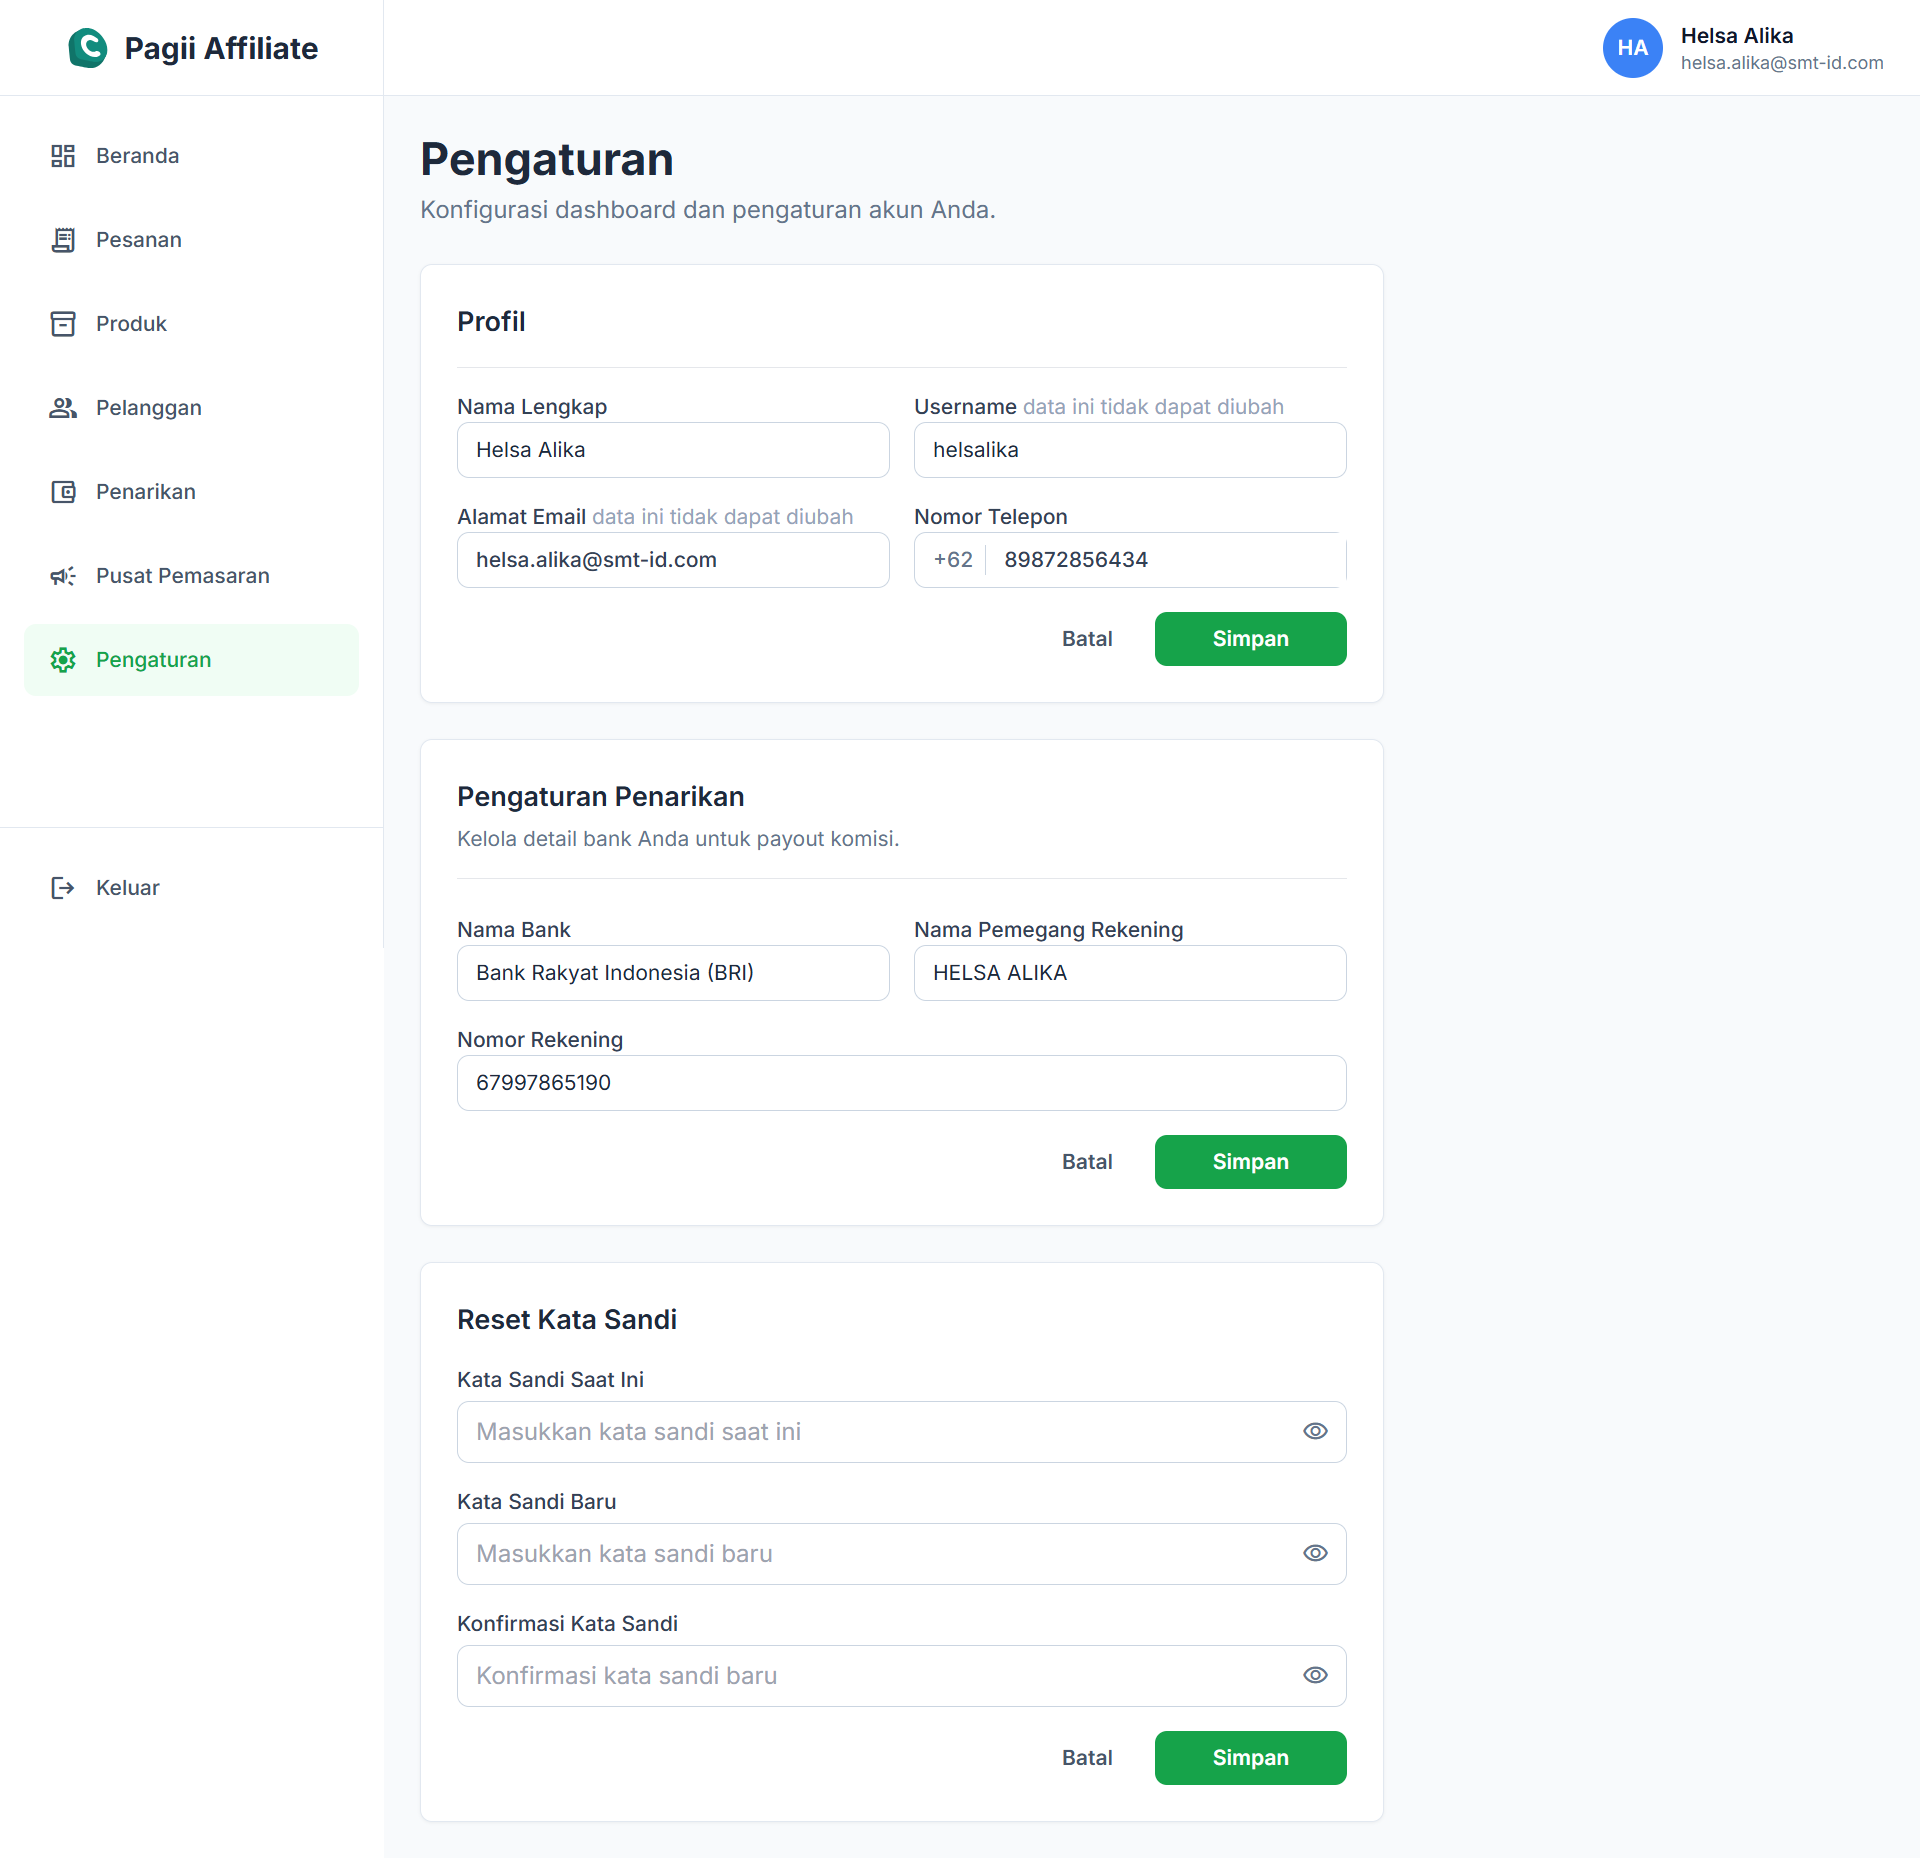
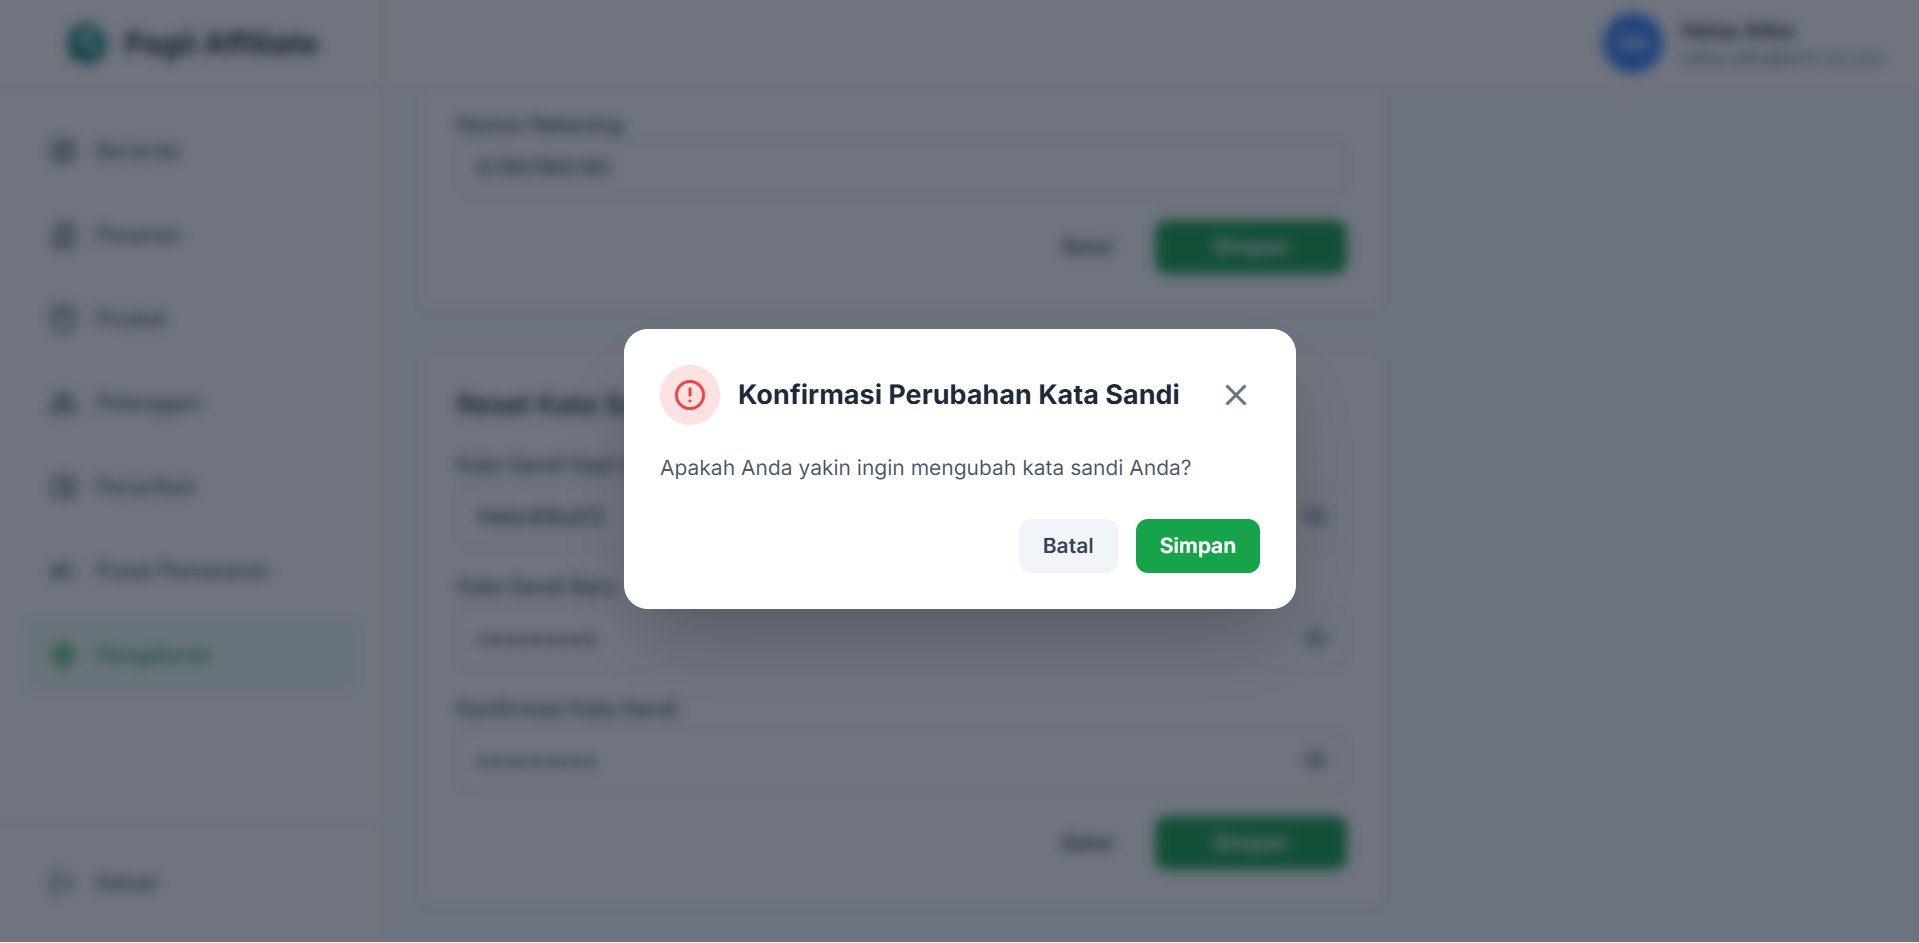
10.2 Reset Password
- Scroll down on the Settings page to the Reset Password section.
- Click the Reset button.
- Enter your current password, new password, and confirm new password.
- Click Simpan Perubahan (Save Changes).
Last Update: March 13, 2026
Smooets PHP Outsourcing Company